
Celebrate Independence with Perfect Patriotic Nails
Imagine the vibrant atmosphere of 4th of July celebrations, with fireworks lighting up the sky and family gatherings filled with laughter. As you prepare to embrace the festivities, have you considered giving your nails the patriotic treatment they deserve? In this post, we’ll explore 16 stunning patriotic nail ideas that will ensure you rock the holiday in style. From vibrant red and blue combinations to subtle star accents, there’s something for everyone wanting to show off their American spirit. You may also find 13 Best Educational Toys For Toddlers 1 3 Years That Teach Real Skills useful.
Many of us embrace this holiday filled with nostalgia, so why not incorporate that into how we express ourselves? Whether you’re a DIY nail art enthusiast or prefer to visit a salon, getting creative with your nails can elevate your 4th of July experience. So, let’s dive into some fabulous nail designs that not only celebrate freedom but also make a beautiful statement. You may also find 15 Best Baby Monitor With Camera 2026 Honest Mom Review useful.
Creative Nail Designs to Celebrate
Classic Red, White, and Blue
You can never go wrong with a classic red, white, and blue combination. Opt for a deep crimson base and use white and blue nail art pens to create stars and stripes effects. This timeless design is not just simple but also effective in capturing the essence of the holiday.
Starry Nights
For a modern take on a classic theme, try a starry night look. You can use a dark blue base and add white stars of various sizes scattered across your nails. Feel free to sprinkle some sparkles on top for a dazzling effect!
Glittery Independence
Want to add some sparkle to your nails this 4th of July? A glitter topcoat over a solid red or blue polish will make your nails twinkle like the night sky. This design is mesmerizing and fun, turning heads wherever you go.
Ombre Sunrise Effect
A gradient look can be stunning, shifting from red to blue with soft white in between. This ombre effect represents the beautiful hues of a summer sunrise and can give a whimsical twist to your festive nails.
Striped Perfection
If you prefer a more geometric approach, creating stripes can be an eye-catching choice. Use tape to achieve clean lines between red and blue polish. You can even get creative and alternate colors on each finger for added fun.
Watercolor Effect
A watercolor effect can be an easier method for achieving beautiful nail art. Swirl red, blue, and white polishes together to create a dreamy effect. This look embodies the freedom of creativity while keeping your nails chic.
Nail Art Tools for Success
Before diving into your nail adventure, let’s chat about some essential tools that will make the process smoother and more enjoyable. Sometimes it’s the little things that can enhance your experience and outcome.
Quality Nail Polish: Invest in good-quality polishes for longer-lasting and vibrant colors. Look for brands that prioritize safety, especially if you’re considering options for children. Check out Piggy Paint for non-toxic options that are perfect for the whole family.
Nail Art Brushes: Fine brushes can help create intricate designs, especially for adding details like stars or stripes that need precision.
Dotting Tool: Perfect for creating polka dots or small stars. They’re affordable and make nail art a breeze.
Nail Tape: This is a game changer! It helps guarantee clean, straight lines when creating designs with multiple colors.
Topcoat: Never underestimate the importance of a good topcoat. It seals your design and adds shine while ensuring longevity.
Using these tools can help elevate your nail art game, and who knows? You might even inspire your friends and family to join in the fun.
DIY Nail Art Steps
If you’re feeling adventurous and want to try your hand at creating your own patriotic nails, follow these simple steps:
Preparation: Start by cleaning your nails and pushing back your cuticles. This step is crucial as it ensures a smooth, clean canvas.
Base Coat: Apply a clear base coat to protect your nails and help the polish adhere better.
Apply Base Colors: Choose your base colors – whether it’s red, white, or blue. Two coats might be necessary for that rich, vibrant finished look.
Nail Art: Once your base is dry, dive into your creative designs. Use your tools to create the effects mentioned in the previous sections.
Seal the Deal: Finish with a glossy topcoat to seal everything in place. Done!
Remember, practice makes perfect. Don’t worry if your first attempt isn’t Instagram-worthy. The process should be enjoyable, so have fun with it!
Time-Saving Tips for Busy Moms
We know how chaotic life can get, right? Maybe you’re juggling kids, work, and everything else in between. When it comes to prepping for a holiday celebration, we could all use a little extra help. Here are some quick tips to look festive without dedicating your entire day to nail art.
Opt for Stickers: Nail stickers can add amazing designs in seconds! Simply peel and stick, and voilà—you’re ready to go!
Pre-Made Designs: Many beauty stores offer press-on nails with designs. They’re quick, easy, and come in various patriotic themes.
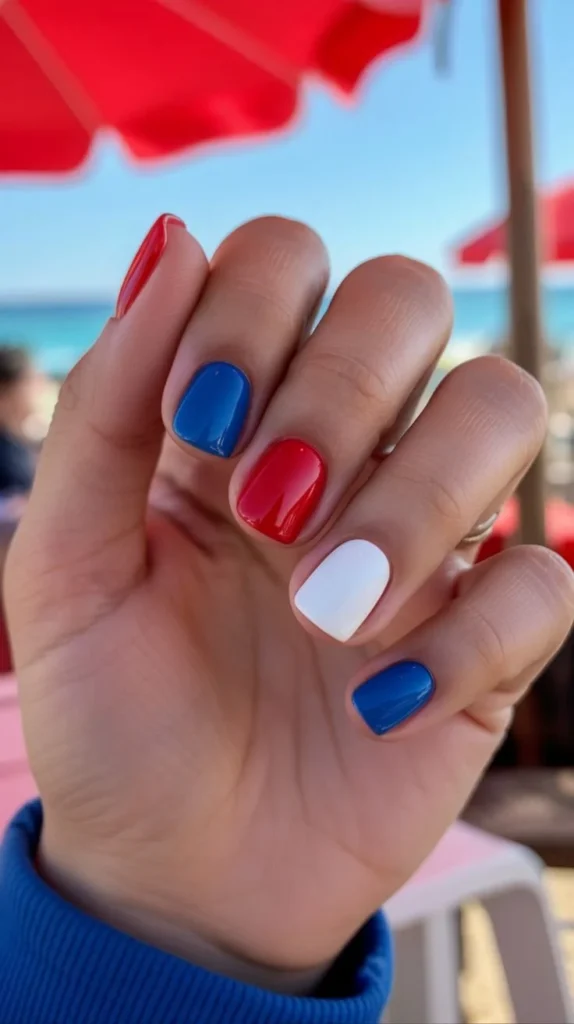
Color-Blocking: Instead of detailed designs, use bold blocks of color. A mix of red, white, and blue on different nails can give a fun and playful look with lesser effort.
These tips ensure you can maintain your beautiful nails without sacrificing your precious time.
Comfort and Confidence in Your Look
Getting your nails done isn’t just about temporary beauty; it’s an opportunity to express yourself and have some fun. Each polished design helps celebrate our nation’s freedom in a stylish way. Nail art can boost confidence too; have you noticed how something as small as a pretty manicure can brighten your day?
If you’re navigating the world of parenting, just remember you’re not alone. Embracing these small self-care rituals can be an integral part of maintaining a positive mindset amidst the daily chaos. Speaking of resources to help parents, check out this guide on therapy platforms that share great insights for personal well-being.
Bonus Ideas for Kids
Let’s not forget about the younger ones celebrating alongside us! Engaging children in festive nail art can be a wonderful bonding experience. Here are some ideas:
Simple Finger Painting: Use kid-friendly, non-toxic nail polishes and let them create their own designs. You might find hidden talents!
Temporary Tattoos: These work wonders too! They can apply these to their nails for a festive look without the mess of polish.
Themed Nail Parties: Invite their friends over for a nail art afternoon whether it’s painting, applying stickers, or simply goofing around with colors.
Whether you’re preparing for your 4th of July festivities or just looking for a fun activity to share with the kids, these ideas can keep things festive and lively.
Conclusion
As you gear up for this year’s 4th of July, let your nails reflect your festive spirit with these creative designs. These nail ideas not only celebrate the holiday but also give you a moment to express yourself. If you’re looking for more inspiration, find gorgeous tutorials and trendy ideas, such as those in this article featuring chic nail ideas.
And if you’re the epitome of multitasking, a quick browse through this resource can provide fresh styles to try while balancing the demands of the day. Lastly, if you’re in search of safe options for your kids, Pampering’s Piggy Paint is the perfect go-to for non-toxic nail polish.
Enjoy the holiday with vibrant nails and a joyful spirit!