
Dive into the World of DIY Peppermint Mason Jar Candles
Imagine this: You’ve had a long day. The kids are finally asleep, you’ve managed to finish up the household chores, and now it’s your time to unwind. You grab your favorite cozy blanket, pour a soothing cup of herbal tea, and settle into your chair. But something’s missing, right? You need that perfect ambiance to set the scene. This is where DIY peppermint mason jar candles come to the rescue, bringing not just light and warmth, but the invigorating scent of peppermint that uplifts your spirits and transforms your space into a sanctuary.
We’ve all been there—desiring a slice of tranquility amidst the chaos of motherhood and everyday life. What if I told you that creating your very own candles is not only a fun project but also a wonderful opportunity for self-care? Let’s dive into the enchanting world of crafting your own peppermint mason jar candles, perfect for self-pampering or gifting to a friend who deserves a little extra love.
Why Peppermint Scent
First things first, why peppermint? This aromatic wonder is known for its refreshing and invigorating properties, making it the ideal scent to uplift your mood and energize your space. Beyond just smelling great, peppermint has been linked to improved concentration and can even help alleviate headaches and reduce fatigue. Sounds like a win-win, right?
Plus, there’s nothing quite like the satisfaction of lighting a candle that you’ve crafted yourself. It’s an investment in your well-being and a beautiful way to add a personal touch to your home. So, let’s jump into the details of how to create these delightful candles.
What You’ll Need
Embarking on this DIY adventure requires just a few simple materials. Don’t worry, everything is easy to find and won’t break the bank!
Essential Ingredients and Tools
- Mason jars: Choose from various sizes depending on how much candle you’d like to create.
- Wax: You can opt for soy wax, beeswax, or paraffin wax. Soy wax is eco-friendly and provides a cleaner burn, which is perfect if you’re all about wellness.
- Essential oils: About 20-30 drops of peppermint oil will do the trick for that amazing fragrance experience.
- Wicks: Make sure these are suitable for your chosen wax type. Cotton wicks are a popular choice.
- Double boiler: For melting your wax safely.
- Thermometer: To check the wax temperature, ensuring it’s just right for adding your scent.
- Stirring stick: This could be a wooden spoon or even a disposable chopstick—whatever you have on hand will work just fine.
- Colorants (optional): If you want to add some festive color, you can include candle dye.
- Labels (optional): For personal touches, use labels for gifting or a thoughtful reminder for yourself.
Step-by-Step Guide to Making Your Candles
Let’s get crafting! Here’s a simple step-by-step guide you can follow, even if you’re a beginner.
Step 1: Prepare Your Jars
Make sure your mason jars are clean and completely dry. If they’re new, just a quick wash will do. If you’ve used them for something else, a nice soak in soapy water could help eliminate any lingering scents.
Step 2: Measure Your Wax
Determine how much wax you need. A good rule of thumb is to fill your jars with water, then measure the water to get the volume of wax needed (one pound of wax generally fills about three cups).
Step 3: Melt the Wax
Using your double boiler, heat the wax slowly over medium-low heat. Stir it gently until it’s completely melted. Keep an eye on the temperature; aim for about 170°F.
Step 4: Add Peppermint Oil
Once your wax is melted and at the right temperature, remove it from the heat. Now’s the time to add in that luscious peppermint essential oil. Stir it well to disperse the oil evenly throughout the wax. The scent is going to be delightful!
Step 5: Attach the Wicks
Before pouring, you’ll want to prepare your wicks. Dip the bottom of the wick in the melted wax and stick it to the bottom of the mason jar. This will help keep it in place when you pour the wax in.
Step 6: Pour the Wax
Gently pour the wax into the jar, leaving about half an inch at the top. You can pause to reposition the wick if it shifted during pouring.
Step 7: Allow to Cool
Let your candles cool completely. This might take a few hours. It’s tempting to light them right away, but patience pays off!
Step 8: Trim Your Wicks
Once fully cooled, trim the wicks to about ¼ inch above the wax surface. This ensures a clean burn without excessive flickering or soot.
Step 9: Add Personal Touches
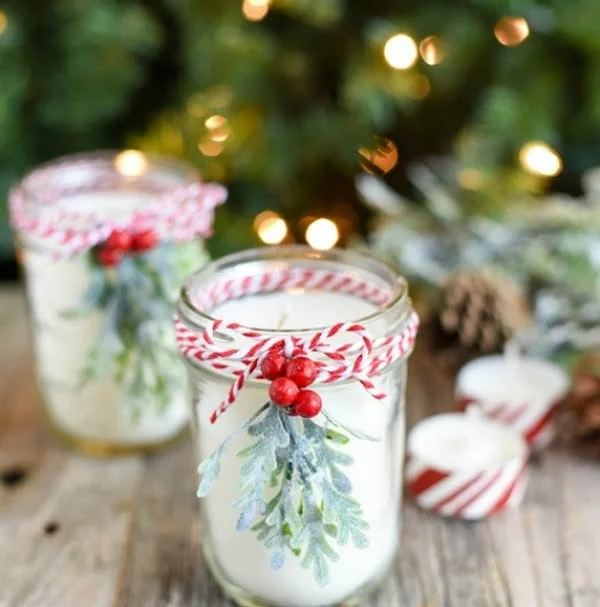
If you’re planning to gift these beauties, consider adding labels or even decorating the jars with twine, lace, or pretty ribbons. It adds an extra layer of love and effort, and who wouldn’t appreciate that?
Step 10: Light and Enjoy
Your DIY peppermint mason jar candles are complete! Light them up, sit back, and enjoy the flickering glow and uplifting scent.
Common Mistakes to Avoid
Even with something as fulfilling as candle making, we can slip up sometimes. Here are some common pitfalls to steer clear of:
- Overheating the wax: This can cause smoke and create unsafe fumes. Stick to moderate heat.
- Skipping the thermometer: Adding scent at too high a temperature can burn off the aroma. Trust me, it’s worth waiting for the right moment.
- Using unsuitable wicks: Not all wicks burn the same. A wick that’s too small can cause tunneling, while one that’s too big will produce soot.
- Ignoring cooling times: If you try to burn your candle too soon, you may end up with a messy burn.
Bonus Self-Care Ideas
Once you’ve got your candles lit, here are a few self-care ideas to enhance your relaxing evening:
- Create a spa day: Pair your candle with a warm, soothing bath. Add Epsom salts for extra relaxation.
- Get cozy with a good book: There’s nothing like curling up with a novel as the scent of peppermint fills the air.
- Practice mindfulness: Light your candle during meditation or yoga. Let the aroma elevate your practice.
- Host a candle-making night: Gather your friends and share the joy. It’s a great way to bond and create lovely gifts together.
FAQs About Making Candles
You might have some lingering questions, so I’ve compiled a few FAQs to help clarify things.
How long do homemade candles last?
Typically, homemade candles can last anywhere from 30 to 50 hours, depending on size and wax type.
Do I need to add color?
Not at all! Color is purely optional. If you prefer natural-looking candles, skip it and let the wax speak for itself.
Can I use other essential oils?
Absolutely! Explore with scents like lavender, citrus, or eucalyptus for a different sensory experience.
How do I store my candles?
Keep them in a cool, dark place when not in use. This helps maintain their scent and ensures a longer lifespan.
Conclusion
DIY peppermint mason jar candles are not only a beautiful project, but they also serve to enhance your home environment and self-care routine. Remember, it’s the little things that add up to a beautiful life. Lighting a candle you made yourself can transform an ordinary moment into something spectacular. So, gather your materials, find your favorite playlist, and dive into this fun and rewarding activity.
Here’s the truth: nurturing yourself and creating a serene space is more important than ever, especially in our busy lives. So light that candle, take a deep breath, and enjoy the magic you’ve made. You deserve it!