
Make Your Own Mason Jar Soy Candles with This Quick and Easy Tutorial
Imagine this: it’s a cozy evening, and you’re curled up on the couch with a warm blanket, a good book, and the soft glow of a candle flickering on the table. That inviting scent fills the room, wrapping you in a soothing embrace, and for a moment, everything feels just right. Sound familiar?
Candles can transform a space, elevate your mood, and are a perfect little treat for self-care. But, let’s be honest—store-bought candles can get pricey and sometimes don’t deliver the scent you’re craving. So, what if you could make your own? I’m excited to guide you through creating beautiful and fragrant mason jar soy candles with a quick and easy tutorial!
Why Choose Soy Candles?
Before diving into the DIY process, let’s chat about why you should consider soy candles. Unlike traditional paraffin candles, which are made from petroleum, soy candles are made from soy wax—a renewable resource that burns cleaner. Here are a few benefits of using soy candles:
- Eco-friendly: Soy wax is biodegradable and renewable.
- Long-lasting: Soy candles tend to burn longer than paraffin.
- Better scent throw: They hold fragrance well, so your space smells amazing.
- Healthier: Soy candles don’t release toxins when burned.
We’ve all been there—lighting a candle only to find it has a chemical smell, right? Soy candles are significantly better for your health and the environment. Let’s get into the fun part.
What You’ll Need
Gathering your supplies is super easy. Here’s what you’ll need to get started:
Materials
- Soy wax flakes (around 2 cups)
- Mason jars (any size you prefer; I love using pint-sized jars)
- Wicks (cotton or wooden, your choice)
- Fragrance oil (make sure it’s specifically formulated for candles)
- Double boiler (or a heat-safe container for melting the wax)
- Thermometer (optional, but super handy)
- Stirring utensil (something like a wooden spoon)
- Scale (to measure wax and oils, if you want precision)
Optional Decorations
- Labels (for personalizing your jars)
- Dried flowers or herbs (for a beautiful, natural touch)
Let’s Get Crafty
Now that you’ve got everything ready, let’s dive into making your own soy candles. There’s something so rewarding about creating something beautiful with your hands.
Step 1: Measure Your Wax
Start by measuring how much wax you need. A good rule of thumb is that one pound of wax will fill about 20 ounces of container space. Here’s a simple breakdown:
- For 8-ounce jars, you’ll need about 1/2 pound of wax.
- For 4-ounce jars, around 1/4 pound should do the trick.
Step 2: Melt the Soy Wax
Set up your double boiler. Fill the bottom pot with water and bring it to a gentle simmer. Place your wax flakes in the top pot or heat-safe container. You’ll want to melt the wax slowly—aim for about 170°F to 180°F (77°C to 82°C). Stir it occasionally to help it along.
Step 3: Add Fragrance
Once your wax is completely melted, it’s time to add your fragrance oil. A common ratio is 1 ounce of oil per pound of wax, but you can adjust to your preference. Keep in mind that stronger scents can be great, but some scents can overwhelm, so start small!
Stir gently for about 2 minutes, making sure the oil blends well into the wax. You’ll know it’s the right time when you can smell the fragrance lingering in the air.
Step 4: Prepare Your Jars
While your wax is melting, you can prep your jars. Clean and dry them, and if you’d like, add labels or any decorative touches you want.
Use a hot glue gun or adhesive wick sticker to attach the wick to the bottom of the jar. Make sure it’s centered, as this helps the candle burn evenly.
Step 5: Pour the Wax
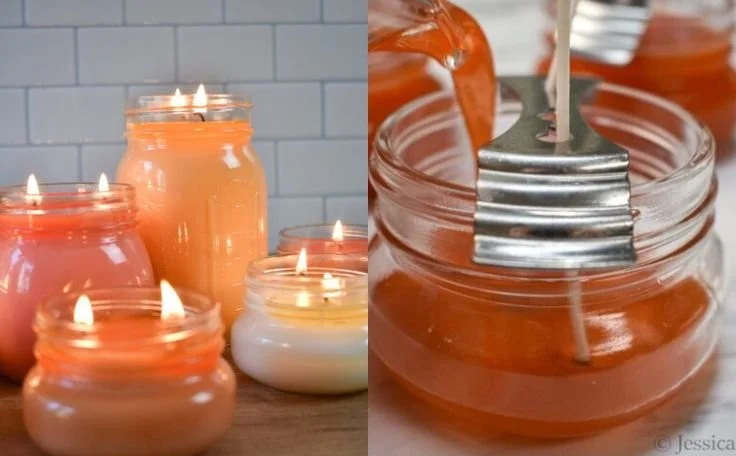
Now comes the fun part: pouring! Slowly pour the melted wax into your jars, making sure to leave about half an inch of space at the top. Don’t worry if there are small bubbles; they usually settle down once it cools.
Step 6: Keep the Wick Centered
To ensure your wick stays centered while the wax solidifies, you can use a pencil or chopstick. Lay the pencil across the top of the jar and gently secure the wick in the center.
Step 7: Let Them Cool
Let the candles cool for a few hours at room temperature. Avoid putting them in the fridge—this can lead to cracks in the wax. Before you light them, allow your candles to cure for at least 24 hours to help the scents develop fully.
Step 8: Trim the Wick
Once they’re fully cooled and set, trim the wick to about 1/4 inch above the wax. This will help your candle burn cleanly and prevent excess soot.
Step 9: Add Finishing Touches
If you like, this is the time to add any additional decorative touches. Consider tying twine or ribbon around the jar for a nice rustic look. They also make fantastic personalized gifts!
Common Mistakes to Avoid
Even the best of us make mistakes, right? Here are a few common pitfalls to watch out for when making soy candles:
- Pouring too hot: If the wax is too hot when pouring, it can create air bubbles and a rough finish.
- Skipping the wick prep: Make sure your wick is centered before pouring. If it’s crooked, your candle won’t burn evenly.
- Overdoing the fragrance: This is a tricky one! Too much oil can lead to poor burns and a mess. Trust your instincts, but also measure carefully.
Quick Beauty Tips for Candle Lovers
- Use your candles beyond burning: Once your candle is used up, clean out the jar with warm soapy water and use it for storage or as a planter.
- Mix scents: Try blending a couple of fragrance oils to create a custom scent that’s uniquely yours.
FAQs About Mason Jar Soy Candles
How long do homemade soy candles last?
Homemade soy candles can last anywhere from 10 to 50 hours, depending on the size and how frequently you burn them.
Can I use essential oils instead of fragrance oils?
Yes! Just be aware that essential oils typically have a lighter scent throw than fragrance oils specifically formulated for candles.
How do I store my candles?
Keep your candles stored in a cool, dry place away from direct sunlight. This keeps the color and scent intact longer.
Bonus Self-Care Ideas
Creating your own candles is one beautiful step toward self-care, but what if you want to take it further? Here are a few ideas:
- Set the mood: Light your candles during a bath or when doing your skincare routine for an elevated experience.
- Create a calming space: Arrange your candles around your favorite relaxation area, making it a sanctuary for self-care.
- Host a candle-making night: Invite friends over for a DIY candle-making session, combining creativity with connection.
Conclusion
At the end of the day, making your own mason jar soy candles is not just about the finished product; it’s about the joyful process of creation, the sweet scents, and the cozy ambiance they bring to your home. Remember that self-care doesn’t always mean a spa day; sometimes, it can be as simple as lighting a candle you made yourself.
So, are you ready to give it a try? You might just find that this little project becomes a cherished part of your self-care routine—something you look forward to time and time again. Happy crafting!