
These Loofah Soap Bars Make Perfect Homemade Gifts
Picture this: you’ve had a long week. Between work, family obligations, and trying to squeeze in a few moments of self-care, you’re feeling a bit frazzled. One day, as you soak in a warm bath, you notice the little things that can elevate your body care routine. The sweet scent of a beautifully crafted soap bar, the gentle exfoliation from a loofah, the richness that natural ingredients provide—can you see it?
Those moments of bliss got me thinking about how perfect these loofah soap bars would be not only for yourself but also as delightful homemade gifts for your friends and family. Here’s the truth: a beautifully packaged loofah soap bar can bring joy and pampering to anyone’s routine. Plus, that feeling of making something by hand adds a touch of warmth and thoughtfulness that store-bought gifts just can’t compete with.
So, if you’re ready to make something special that’s equal parts practical and pretty, let’s dive into the world of DIY loofah soap bars!
Why Loofah Soap Bars Are the Ultimate Gift
Giving a loofah soap bar is like giving a little piece of relaxation and rejuvenation. And let’s be honest, who doesn’t need that? Here are a few reasons why they make fantastic gifts:
- Natural Exfoliation: Loofah provides natural exfoliation, helping to slough off dead skin cells. Who wouldn’t appreciate soft, smooth skin?
- Customization: When you make these soap bars at home, you can personalize scents and colors for your friends’ tastes. Lavender for your bestie who loves calming scents or citrus for the one who needs a little energizing boost—endless possibilities!
- Sustainability: Homemade gifts often mean less plastic and waste. You can package them in biodegradable or recyclable materials. Isn’t that a win-win?
Simple Steps to Making Loofah Soap Bars
You might be wondering how to make these beautiful delights. The best part? It’s easier than you think! Let’s break down the process step-by-step. Grab your supplies, and let’s get crafting!
What You’ll Need
- Loofah slices (dried and cut)
- Melt-and-pour soap base (glycerin or shea butter work great)
- Essential oils (your choice for fragrance)
- Soap colorants (optional, but fun!)
- Silicone mold
- Double boiler or microwave-safe container
- Stirring stick
- Spray bottle with rubbing alcohol (to eliminate bubbles)
Step-By-Step Instructions
Step 1: Prep Your Work Area
Start by setting up a clean space to work in. Get all your ingredients and tools at hand. Put on some music or a podcast—it’s a perfect time to indulge in a little me-time!
Step 2: Cut the Loofah
Slice your loofah into desired thickness (around ¼ inch) and rinse them thoroughly to remove any residue.
Step 3: Melt the Soap Base
Using a double boiler or a microwave, gently melt your soap base. If you’re using a microwave, heat in 30-second intervals, stirring in between, until completely melted.
Step 4: Add Fragrance and Color
Once melted, add your desired essential oils and soap colorants. If you’re unsure of how much to add, start small—just a few drops of essential oil or color can go a long way.
Step 5: Incorporate the Loofah
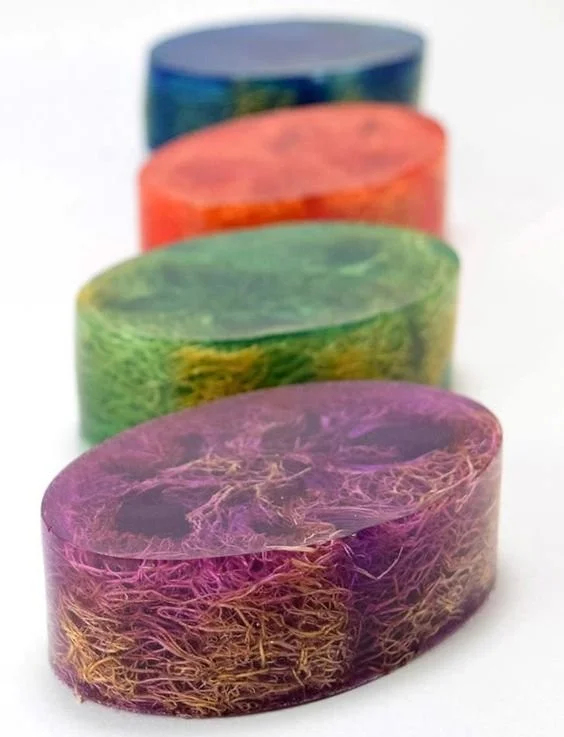
Carefully pour a small amount of the melted soap base into your silicone mold to create a base layer. Then, place the loofah slices into the mold. Pour more melted soap over them until fully covered.
Step 6: Eliminate Bubbles
Give the filled molds a light spritz of rubbing alcohol to eliminate any bubbles on the surface. It’s an easy way to achieve a smooth finish.
Step 7: Let It Set
Allow your soap bars to cool and harden completely. Depending on the size of your mold, this could take anywhere from 30 minutes to a couple of hours. If you’re feeling impatient, you can place them in the refrigerator for a quicker “set.”
Step 8: Pop Them Out and Package
Once hardened, gently push them out of the silicone molds. You can wrap them up in some pretty cellophane or a cute box with a personalized note. Consider pairing them with a natural scrub or a cute washcloth for an adorable spa-themed gift.
Tips for Perfecting Your Loofah Soap Bars
Want to take your soap bars to the next level? Here are some tips I’ve picked up along the way:
- Don’t Skip the Rubbing Alcohol: This small step can make a big difference in how your bars look. It gives that polished appearance we all love.
- Experiment with Layers: For a fun visual effect, try layering different colors and scents. Just pour a layer, let it cool slightly, then add another layer.
- Natural Add-Ins: If you want to really make these bars special, consider adding dried flowers or oats for added textures. They’ll look beautiful and feel even better on the skin.
Wrapping and Personalizing Your Gift
It’s time to make your soap bars shine even brighter! Here are some wrapping ideas:
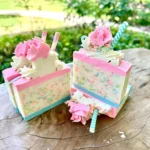
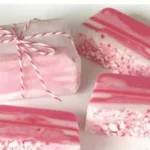
- Simple Wrap: Use natural twine to tie a piece of parchment or kraft paper around the bar. It gives off a rustic, homemade feel that’s hard to resist.
- Customize Labels: Print personalized labels with your friend’s name and the scent of the soap. You can even add a little care instruction tag for an extra touch.
- Gift Sets: Create gift sets with a matching scrub, lotion, or body cream. This can inspire a full pampering session, and who wouldn’t want that?
Common Mistakes to Avoid
Although making loofah soap bars is relatively easy, here are a few common pitfalls to watch out for:
- Too Much Fragrance: Remember that essential oils are potent. A few drops usually suffice!
- Inaccurate Measurements: If you’re adding colorant, it’s better to start with less and gradually increase. It’s easier to add than to take away.
- Rushing Cooling: Let your bars set completely before popping them out. It can be tempting, but a little patience goes a long way.
Frequently Asked Questions
How long do loofah soap bars last?
When stored properly, typically in a cool, dry place, your loofah soap bars should last around 6 months.
Can I use regular soap instead of melt-and-pour?
While it’s possible to make soap from scratch, it requires a bit more expertise and safety precautions. Melt-and-pour soap is beginner-friendly and much simpler.
Are loofah soap bars suitable for sensitive skin?
It depends on the individual’s skin type. Always do a patch test first. Natural ingredients are generally milder, but it’s always best to check.
Bonus Self-Care Ideas
Want to elevate your self-care game while making these gifts? Here are a few ideas:
- Spa Day with Friends: Host a DIY soap-making party. Everyone can create their own bars while snacking and chatting about beauty secrets.
- Relaxation Kits: Pair your loofah soap bars with calming teas and a journal for a beautiful relaxation kit.
- Self-Care Affirmations: Include a card with a positive affirmation for each gift. A little encouragement goes a long way!
Final Thoughts on Giving the Gift of Loofah Soap Bars
Let’s be real; there’s something incredibly fulfilling about creating something with your own two hands. Gift-giving becomes so much more special when it comes from the heart (and your kitchen). Whether you decide to share your lovely loofah soap bars or keep them all to yourself (no judgment here!), I hope this experience inspires you to add a bit of creativity and care to your beauty routine.
So, what are you waiting for? Grab those supplies, unleash your inner artisan, and have fun while making your aromatic, skin-loving treasures. You’ll not only treat your skin but also nurture those loving bonds with your friends and family. Happy crafting!