
Create Your Own Beeswax Candles for a Healthier Home
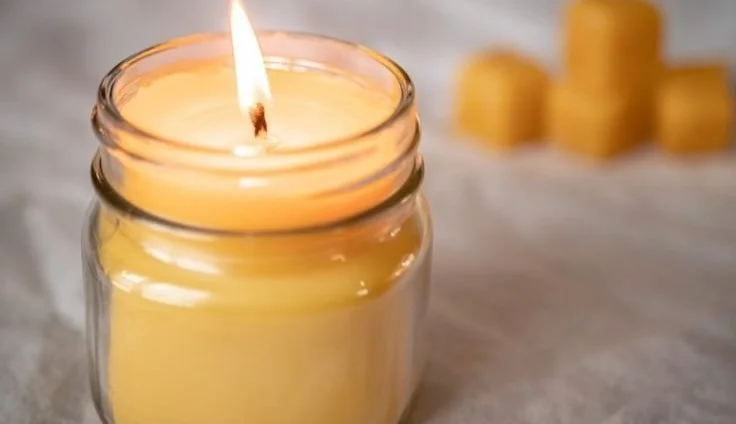
Imagine this: it’s a cozy evening, you’re wrapped in a soft blanket, and you light a beautifully crafted candle. The warm, flickering glow instantly elevates your mood, creating an inviting atmosphere. Here’s the truth: while many candles promise to enhance your space, most are filled with toxic chemicals that can harm your health. If you’ve ever felt concerned about what you’re inhaling while trying to create that serene ambiance, you’re not alone. The good news is that you can create your own beeswax candles at home.
Not only are these candles stunning to look at and provide a gentle, warm glow, but they’re also slow-burning and non-toxic. Plus, they do the remarkable job of purifying the air. Curious to learn how? Let’s dive into this satisfying DIY project that doubles as a delightful self-care ritual.
Benefits of Beeswax Candles
Before we jump into the how-to, let’s take a moment to understand why beeswax candles deserve a spot on your beauty routine (because yes, creating them is a self-care act!).
Air Purification: Beeswax candles release negative ions when burned, which can help reduce indoor pollutants. You might be wondering how this works. Well, these ions attach to toxins and help clear them from the air. Imagine breathing easier in your own home!
Natural and Non-toxic: Unlike commercial paraffin candles made from petroleum, beeswax is a natural substance. So, lighting one of these beauties won’t fill your space with harmful toxins. Sound familiar? Many of us have been in situations where we’ve had to toss out candles because they made us feel unwell. With beeswax, that’s a worry you can set aside.
Long-lasting: These candles burn longer than traditional ones, thanks to the unique composition of beeswax. You get to enjoy their warm glow much longer, making them a cost-effective choice too.
Gather Your Supplies
Let’s get you geared up for this exciting DIY adventure. Here’s what you’ll need:
- Beeswax: You can find beeswax sheets or pellets. I personally love pellets, as they melt down quicker.
- Wicks: Choose cotton or wood wicks for a cleaner burn.
- Containers or Molds: You can use glass jars, metal tins, or silicone molds. Get creative and have fun with different shapes!
- Double boiler (or microwave-safe bowl if you prefer quick melting).
- Essential oils (optional): For adding a delightful scent to your candles.
- Thermometer (also optional but useful).
Steps to Making Your Own Beeswax Candles
Creating your own beeswax candles isn’t as complicated as it may seem. It’s a beautiful process that allows you to pour your creativity into each candle. Here’s a step-by-step guide to get you started.
Step 1: Prepare Your Work Area
I can’t stress this enough: make sure you have a clean and safe workspace. Beeswax can be sticky, so lay down some newspaper or a silicone mat for easy cleanup. And don’t forget to gather your supplies mentioned above!
Step 2: Measure Your Beeswax
You’ll want to measure out the amount of beeswax you need based on your containers or molds. A good rule of thumb is one ounce of beeswax for every ounce of candle volume. For instance, if you’re using an 8-ounce jar, measure out 8 ounces of beeswax.
Step 3: Melt the Beeswax
Using a double boiler, heat the beeswax until completely melted. This typically takes about 10-15 minutes. If you’re using your microwave, melt in short bursts of about 30 seconds to avoid overheating it. Keep an eye on it, and give it a stir occasionally. If you have a thermometer, aim for around 145°F to 160°F for the best results.
Step 4: Add Essential Oils (Optional)
Once your beeswax is fully melted, you can add a few drops of essential oils if you prefer your candles infused with lovely scents. Lavender, lemon, and eucalyptus are fabulous choices, but feel free to mix and match based on your personal preferences. Just remember—less is more! Around 10-15 drops should suffice for an inviting scent without overwhelming.
Step 5: Attach the Wick
Now it’s time to secure your wick. You can dip the wick base into the melted wax briefly and then place it in the center of your container or mold. This will help it stay anchored while you pour in the wax.
Step 6: Pour the Wax
Carefully pour the melted beeswax into your container, leaving a little space at the top. It’s important to pour slowly to avoid air bubbles. You may need to hold the wick in place for a moment until the wax starts to solidify.
Step 7: Allow to Cool
Now comes the hardest part: waiting. Let your candles cool completely at room temperature. This usually takes about 2-3 hours, but for larger candles, it may take longer. You want them to be firm and set before moving on.
Step 8: Trim the Wick
Once your candles have cooled, trim the wick to about ¼ inch above the surface of the candle. A shorter wick will burn better, allowing for a longer and steadier flame.
Common Mistakes to Avoid
Creating your own beeswax candles is a delightful experience, but there are a few mistakes that could dampen your DIY joy. Here’s what to watch out for:
Overheating the Wax: It’s crucial not to overheat your beeswax, as this can change its chemical structure and affect how it burns.
Wrong Wick Size: Choosing a wick that’s too large can cause excessive soot and a flickering flame. Double-check the size recommendations for the wick you purchase.
Pouring Too Fast: Pouring too quickly can lead to air bubbles, which may affect the look and burn time of your candles.
FAQs About Beeswax Candles
How long do beeswax candles burn?
Beeswax candles can burn up to three times longer than traditional paraffin candles. That means you get to enjoy the glow and benefits for an extended period!
Do beeswax candles drip?
Generally, beeswax candles are known for their slow burn and minimal dripping, especially when the wick is properly trimmed. However, keep them away from drafts or hot air to minimize any potential drips.
Can I color beeswax candles?
Absolutely! You can add natural colorants or dyes designed for candle making. However, keep in mind that adding colors can sometimes alter the burning properties.
Bonus Self-Care Ideas
While you’re at it, why not turn this project into a full self-care experience? Here are a few ideas:
Candle-Making Party: Invite a few friends over, have some snacks, and create beautiful candles together. It’s a fun way to bond and enjoy each other’s company.
Create a Cozy Atmosphere: Set the mood with calming music and maybe a warm cup of tea by your side while creating.
Gift Yourself: After spending this time crafting, treat yourself to a quiet moment with your new candle lighting up a special corner of your home.
Conclusion
Making your own beeswax candles is not just an enjoyable activity—it’s a step toward a healthier, more eco-friendly home environment. Picture yourself lighting one of these gorgeous creations, knowing that you’ve crafted something beautiful and beneficial for your home.
As we’ve explored, the process is straightforward and rewarding, inviting you to engage in a mindful moment of creativity. So gather your materials, clear your space, and channel your inner candle artisan. You’ll find that this simple act can transform not only your space but also your self-care routine. Happy candle-making, beautiful!