
Creating Your Own Beeswax Candles with Essential Oils
Imagine this: it’s been a long week. You’re finally settling into the weekend, and you crave a moment of peace and tranquility. You dim the lights, put on your favorite playlist, and light a candle that fills your space with a warm, calming glow. It brings not only illumination but an inviting aroma that soothes your mind and lifts your spirits. Sound familiar? The right candle can transform your atmosphere, making it feel cozy and rejuvenating.
Now, picture this: instead of grabbing that store-bought candle, you craft your own special treat. It’s made from natural beeswax and infused with lovely essential oils. Not only do you get that desired warm glow, but you also surround yourself with fragrances that nourish your soul and enhance your self-care routine. That’s right! Making beeswax candles with essential oils is not only simple but also a delightful way to personalize your self-care environment. Let’s dive into this cozy DIY adventure together!
Why Choose Beeswax?
Before we roll up our sleeves and get crafting, you might be wondering: why use beeswax? Here’s the truth—beeswax is a natural powerhouse. Unlike paraffin candles, which can release harmful toxins when burned, beeswax candles are a healthier choice. They’re made from pure, renewable resources and can actually purify the air by releasing negative ions that neutralize pollutants.
Plus, the natural honey scent of beeswax is heavenly, even without any added fragrances! They burn longer than other candles too, making them a great investment for your self-care stash. So if you’re ready to transform your space with something special, beeswax is the way to go.
Essential Oils: The Perfect Touch
Now, let’s talk essential oils. Incorporating them into your candles not only elevates the fragrance but also brings their therapeutic benefits to your space. Want to unwind? Consider lavender. Need an energy boost? Peppermint might be your go-to. Feeling a bit nostalgic? Orange can fill your room with warmth and joy.
The beauty of essential oils is their versatility. There are so many options! You can mix and match to create a scent profile that fits your mood. Isn’t it wonderful that a simple candle can evoke such strong emotions and even uplift our spirits? So grab your favorite oils, and let’s get to creating!
The Recipe for Your Beeswax Candles
Ready to get started? Let’s make those beeswax candles! Below is a straightforward recipe that will guide you step by step. Trust me, you’ll feel accomplished and empowered when you see (and smell) the final product!
What You’ll Need
Materials:
- 1 pound of beeswax pellets (or blocks, if you prefer to grate them)
- 1-2 ounces of essential oils (your choice)
- Candle wicks (make sure they’re suitable for beeswax)
- Candle containers (glass jars or metal tins work beautifully)
- Double boiler (or a makeshift one using a saucepan and a heat-safe bowl)
- Thermometer (optional, but helpful)
- Stirring utensil (wooden spoon or stick)
- Scissors (for trimming wicks)
- Pouring pitcher (optional, but makes it easier)
Step-by-Step Instructions
1. Set Up Your Work Space
First things first, let’s create your candle-making zone. Make sure your space is clean and prepared for some fun! Lay down some newspaper or a cloth to catch any spills. You’ll thank yourself later!
2. Melt the Beeswax
Place your beeswax in the top portion of the double boiler set over simmering water. If you don’t have a double boiler, simply place a heat-safe bowl on top of a saucepan filled with water. Stir occasionally as the wax melts. It’ll take about 10-15 minutes. Keep an eye on it; you want it to melt gently without getting too hot. Ideally, the temperature should reach around 160°F (70°C).
3. Add Essential Oils
Once your beeswax is fully melted, it’s time for the fun part: adding the essential oils! You can start with about 1 ounce (or 30ml) per pound of beeswax. Simply pour the oils into the melted wax and stir gently. This is where you can truly express your creativity. Need stronger scents? Feel free to add a bit more.
4. Prepare Your Containers
While the beeswax cools slightly, set up your containers. If you’re using wicks with a sustained base, stick them into the center of your containers. If not, you can tie the wick to a pencil and rest it across the top of the container to keep it centered.
5. Pour the Wax
When your wax cools to about 150°F (65°C), it’s time to pour! Carefully pour the melted wax into your containers, leaving a bit of space at the top. Remember to keep the wick centered! If you’re using a pouring pitcher, it’ll make this step much easier.
6. Let Your Candles Set
Now comes the waiting game. Let your candles sit for about 24 hours at room temperature. Avoid moving them during this time, as they need to set undisturbed. It’s okay to admire your handiwork, though!
7. Trim the Wicks
Once they’re fully cooled and hardened, trim the wicks to about 1/4 inch above the wax surface. This will help the candle burn more evenly and prevent soot.
8. Enjoy Your Candles
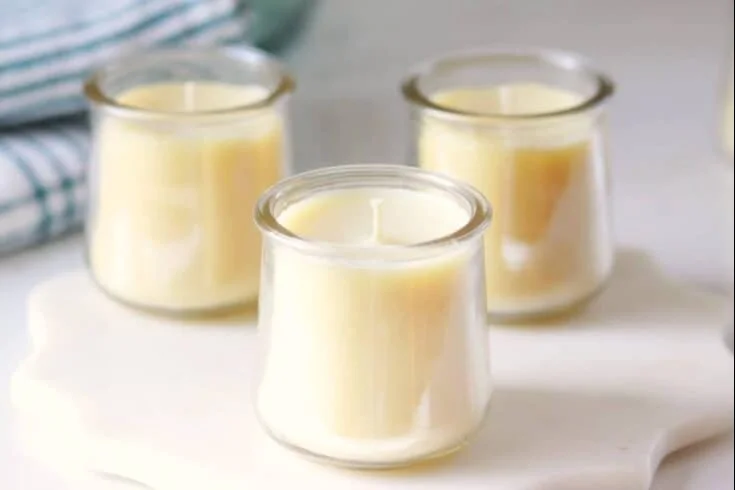
Now the moment has arrived! Light your new beeswax candles and enjoy the delightful ambiance and aroma they bring to your home. You’ve created something special, and you deserve to bask in its glow.
Quick Beauty Tips for Candle Love
Try Mixing Scents: Experiment by blending different essential oils for a unique aroma that resonates with you. Maybe a little lavender and eucalyptus for tranquility? Yum!
Keep Your Candles Away from Drafts: This can help them burn better and last longer. Nobody wants a candle that flickers and throws soot around, right?
Use Off-Cuts for Melting: If you have leftover beeswax, melt it down and use it to create smaller votives or wax melts. Nothing goes to waste!
Common Mistakes to Avoid
Here are a few things to keep in mind to ensure your candle-making experience goes smoothly:
Ignoring Wick Size: For beeswax candles, it’s important to select the right wick size. Too small, and the candle will tunnel; too large, and you’ll end up with soot.
Heating Too Quickly: Remember, beeswax is precious! Melt it gently to maintain its beautiful properties.
Overdoing the Oils: While it’s tempting to add more essential oils, too much can result in a weaker burn or an overwhelming scent. Less is often more!
FAQs about Beeswax Candles
Can I use beeswax blocks instead of pellets?
Absolutely! You can grate or cut the blocks into smaller pieces for easier melting.
How long do beeswax candles last?
Beeswax candles can burn anywhere from 25 to 50 hours, depending on the size and wick used. They’re a great investment in your self-care ritual.
Are scented beeswax candles safe for kids and pets?
Yes, beeswax candles with pure essential oils are generally safe for children and pets. Just practice good candle safety!
Bonus Self-Care Ideas
Besides enjoying the fruits of your labor, here are a few self-care activities to pair with your lovely candles:
- Set the mood for a bubble bath with your candles lit around the tub.
- Light your candles during your yoga or meditation sessions to enhance relaxation.
- Use your candles as part of a cozy reading nook—nothing beats a good book under soft candlelight.
Best Routine for Busy Women
We all lead busy lives, don’t we? Adding a moment of pause for ourselves can feel like a luxury in today’s fast-paced world. Here’s a quick routine you can adopt:
- Schedule Your Candle Time: Choose a day each month to make your candles. Maybe it’s your “self-care Sunday”!
- Plan Your Scents: Decide ahead of time which essential oils speak to you for that month.
- Create a Calm Space: Set the mood with soft music and a clean environment while you craft.
Conclusion: Embrace the Magic of Candle Making
Creating your own beeswax candles is more than just a crafting activity; it’s an opportunity to indulge in self-care, express your creativity, and enhance your living space. Remember, it’s all about taking that time for yourself. We all need those moments when we light a candle, take a deep breath, and simply enjoy.
So, next time you crave a cozy evening or want to fill your home with delightful scents, remember you have the power to create your ambiance with homemade goodness. Here’s to your journey in becoming a candle-making guru and discovering the joy of crafting beautiful, personalized candles to illuminate your life!
Let’s keep igniting that passion for self-care, one candle at a time. ✨