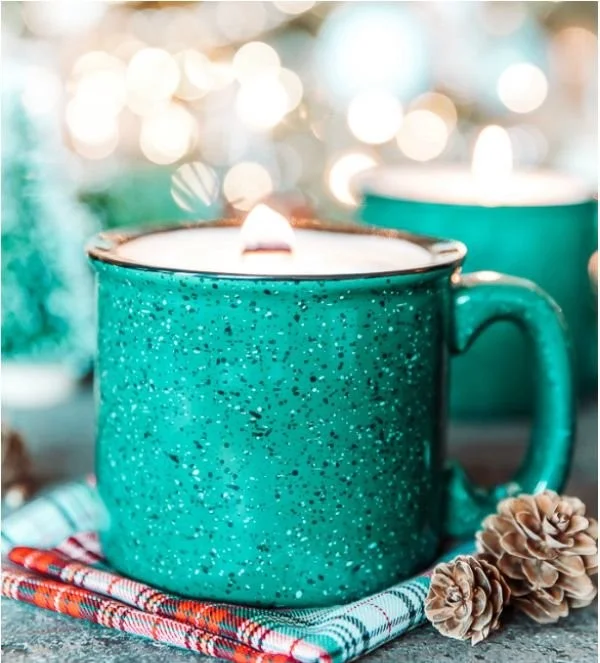

Create Your Own DIY Campfire Mug Candle for a Cozy Atmosphere
Picture this: it’s a chilly evening, the air is crisp and filled with the smell of falling leaves. You’re snuggled into your favorite blanket, and a warm glow fills your space. This is the kind of vibe we all crave, isn’t it? And what if I told you that you can create that cozy atmosphere yourself, all while enjoying a little self-care moment? Yes, friends, we’re diving into the delightful world of DIY campfire mug candles.
Why Campfire Mug Candles Are So Special
Here’s the truth—there’s nothing quite like the flickering warmth of a candle to create an atmosphere of comfort. But when that candle is nestled in a charming campfire mug, it takes the experience to a whole new level. Not only is it a unique décor piece, the nostalgic design of a campfire mug can transport you back to summer nights spent under a starlit sky. Sound familiar? You know the vibes—relaxation, good company, and the simple pleasure of a warm drink.
What You’ll Need to Get Started
Before we start pouring wax (and trust me, the mess can be a tad tricky if you’re new), let’s gather our supplies. It’s a straightforward adventure. Here’s your list:
- Campfire mugs – These charming mugs can be found at local shops or online. Vintage ones add a unique twist!
- Soy wax or beeswax – Eco-friendly options are becoming popular. Soy wax is easy to work with, while beeswax offers a natural honey scent.
- Wicks – Look for ones that are appropriate for the size of your mug.
- Fragrance oils or essential oils – Choose scents that evoke nostalgia—think vanilla, cinnamon, or a cozy pine scent.
- Double boiler or a pot and a heat-safe bowl – For melting the wax.
- Thermometer – To monitor the wax temperature.
- Stirring utensil – Wooden spoons work wonders.
- Newspaper or an old cloth – To catch spills (because let’s be honest, we all need a safety net).
The Step-By-Step Guide to Crafting Your Campfire Mug Candle
Now that we have everything we need, let’s get started on this creative journey together!
Step 1: Prepare Your Workspace
Let’s be real; the last thing you want is to be cleaning wax off your cherished table. So lay down some newspaper or an old cloth. This will catch drips and prevent any stress over potential messes.
Step 2: Measure Your Wax
You might be wondering how much wax to use. A good rule of thumb is to fill your mug with water, then pour that water into a measuring cup to estimate how much wax you’ll need. Remember, wax shrinks a bit as it cools, so it’s better to have a little extra than not enough.
Step 3: Melt the Wax
In your double boiler, gently heat the wax. Use your thermometer to keep an eye on the temperature. You want to aim for about 170°F for soy wax. As it begins to melt, don’t forget to stir occasionally. This will help it melt evenly.
Step 4: Add Fragrance
Once your wax is fully melted and at the right temperature, it’s time to add that wonderful scent. For every pound of wax, you’ll need about one ounce of fragrance oil. Stir it in thoroughly (this part smells heavenly).
Step 5: Set the Wick
Before pouring, you need to secure the wick in your mug. You can do this by dipping the bottom of the wick in the hot wax and pressing it against the mug’s base. This keeps it centered as the wax cools. To ensure it stays upright, you can also use a pencil or chopstick laid across the top of the mug, with the wick in the middle.
Step 6: Pour the Wax
Now the fun part—pouring! Slowly pour the melted wax into your mug. You want to fill it to just below the rim. After pouring, let it settle for a couple of minutes. If you see any air bubbles, don’t fret—just give it a light tap on the counter.
Step 7: Let it Cool
Allow your candle to cool for several hours. Once it’s firm to the touch, you can trim the wick down to about ¼ inch above the wax. This will ensure a nice, even burn.
Step 8: Enjoy Your Creation
You did it! You’ve created a DIY campfire mug candle. Light it up, sit back, and soak in those cozy vibes. Maybe even pair it with a warm drink—it really completes the experience.
Quick Beauty Tips for Candle Care
As you’re enjoying your beautiful candle, here are a few quick tips to ensure it burns beautifully:
- Trim the Wick Regularly: This helps maintain an even burn, preventing soot.
- Let it Melt Completely: Make sure to let the candle burn until the top layer of wax is fully melted. This helps avoid "tunneling.”
- Store Wisely: Keep your candles in a cool, dark place to extend their life.
Common Mistakes to Avoid When Making Candles
Candlemaking can be a bit tricky, especially if you’re just starting out. Here are a few common pitfalls and how to sidestep them:
- Using Too Much Fragrance: More doesn’t always equal better. If you overdo it, your candle could burn unevenly or even smoke.
- Not Monitoring Temperature: Always use a thermometer. If your wax gets too hot, it can ruin the scent and texture.
- Ignoring Safety: Candles should never be left unattended while burning. Make sure you’re always in the vicinity to enjoy them safely.
Bonus Self-Care Ideas to Pair with Your Candle
Want to enhance that cozy evening? Here are some self-care ideas that pair beautifully with your freshly crafted candle:
- Settle into Your Favorite Book: Grab that novel you’ve been meaning to read. You have the perfect ambiance now.
- Enjoy a Warm Bath: Light your candle and listen to some soothing music.
- Journal Your Thoughts: There’s therapy in writing. Let the candle’s glow ignite your creativity as you reflect and dream.
FAQs About DIY Candles
What if the wax doesn’t harden properly?
Sometimes, environmental factors can affect the cooling process. If this happens, you can reheat and re-pour the wax for a smoother finish.
Can I use regular kitchen candles for supplies?
While you can use wax from old candles, keep in mind that fragrances and additives in kitchen candles might change the burn properties. It’s generally best to stick with dedicated candle making supplies.
How long will my DIY candle last?
This depends on the size and the quality of the wax used. Generally, soy candles tend to burn longer than paraffin candles, and with care, they can last for many hours of cozy enjoyment.
Conclusion
As we wrap up this little DIY adventure, I hope you’re feeling empowered to create your very own campfire mug candle. It’s more than just a craft; it’s a way to infuse your space with warmth and beauty, serving as a reminder of those cherished moments by the fire. These cozy creations are perfect for you or as a thoughtful, handmade gift for friends and family.
So go on, gather your supplies, and let your creativity shine. Nothing beats the joy of surrounding yourself with a little cozy magic. You got this!