
Discovering the Joy of Easy Homemade Beeswax Candles
Imagine a cozy evening where the light of a soft candle flickers in the background, casting warm shadows across the room. You’re nestled in your favorite chair, perhaps with a good book or a steaming cup of tea. The sweet, natural scent of beeswax fills the air, creating a comforting atmosphere that invites relaxation and peace. Sound familiar? It’s one of those little moments we all crave, isn’t it?
If you’ve ever thought about indulging in a creative project that not only beautifies your space but also nourishes your spirit, making homemade beeswax candles might just be the answer. Let’s explore how easy it is to craft these delightful candles, transforming your home into a sanctuary while indulging in a little self-care along the way.
The Benefits of Beeswax Candles
Before we dive into the how-tos, let’s talk about why beeswax candles are worth your time.
Natural and Non-Toxic: Unlike paraffin candles, which can release harmful chemicals into the air, beeswax is a natural product. When burned, it actually purifies the air.
Long-lasting: Beeswax candles usually burn longer than other types, meaning you can enjoy that lovely glow much longer.
Add a Touch of Luxury: There’s something inherently elegant about the warm glow and subtle honey scent of beeswax. They elevate any space, whether it’s a dinner party or a calming bath evening just for you.
Excellent Gift Idea: Homemade candles make thoughtful gifts for loved ones. Imagine the joy on your friend’s face when they receive a package of beautifully crafted beeswax candles, made with love.
Now that you know why beeswax candles are excellent, let’s jump into actually making your own.
What You’ll Need for Your Beeswax Candles
Here’s a quick shopping list for your beeswax candle-making adventure:
Beeswax: You can buy this in sheets, blocks, or pellets. Sheets are great for rolled candles, while blocks are best for pouring.
Wicks: Cotton wicks are typically recommended for beeswax candles. Make sure to choose the right size based on your candle diameter.
Double Boiler: This is essential for melting your beeswax safely. If you don’t have one, a glass bowl over a saucepan works just as well.
Thermometer (optional): For those of you who want to be precise, a thermometer will help ensure the wax doesn’t get too hot.
Molds or Containers: You can use glass jars, silicone molds, or even cupcake tins. It’s completely up to your creative vision!
Essential Oils (optional): If you want to add a fragrant twist, consider incorporating pure essential oils.
Making Easy Homemade Beeswax Candles
Let’s get into the heart of the matter with a simple, step-by-step guide!
Step 1: Prepare Your Workspace
Before you begin, it’s crucial to have a clean, organized workspace. This makes the process smoother and more enjoyable. Lay down some newspaper or a protector on your counter, and gather all your materials.
Step 2: Measure Your Beeswax
If you’re using blocks or pellets, measure out the amount you’ll need. A general rule of thumb is to use approximately half a pound of beeswax for two medium-sized candles.
Step 3: Melt the Beeswax
Using a double boiler, heat the beeswax on a low flame. Be patient and stir occasionally. If you don’t have a double boiler, place your glass bowl over a saucepan filled with a couple of inches of water and let the beeswax melt slowly.
Step 4: Prepare Your Wicks and Containers
While the wax melts, prepare your wick. Secure it to the bottom of your container using a bit of melted wax or a wick sticker. If you’re using molds, make sure they’re clean and dry.
Step 5: Add Essential Oils (Optional)
Once your beeswax is fully melted (it should reach around 145°F to 175°F, but you don’t need to fuss too much about the exact temperature), consider adding essential oils for fragrance. A few drops can enhance your candle, but start with a small amount and test which scents resonate with you.
Step 6: Pour the Wax
When your beeswax is completely melted and any essential oils you wish to add are mixed in, carefully pour the wax into your prepared containers. You may want to hold the wick in place while you do this. Fill them to your desired height, but be cautious not to overflow.
Step 7: Allow to Cool
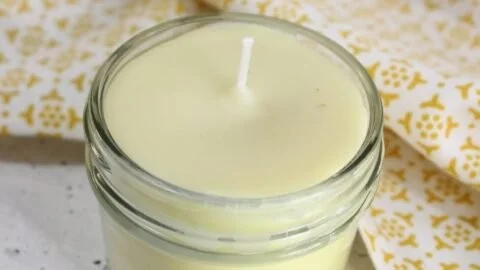
Let your candles cool undisturbed at room temperature. This usually takes a few hours. As they cool, the candles will form a slight sheen, showcasing their beautiful, natural color.
Step 8: Trim the Wick
Once cooled completely, trim the wick to about ¼ inch above the candle’s surface. This encourages a clean burn without excessive soot.
Step 9: Enjoy Your Candles
Light your candles and take a moment to appreciate the ambiance they create. Your home will feel instantly warmer, cozier, and inviting.
Quick Beauty Tips for Candle-Loving Mamas
Use Leftovers: If you have leftover wax from previous projects, melt it down and blend it with new beeswax. It’s eco-friendly and keeps everything on hand!
Decorate Your Containers: Before pouring the wax, consider painting or decorating your containers. This adds a personal touch that aligns with your home decor.
Experiment with Colors: If you’d like colored candles, consider safe natural colorants, or mix in a bit of crayon for a pop of color.
Layer It Up: Try pouring multiple layers of different colored wax. This can create a beautiful ombre effect, and it’s a fun way to express creativity.
Common Mistakes to Avoid
We’ve all been there, right? Trying something new but stumbling over a simple mistake. Here are a few pitfalls to avoid when making your candles:
Too High Temperature: Melting wax should be done slowly. High temperatures can change the chemical structure of the wax and affect how it burns.
Not Securing the Wick: If the wick isn’t secured properly, it may fall over during the pouring process.
Pouring Too Quickly: This can cause air bubbles, leading to uneven surfaces and having an unpolished look.
Frequently Asked Questions
Can I add fragrance to beeswax candles?
Absolutely! Just make sure to use pure essential oils. Synthetic fragrances can mask the natural scent of beeswax.
How long do beeswax candles last?
A well-made beeswax candle can last up to 40 hours or more, depending on its size and thickness.
Are beeswax candles safe for allergy sufferers?
Yes, beeswax is known for being hypoallergenic, and it often helps reduce the build-up of dust and toxins in the air.
What if my candle has a funny shape after cooling?
Don’t stress! This often happens if the wick moved during the cooling process. You can always remelt the wax and try again.
Bonus Self-Care Ideas
Beyond candle making, consider these self-care ideas to combine into your creative time:
Make a Cozy Night In Kit: Pair your candles with homemade face masks and soothing herbal teas for the perfect “me time” night.
Journaling Session: Light your candles and take a moment to jot down thoughts or goals. There’s something so calming about putting pen to paper by candlelight.
Host a Candle-Making Party: Gather a few friends and make it a fun event! There’s magic in crafting together.
Embrace the Glow of Homemade Candles
Creating easy homemade beeswax candles is more than just crafting; it’s about exploring creativity, enhancing your self-care rituals, and enriching your home atmosphere. You might find, like I did, that each candle represents a moment of peace, an expression of love, or even a cherished memory.
So, what are you waiting for? Grab your supplies and start making beautiful, natural candles that will not only light up your space but also your heart. Let’s embrace that warm glow together and bring a touch of homemade beauty into our lives. You deserve it!