
Unleash Your Creativity with Mica-Powder Dyed Candles
Imagine this: it’s a cozy weekend afternoon. You’ve spent the week hustling at work, juggling family duties, and navigating life’s little surprises. Your soul craves some self-care, but you’re not in the mood for a long spa day. What if I told you that making your own stunning candles could be the perfect way to express your creativity while indulging in a bit of tranquility?
That’s right! Dyeing candles with mica powder offers an affordable and fun DIY project that results in beautiful, shimmering candles tailored to your taste. Whether you’re a candle enthusiast or a crafting novice, this easy and delightful activity might just be the self-care escape you’re looking for. So, let’s dive into how you can create stunning candles that not only illuminate your space but also make it a reflection of your personality.
What is Mica Powder?
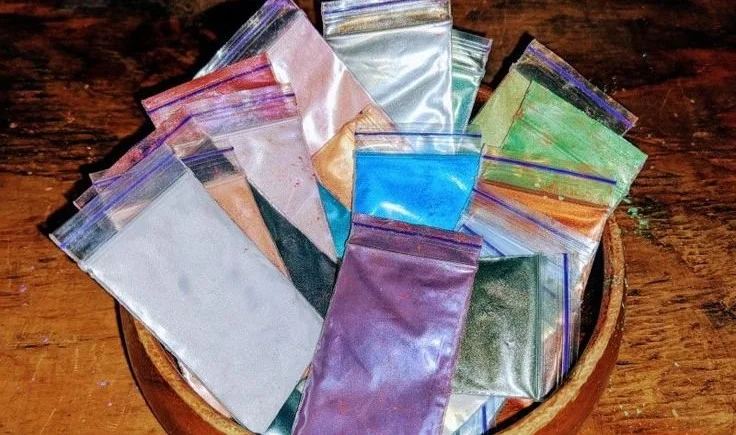
Before we start melting wax, let’s talk about mica powder. This colorful mineral is often used in cosmetics, crafts, and, of course, candle-making. Its shimmering quality adds a gorgeous touch to any project, making your candles sparkle like stars in the night sky. It’s non-toxic, easy to work with, and comes in a rainbow of colors. Plus, it’s incredibly affordable—something we all appreciate!
Why Use Mica Powder for Candle Dyeing?
Using mica powder to dye candles is not just about aesthetics. Here are a few reasons why this method is becoming a favorite in the DIY community:
- Cost-effective: Mica powder is inexpensive and goes a long way. A little can create a rich, vibrant color without breaking the bank.
- Non-toxic: Unlike some traditional candle dyes, mica powder is safe to use and doesn’t emit harmful fumes.
- Customizable: You can mix colors to create your unique shades, making your candles truly one-of-a-kind.
- Simple to use: It’s straightforward to incorporate mica powder into your candle-making process, even for beginners.
Getting Started with Your Candle-Making Journey
Now that we’ve covered the basics, let’s gather our supplies and get crafting! Here’s what you’ll need for your weekend project:
Supplies You’ll Need
- Soy wax (or any wax of your choice)
- Mica powder in colors of your choice
- Candle wicks (make sure they’re suitable for the type of wax you’re using)
- Double boiler (or a makeshift one using a pot and a heat-safe measuring cup)
- Containers or molds for your candles
- Thermometer (optional but helpful for precise temperatures)
- Stirring utensil (like a wooden stick or a chopstick)
- Fragrance oil (optional, but why not make it smell as good as it looks?)
- Paper towels for any spills
Step-by-Step Guide to Dyeing Your Candles with Mica Powder
Ready to bring some sparkle to your weekend? Here’s a simple guide to get you started on your mica-powdered candles.
Step 1: Melt the Wax
Start by measuring out the amount of wax you’ll need based on the size of your container or mold. Place the wax in your double boiler and heat it over medium heat, stirring occasionally until fully melted. Keep an eye on the temperature; you want it around 170°F for best results.
Step 2: Add Mica Powder
Once your wax is fully melted, it’s time to add the mica powder. Here’s the truth: the amount of mica powder you’ll need depends on how vibrant you want your color. Start with a small scoop (about a teaspoon) and stir well to incorporate it. Watch as the wax transforms into a beautiful, shimmering hue!
Step 3: Fragrance It Up
If you want your candles to have a little extra charm, now’s the time to add fragrance oil. Depending on your wax, follow the recommended guidelines on the bottle—usually about 1 ounce per pound of wax. Stir it in thoroughly.
Step 4: Prepare Your Containers
While the wax is cooling slightly, prepare your containers or molds. Secure the wicks to the bottom using a dab of melted wax or a wick sticker, so they don’t shift when you pour in the mixture.
Step 5: Pour the Wax
Let your wax cool to around 150-160°F before pouring. Carefully pour the glittery wax into your prepared containers, leaving a little space at the top. This will allow the wax to settle and prevent overflow.
Step 6: Secure the Wicks
To keep the wick centered while the candle hardens, you can lay a chopstick or pencil across the top of the container, resting the wick in the middle.
Step 7: Let It Set
Once you’ve poured the wax, let your candles sit undisturbed for about 4–6 hours, depending on the size of your candles. If you notice any surface imperfections after cooling, don’t worry; they can easily be fixed with a little heat from a heat gun.
Step 8: Trim the Wicks and Enjoy
After your candles have completely set, trim the wicks to about ¼ inch above the surface and admire your handiwork! You’ve made gorgeous candles that will light up your home (or make fabulous gifts).
Common Mistakes to Avoid
As someone who’s dabbled in the art of candle making, I know there can be a learning curve. Here are a few common pitfalls to look out for:
- Overheating the wax: Too high a temperature can cause the wax to break down, affecting the scent throw and overall quality.
- Using too much mica: While we all want our candles to look fabulous, a little goes a long way. Too much can lead to issues with burning and soot.
- Pouring too hot or too cool: Make sure to check the temperature before pouring for an even finish.
- Skipping the wick adjustment: A centered wick is crucial for even burning. Secure it well before pouring in your wax.
FAQs About Mica-Powder Dyed Candles
Can I use mica powder in any type of wax?
Absolutely! Mica powder works well with soy wax, paraffin, and beeswax. Just be sure to check the specifications for your chosen wax.
How do I know how much mica powder to use?
Start with about 1 teaspoon per pound of wax and adjust according to the vibrancy you desire. Remember, you can always add more!
Will the candles look different when burned?
Yes, they might look a little different when lit due to the nature of the wax and pigments, but that’s part of their unique charm.
Bonus Self-Care Ideas
If you’re feeling adventurous, why not plan a little DIY candle-making party? Invite your friends over, set up a craft station, and enjoy some light snacks or a glass of wine while you create together. Crafting can build connections and make memories that last far longer than any store-bought candle.
Wrapping It Up with Light and Love
Creating your own beautifully dyed candles using mica powder can be an incredibly rewarding activity. Not only are they visually stunning, but they also provide a sense of accomplishment and a dose of creativity that can brighten up your day.
So, next weekend, when you’re craving a little self-care, gather your supplies and unleash your inner artisan. You might just find that this simple DIY project ends up being one of your new favorite rituals for relaxation.
Remember, we all need a little indulgence in our busy lives, and this crafty escape can give you that and more. Light your candles, breathe in those soothing scents, and take a moment to bask in the glow you’ve created. You’ve earned it!