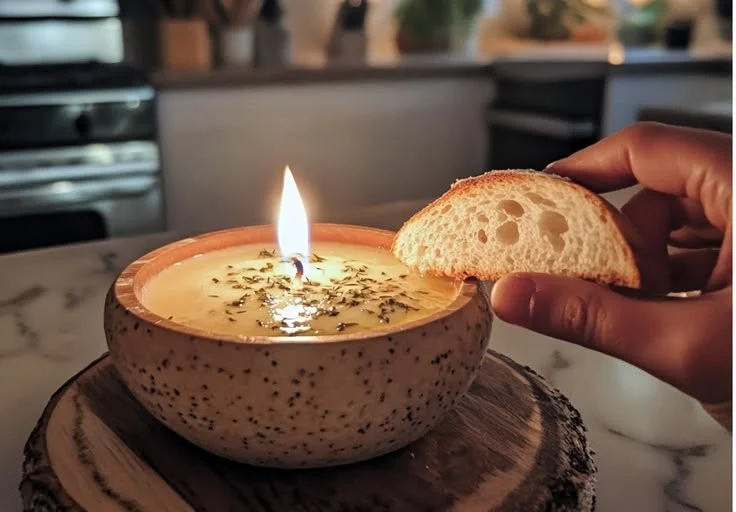

Picture This
Imagine you’re hosting a cozy gathering with friends, laughter filling the air, and delicious aromas wafting from your kitchen. You’ve prepared your signature dish, but what if you could add a fun twist to your entertaining game? Here’s the truth: a DIY butter candle can make your meal not only delicious but also memorable. It’s an unexpected treat that can elevate any dining experience, adding flair and a touch of personal creativity. Sounds delightful, right?
The Allure of Butter Candles
Before we dive into our scrumptious DIY butter candle recipe, let’s chat about what makes these candles so appealing. Butter candles are not just a fun idea; they’re also a beautiful addition to any table setting. When melted on warm bread, they create a blissful, rich flavor. They’re perfect for birthdays, weddings, or casual dinners, and let’s be honest, who doesn’t love a unique centerpiece that doubles as a snack?
There’s something incredibly satisfying about making these candles yourself. You can personalize them with different herbs, spices, or even sweeteners depending on your theme or the dishes you’re serving. It brings that extra dash of thoughtfulness to your entertaining.
What You’ll Need
Ready to dive in? First, let’s gather our supplies. This isn’t a complicated recipe, and chances are, you already have most of the ingredients at home. Here’s what you’ll need for your DIY butter candle:
- 1 cup of unsalted butter: Opt for high-quality butter for the best taste.
- Fresh herbs: Think rosemary, thyme, or basil for a savory touch.
- Garlic or shallots: If you’re feeling adventurous, these add great flavor!
- Salt: A pinch to enhance the flavors.
- Small candle molds: Silicone molds are perfect for easy removal.
- Spoon: For mixing.
- Optional key flavors: Lemon zest, chili flakes, or honey for a sweet candle.
Step-by-Step Guide to Crafting Your Butter Candle
Alright, let’s get to the fun part—making that butter candle! Follow me through these easy steps, and you’ll impress your friends in no time.
Step 1: Prepare the Ingredients
Start by letting your butter come to room temperature. It should be soft but not melted. While that’s happening, gather your herbs and any other flavor additions. If using garlic or shallots, finely chop them so they can release their flavors well throughout the butter.
Step 2: Mix the Ingredients
In a mixing bowl, combine the softened butter with your chosen herbs, garlic, salt, and any additional flavors. This is where you can get creative! Give everything a good stir until it’s evenly mixed. You can use a fork or a spoon for this.
Step 3: Fill the Molds
Scoop the butter mixture into your silicone molds. Make sure you pack it nicely so it holds together when it sets. If you want, you can make them in different shapes to match the theme of your gathering!
Step 4: Refrigerate
Pop the filled molds into the refrigerator for at least 1-2 hours. This lets the butter harden up nicely. If you’re in a rush, you can also use the freezer for 30 minutes, but be careful not to let them freeze solid—just firm them up a bit.
Step 5: Remove and Serve
Once set, gently push the butter candles out from the molds. They should come out easily if you used silicone. Place them on a serving platter and get ready to impress!
Quick Serving Tips
- Presentation is Everything: Serve your butter candles with freshly baked bread or rolls. Arrange them artfully on a rustic wooden board or a pretty platter.
- Pair with Wine: If you’re serving wine, consider a nice white to balance the rich flavors of the butter.
- Herb Sprigs: Garnish the platter with extra herb sprigs for a pop of color and freshness.
Common Mistakes to Avoid
We’ve all had our share of kitchen mishaps. Here are a few things to keep in mind to ensure your butter candles turn out fabulous:
- Too Soft: If your butter isn’t soft enough, it won’t mix well with the herbs. Let it sit out until it’s just the right texture.
- Over Mixing: You want the flavors to meld but not to whip it into a fluffy consistency. A good stir will do the trick.
- Too Much Flavor: You might be tempted to add a ton of spices and herbs, but remember, balance is key. Less can sometimes be more!
Frequently Asked Questions
How long do butter candles last?
Typically, they can last about two weeks in the refrigerator, but they’re best enjoyed fresh!
Can I use salted butter?
Absolutely! Just adjust the amount of salt you add to taste.
What if I don’t have molds?
No molds? No problem! You can roll the butter mixture into a log shape using parchment paper and slice it as needed.
Bonus Self-Care Ideas
Now that we’ve created something beautiful and delicious, let’s talk about taking care of yourself as a busy woman who juggles all these tasks. Here are a few self-care ideas to consider:
- Schedule Downtime: After entertaining, take a moment for yourself. Whether it’s curling up with a good book or taking a long bath, recharging is critical.
- Beauty Routine: Treat yourself to a face mask while preparing for the gathering. This can work wonders not just for your skin but also for your spirit.
- Get Moving: A quick workout or even a walk outside can boost your mood and help you feel more refreshed.
Wrapping Up
So there you have it: a delightful DIY butter candle recipe that brings a touch of fun and creativity to your next gathering. It’s a simple way to impress your friends and family, providing not just a culinary experience but also a beautiful presentation! You’ll not only leave your guests talking about the savory flavors but also the unique twist that made your evening unforgettable.
As you gather around the table, remember that it’s the little touches that make the biggest impact. From delicious homemade treats to moments of laughter and connection, these are the memories we cherish. And while everyone enjoys the butter candles, don’t forget to sit back and relish in the joy of creating something truly special. You’re not just a host; you’re a creator of beautiful moments. Happy entertaining!