
Discover the Joy of DIY Mosquito Repellent Candles
Picture this: It’s a warm summer evening, the sun is dipping below the horizon, and you’re outside, soaking in the delightful ambiance of a backyard barbecue or a cozy fire pit gathering. You can almost taste the s’mores, and the laughter of friends fills the air. But then, it happens. You feel that annoying sting on your leg and realize it’s a pesky mosquito. Sound familiar?
We’ve all been there, and it’s so frustrating. But here’s the truth: you don’t have to suffer through annoying bites or reach for chemical-laden repellents to keep those buzzers at bay. I’ve discovered a brilliant little solution that’s as effective as it is charming – DIY mosquito repellent candles. They’re not just functional; they can add a lovely touch to your outdoor space. And the best part? You can whip them up in just 10 minutes with a few basic supplies. Let’s dive into this fun summer craft and ensure you stay pest-free during all your summer activities!
Why Choose DIY Mosquito Repellent Candles?
You might be wondering why you should DIY these candles instead of just buying pre-made ones. Well, here’s what makes these homemade candles special:
- Natural Ingredients: Many store-bought candles contain synthetic fragrances and chemicals. By making your own, you’ll control what goes into your candles.
- Customizable Scents: You can tailor the aromas to your liking. Love lavender? Prefer citrus? The choice is yours!
- Eco-Friendly: DIY candles can be made from natural waxes like soy or beeswax, which are better for the environment.
- Cost-Effective: With just a few ingredients, you’ll save money compared to those expensive specialty candles.
Essential Supplies for Your DIY Candles
Let’s gather our supplies! Here’s what you’ll need to make these delightful candles:
Materials
- Wax: Soy wax or beeswax are popular choices. They burn longer and cleaner than paraffin.
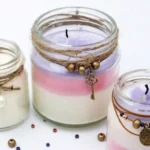
- Containers: This could be glass jars, tins, or even teacups. Get creative!
- Essential Oils: Citronella is key for repelling mosquitoes, but feel free to mix in other essential oils like lavender, eucalyptus, or lemon balm for added fragrance.
- Wicks: You can buy pre-made candle wicks or create your own with cotton string.
- Double Boiler: To melt your wax. If you don’t have one, a heat-safe bowl over a pot of boiling water works, too.
- Optional: Dye chips for a pop of color, if that’s your style.
Quick Tip
If you’re not sure what type of container to use, look around your home. Mason jars, empty candle holders, and even metal tins can work beautifully. Just ensure they can withstand heat.
Crafting Your Candles in 10 Minutes
Here’s where the fun begins. Follow this simple step-by-step guide:
Step 1: Prepare Your Workspace
Clear off a flat surface where you can work. Lay down some newspaper or an old tablecloth to catch any spills—trust me, it’ll save you cleaning time later!
Step 2: Melt the Wax
In your double boiler, melt the wax slowly over medium heat. If you’re using a microwave, heat it in short intervals, stirring in between. You want it melted but not bubbling.
Step 3: Add Essential Oils
Once your wax is completely melted, it’s time to add the magic. For a standard mason jar, use about 15-20 drops of citronella oil. You can mix other oils for a unique scent profile—here’s where your personality shines! Stir well to combine.
Step 4: Secure the Wick
While your wax cools slightly (but not solidifying), secure the candle wick in the center of your container. You can use a dab of melted wax or hot glue to hold it in place.
Step 5: Pour the Wax
Carefully pour the melted wax into your prepared container, leaving a little space at the top. If you’ve gone for a color, sprinkle in the dye chips now and watch how they blend in!
Step 6: Let It Set
Allow your candles to cool and set completely. This usually takes about 30 minutes.
Step 7: Trim the Wick
Once solid, trim the wick to about 1/4 inch above the wax. This will ensure an even burn.
Step 8: Light Up!
Your DIY mosquito repellent candles are ready to shine! Light them when you head outside, and enjoy summer evenings without the buzzing invasions.
Common Mistakes to Avoid
Even though this is a simple DIY project, sometimes a little slip-up can happen. Here are some common mistakes to watch for:
- Using Too Much Wick: Don’t make the wick too long. A short wick ensures a cleaner burn.
- Overheating the Wax: Make sure not to overheat your wax. Excessive heat can change the melting point and affect how well your candle burns.
- Forgetting Safety: Always keep an eye on your lit candles. Safety first, always!
Bonus Self-Care Ideas for Summer
While we’re on the topic of summer wellness, why not infuse a little extra love into your outdoor time? Here are some quick ideas to elevate your summer self-care:
- Create an Outdoor Spa: Set up a cozy relaxation corner in your garden or balcony. Add some calming music, soft cushions, and your favorite book.
- Hydrating Facial Mist: Mix rose water and aloe vera for a refreshing skin boost while you’re outdoors.
- Summer Playlist: Curate a playlist full of your favorites that gets you dancing and puts you in a good mood.
- Mindful Moments: Take some time to just breathe, soak in the sounds of nature, and appreciate the beauty around you.
Final Thoughts on Your DIY Adventure
Making your own mosquito repellent candles is a delightful summer project that combines creativity with practicality. Not only will you keep those pesky bugs at bay, but you’ll also create a peaceful atmosphere for all your outdoor gatherings.
So, what if your next barbecue or picnic could be completely free of mosquito bites? That’s a summer win, right? By spending a little time crafting these candles, you’re investing in a beautiful, bug-free experience with family and friends.
Embrace your crafty side, enjoy those beautiful evenings, and let your love for DIY shine bright! You’ve got this, and I can’t wait to hear how your candles turn out.
Now grab those supplies, and let’s make summer memories pest-free!