
Unwind with the Art of Homemade Candles
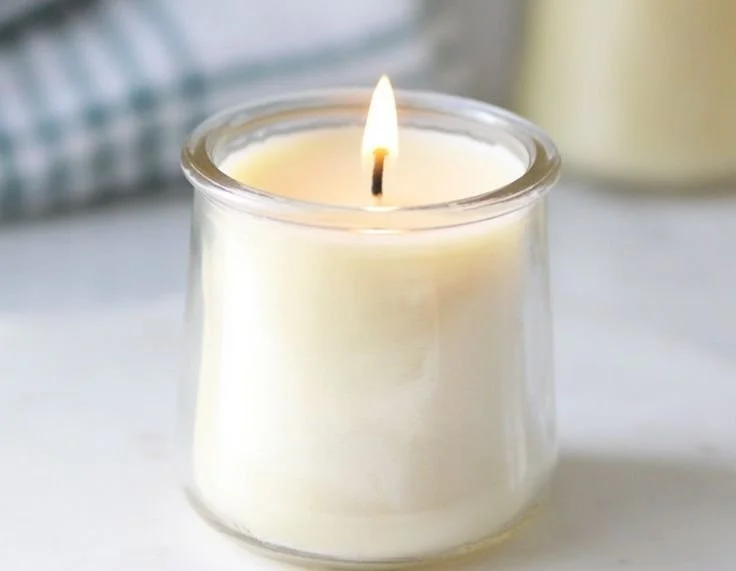
Imagine this cozy scene: you’re settling into your favorite chair at the end of a long day, soft music playing in the background, and a warm, inviting glow emanates from a beautiful candle flickering on your table. But wait—there’s something even better about that ambiance. It’s not just any candle; it’s a homemade beeswax candle, infused with your favorite essential oils. Intrigued? Here’s the truth: making candles yourself is not just easy and fun; it’s a creative way to enhance your space and give thoughtful gifts that show you care.
Why Choose Homemade Candles
You might be wondering why you should swap out store-bought candles for your own homemade creations. Let’s dig into the reasons that just might have you rummaging through your kitchen cabinets for supplies.
Healthier for Your Home
Store-bought candles can be loaded with synthetic fragrances and potentially harmful chemicals, like paraffin wax and lead wick. These ingredients can release toxins into the air when burned. On the other hand, beeswax candles are natural, emitting negative ions that help purify the air. Plus, when you make your own, you have control over the materials and scents. You can choose quality, non-toxic essential oils instead of those artificial fragrances.
Personalized Gifts
We’ve all been there, right? The struggle to find the perfect gift for a friend or loved one can be real. Here’s an idea that’s truly personal: handmade candles! Think about how special it will feel to give a thoughtful, home-crafted gift that reflects their favorite scents. Whether it’s a calming lavender or an invigorating citrus blend, you’re sure to light up their day in every sense.
Creative Outlet
Making candles is also a wonderful way to express your creativity. It’s a chance to play with different scents and colors, and there’s something incredibly satisfying about crafting something beautiful with your own two hands. Plus, it can be an enjoyable activity to do alone or with your kids—imagine the fun family bonding moments you can create while dabbling in this art.
Getting Started with Beeswax Candles
Now that we’ve got you onboard with the idea, let’s jump into how you can whip up your own beeswax candles with essential oils. Grab your supplies, and let’s get crafting!
Supplies You’ll Need
- Beeswax: You’ll want high-quality beeswax sheets or blocks.
- Essential Oils: Choose your favorites for fragrance; some popular options include lavender, eucalyptus, and peppermint.
- Double Boiler: For melting the beeswax.
- Candle Wicks: Opt for natural cotton or wood wicks for a clean burn.
- Molds or Containers: You can use glass jars, silicone molds, or metal tins.
- Thermometer: This is optional but nice to ensure the wax isn’t too hot or cold as you pour.
Step-by-Step Guide to Making Beeswax Candles
Step 1: Prepare Your Work Area
Clear a space on your kitchen counter or dining table. You want a clean, flat surface that’s easy to work on. Lay down some newspaper or a protective covering to catch any spills.
Step 2: Melt the Beeswax
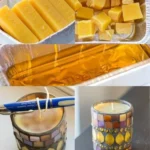
Using the double boiler, melt your beeswax gently over low heat. Beeswax has a relatively high melting point (around 145°F to 150°F), so monitor the temperature. Stir occasionally to help it melt evenly.
Step 3: Add Essential Oils
Once the beeswax is fully melted, remove it from the heat. Now’s the fun part! Add your chosen essential oils. For every cup of melted wax, you might want to add about 30-40 drops of essential oil, but feel free to adjust based on how strong you want the scent.
Step 4: Prepare the Wicks
If you’re using wick tabs, dip the wick in the melted wax, then stick it in the center of your container or mold. If you’re using a pre-tabbed wick, simply stick it to the bottom—this will help keep it centered.
Step 5: Pour the Wax
Carefully pour the wax into your mold or container, making sure the wick stays centered. Leave a little space at the top. You might see some bubbling, which is perfectly normal!
Step 6: Let It Cool
Allow the candles to cool completely. This can take a few hours, but the patience will be worth it. As the wax cools, you’ll notice it settle a bit, so keep an eye on it—if needed, top off with a little more melted wax.
Step 7: Trim the Wick
Once the candle is cooled and solid, trim the wick to about ¼ inch above the wax. This will ensure a proper burn when you light your candle.
Common Mistakes to Avoid
Once you start making your own candles, it’s good to watch out for a few common pitfalls.
- Not melting the wax properly: Beeswax should be melted gently. If you heat it too quickly, it can degrade.
- Using low-quality essential oils: Cheap oils can affect both the scent and the health of your candles. Invest in high-quality oils for the best results.
- Not letting the candles cure: It’s tempting to light them right away, but allowing beeswax to cure for at least a few days before burning will enhance their scent.
Bonus Self-Care Ideas
While you want your homemade candles to provide a beautiful ambiance, here are some self-care tips to help deeply enjoy your candles:
- Create a calming bedtime routine: Light your candles, play soothing music, and unwind with a good book.
- Host a candle-making night with friends: There’s something so delightful about gathering with friends, creating, and enjoying your beautiful candle creations together.
- Make candles as part of a self-care kit: Combine your candles with a cozy blanket and some herbal tea for the perfect evening retreat.
FAQs About Homemade Beeswax Candles
Can I use other types of wax instead of beeswax? Absolutely! You can substitute with soy, paraffin, or palm wax, but remember that each type has its own nuances and might change how your finished product looks and smells.
How long do beeswax candles burn? Beeswax has a long burn time. In fact, they can burn up to 5 times longer than paraffin candles, making them an economical and ecological choice.
How do I store my candles? Keep your candles in a cool, dark place to prevent them from melting or discoloring. If they start to collect dust, simply wipe them gently with a soft cloth.
Wrapping Up
Now that you have all the information you need, I hope you feel inspired to try your hand at making homemade beeswax candles. Not only will they enrich your own living space, but they’ll also make heartfelt gifts that your friends and family are sure to cherish.
So, gather your supplies, ignite that creative spirit, and let’s make some beautiful memories—one flickering candle at a time. You’re just a few simple steps away from creating a warm, inviting atmosphere that speaks of love and care. Happy crafting!