
Get Started Candle Making at Home
Imagine this: you’re winding down after a long day, enveloped in soothing scents while flickering candlelight dances across the walls. It’s more than just ambiance; it’s a moment of self-care, relaxation, and warmth. Now, picture being able to create that cozy corner in your home with candles you made yourself. Sounds nice, doesn’t it? So, let’s dive into the delightful world of candle making, where you can unleash your creativity and add a personal touch to your space.
You might be wondering where to start. Don’t worry! This step-by-step guide is designed just for you, the beginner eager to enter the world of homemade candles. We’ll cover everything from choosing the right wax to selecting the perfect wick, and even how to infuse your candles with delightful fragrances.
Gather Your Candle Making Kit
Before we get into the nitty-gritty of candle making, let’s talk about your essential supplies. Here’s what you’ll need to get started:
- Wax: Paraffin, soy, beeswax, or palm. Each has its unique properties, feel, and scent throw.
- Wicks: Look for cotton or wooden wicks; each provides different burning experiences.
- Containers: Jars, tins, or molds to hold your candles. Make sure they are heat-resistant.
- Fragrance oils or essential oils: Choose scents that inspire you – think lavender for relaxation or citrus for freshness.
- Dye (optional): If you want to add color to your candles.
- Double boiler or pouring pitcher: For melting the wax safely.
- Thermometer: To check the temperature of melted wax.
- Stirring utensil: For mixing in your fragrance and dye.
Quick Beauty Tip:
Don’t forget to lay down some newspaper or a silicone mat! Working with wax can get a little messy, but that’s half the fun.
Step-by-Step Candle Making Process
Now that you’ve got your kit ready, let’s jump into the actual candle making process.
Step 1: Choose Your Wax
The first decision you need to make is selecting your wax. Each type has its advantages:
- Soy Wax: This is a favorite among many candle crafters for its clean burn and ability to hold fragrance well. Plus, it’s a renewable resource!
- Paraffin Wax: This is a classic choice that’s widely used in commercial candles. It burns well, holds color and scent beautifully, but isn’t eco-friendly.
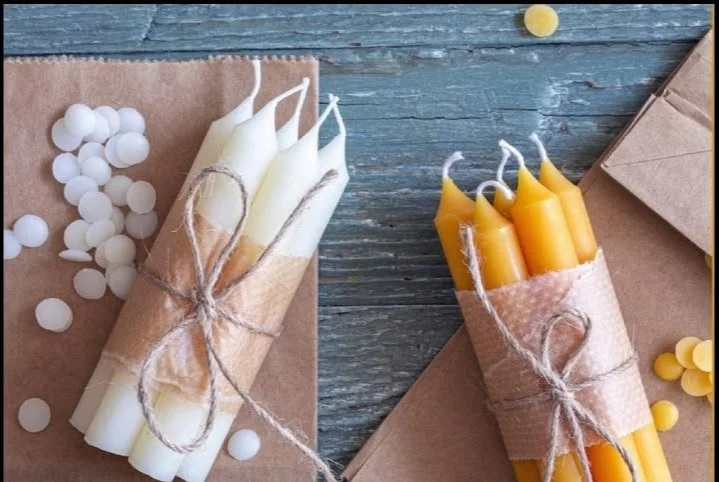
- Beeswax: If you’re after a natural and long-lasting option, beeswax candles are fantastic. They produce negative ions which purify the air, but they might be pricier.
- Palm Wax: This wax is more sustainable than paraffin and gives a beautiful crystalline finish.
Step 2: Measure Your Wax
To begin, you’ll want to measure how much wax you need. A good rule of thumb is to use one pound of wax for every 16 ounces of candle container capacity.
Step 3: Melt the Wax
Set up your double boiler on the stove, filling the bottom pot with water and placing your measured wax in the top pot. Heat it gently over medium heat. Stir occasionally until it’s fully melted. Keep your eye on the thermometer; you want the wax to reach about 170-180°F for most waxes.
Step 4: Prepare Your Containers
While the wax is melting, prepare your containers. If you’re using wicks with a sustainer base, attach them to the bottom of your container using a bit of melted wax or a adhesive. If you’re using a wooden wick, make sure it’s centered.
Step 5: Add Fragrance and Color
Once your wax is melted, it’s time to add fragrance. Here’s the truth: general guidelines suggest adding fragrance oil at around 6-10% of your wax weight, depending on how strong you want the scent to be. Stir in your fragrance thoroughly for about 2 minutes. If you want to color your candles, this is also the time to add any dye, mixing until you’re happy with the color.
Step 6: Pour the Wax
Carefully pour the wax into your prepared containers. Leave a little space at the top (about half an inch) to prevent overflow. If you’re using a wooden wick, you might want to pour less wax, depending on its size.
Step 7: Secure the Wicks
To prevent your wick from moving while the wax hardens, use a wick holder (this can be a pencil or chopstick placed across the top of the container). Make sure the wick remains centered as the wax cools.
Step 8: Let It Set and Cure
Candle making requires patience; let your candles cool completely, which could take several hours. Ideally, wait 24 to 48 hours before burning, as this allows the fragrance to fully bond with the wax.
Step 9: Trim the Wicks
Once your candles are cool, it’s time to trim the wicks. A good length is about 1/4 inch above the wax for optimal burning.
Step 10: Enjoy!
Light your candle, enjoy the scent, and reflect on your lovely creation. Every time you light your candle, it will remind you of the moment you made it.
Common Mistakes to Avoid
As with all crafts, there are a few bumps on the road to successful candle making! Here’s a list of common mistakes and tips on how to avoid them:
- Not Measuring Carefully: Wax amounts and fragrance ratios are crucial. Use a kitchen scale and measuring cups for precision.
- Pouring at the Wrong Temperature: If you pour your wax too hot or cold, it can lead to imperfections like sinkholes or uneven surfaces. Keep an eye on that thermometer!
- Using the Wrong Wick Size: The wick is like the heartbeat of your candle; it needs to be just right. A wick that’s too small can lead to “tunneling,” while one that’s too large can create a flame that’s too large and smoky.
- Not Allowing for Curing Time: Patience is key! Letting your candle cure enhances the scent throw and overall burn quality.
FAQs about Candle Making
What is the best wax for beginners?
Soy wax is typically the best choice for beginners because it’s easy to work with and environmentally friendly.
Can I use essential oils instead of fragrance oils?
Absolutely! Just keep in mind that essential oils can sometimes have a lighter scent throw compared to fragrance oils.
How do I fix sinkholes in my candles?
If your candle has sinkholes after cooling, remelt a bit of the leftover wax and fill in the holes to achieve a smooth top.
What if my candle won’t burn evenly?
This could be due to a wick that’s too small or too large, or the wax might be mixed improperly.
Bonus Self-Care Ideas
Candle making is not just about creating something beautiful – it can also be a form of self-care. Here are a few ideas to further enhance your crafting experience:
- Host a Candle Making Party: Invite your friends over for a fun afternoon of creativity. You can share tips, scents, and enjoy some snacks together.
- Create a Cozy Atmosphere: Use your candles to create a spa-like experience at home. Pair them with soothing music, a warm bath, or a good book.
- Experiment with Unique Scents: Try blending different fragrance oils for a custom scent that’s uniquely yours.
Conclusion
You’ve taken the plunge into candle making, and I hope you’re feeling excited about your new hobby! It’s more than just creating light; it’s about infusing your space with warmth and personality. Each scent you craft tells a story, and every flicker of candlelight invites comfort into your home.
So, light that candle, enjoy the creations of your hands, and remember that in a world full of hustle and bustle, taking time for yourself is invaluable. You deserve this moment of calm, and you’re not alone on this journey. Happy candle making, lovely!