
Imagine This Cozy Scene
Picture yourself on a chilly winter evening, snuggled under a blanket, a warm cup of coffee in hand, while the faint scent of freshly brewed coffee wafts through your cozy home. There’s something undeniably comforting about that aroma, isn’t there? As the holidays approach, we often find ourselves seeking gifts that convey warmth and thoughtfulness for our loved ones. If you know someone who can’t start their day without a cup of joe (or you might just be one of those coffee lovers), I’ve got the perfect DIY project lined up for you. Let’s dive into how to create your own coffee-scented candles that not only make delightful gifts but also enhance the atmosphere of your home.
Why DIY Coffee-Scented Candles Make the Perfect Gift
We all love a little luxury in our lives, but let’s be honest; buying high-end candles can sometimes leave us feeling a bit empty in the wallet. Here’s the truth: making your own candles is not only budget-friendly, but it’s also a fun activity that can turn into a heartfelt gift. Plus, by using soy wax flakes and Real coffee grounds, these candles offer a rich, authentic coffee scent that can brighten anyone’s day.
Personal Touch
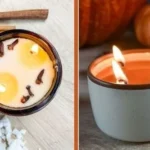
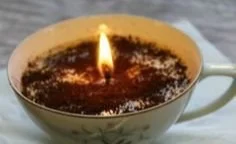
When you pour your heart into making something, it truly shows. Maybe you know someone who adores coffee but struggles to find the perfect scent. Imagine their delight when they unwrap a chic candle, especially knowing it was crafted just for them! Not only are these candles eco-friendly and sustainable, but they’re also a beautiful piece of decor, especially when fashioned from old China coffee cups found at a thrift store.
Materials You’ll Need for Your DIY Latte-Scented Candles
Gathering your materials is half the fun. Here’s what you’ll need to get started:
- Soy wax flakes: These create a clean burn and are better for the environment.
- Real coffee grounds: Fresh or used! They add that rich coffee scent we’re after.
- Essential oils: For an extra aromatic boost. Coffee or vanilla are great choices.
- Old China coffee cups: Thrift stores are perfect places to find unique pieces that can make your candles look elegant.
- Candle wicks: Look for wicks suited for container candles.
- Pouring pot: A double boiler works best for melting the wax.
- Thermometer: To ensure you pour the wax at the right temperature.
- Stirring utensils: Wooden skewers or popsicle sticks work wonderfully.
Quick Beauty Tip
Don’t rush through choosing your coffee cups! Take your time to find ones that resonate with your personal style and the recipient’s taste. You might stumble upon some real gems that tell a story.
Step-by-Step Guide to Craft Your Candles
Now that you’ve gathered everything, let’s get to the fun part—making the candles! Follow these simple steps, and before you know it, you’ll have beautifully crafted coffee-scented candles ready to gift or enjoy yourself.
Step 1: Prepare Your Workspace
Ensure you have a clean area to work in. Lay down some old newspapers or a drop cloth to catch any spills. You’ll want everything organized so you can flow through the candle-making process easily.
Step 2: Measure Out the Wax
You’ll need about 1 cup of soy wax flakes for each candle cup you’ll be filling. If you’re making multiple candles, feel free to measure out more. Remember, wax can be hard to clean off surfaces, so use a container you don’t mind getting messy.
Step 3: Melt the Soy Wax
Fill your double boiler with water and bring it to a gentle simmer. Place the soy wax flakes in the top pot. It usually takes a few minutes for the wax to fully melt, so use this time to take a breather or sip on your favorite warm beverage.
Step 4: Add Coffee Grounds
Once the wax is melted—watch it carefully so it doesn’t burn—off the heat, carefully stir in about 2 tablespoons of coffee grounds for every cup of wax. You might be wondering if it’s too much; trust me, it’s just right for that fantastic scent.
Step 5: Add Essential Oils
Now, for a little extra aromatic magic, add about 10-15 drops of coffee or vanilla essential oil. This step is entirely customizable—if you’re feeling adventurous, why not try a hint of cinnamon or mocha? Stir well to blend the scents evenly.
Step 6: Prepare Your Candle Cups
While that aromatic mixture sits, prepare your coffee cups. Place the wicks in the center of each cup (you can use a bit of melted wax to hold them down). You can also use a stick or pencil to help keep it centered.
Step 7: Pour the Wax
Now for the moment of truth—slowly pour the melted wax mixture into each coffee cup. Aim to fill them about three-quarters full. Remember to keep the wick centered as you pour.
Step 8: Let Them Cool
Let the candles sit undisturbed for several hours, or until the wax completely solidifies. You’ll see that the surfaces may have some imperfections—that’s totally fine and adds to their rustic charm.
Step 9: Trim the Wicks
Once the candles have cooled, trim the wicks to about half an inch above the wax surface. This will ensure a nice clean burn next time you light them.
Step 10: Gift Them or Enjoy Yourself
If you’re gifting these beauties, consider wrapping them with some twine or placing them in a gift bag. You might even include a cute note explaining how they were made—trust me, your loved ones will appreciate the personal touch!
Common Mistakes to Avoid
While candle-making is quite straightforward, it’s easy to make a few missteps. Here are some common pitfalls to keep an eye out for:
- Not measuring the wax correctly: Too little wax will lead to a disappointing burn. Always measure based on your container size.
- Pouring at the wrong temperature: If you pour the wax when it’s too hot, it might crack when cooling. Around 140-150°F is ideal.
- Using too much fragrance: While it’s tempting to overdo it on the essential oils, too much can lead to soot when burning.
- Forgetting to let cool: Patience is key. Let them cool fully before moving or lighting.
FAQs about Candle-Making
Can I use any type of wax?
While you can experiment with paraffin or beeswax, soy wax is eco-friendly and results in a clean burn, which is just what you want for your coffee-scented creation.
How long do these candles last?
Typically, soy candles can last for about 25-30 hours. Just don’t forget to keep an eye on the wick length, trimming as needed!
Can I get creative with scents?
Absolutely! Feel free to mix essential oils together. Lavender with coffee could be divine, or maybe a hint of peppermint for a holiday twist—get creative!
Bonus Self-Care Ideas
Aside from making fabulous coffee candles, why not take some time for yourself while you’re at it? Here are a couple of self-care ideas to pair with your candle-making session:
- At-home spa day: Set the mood with your newly created candles while you indulge in a bubble bath or facial.
- Mindfulness moments: Use the time spent making these candles to practice mindfulness—enjoy the scents, sounds, and feelings.
Conclusion
Let’s bring it all back home. Crafting these DIY coffee-scented candles isn’t just about creating something beautiful; it’s about sharing warmth, love, and joy this holiday season. You might just surprise yourself with how much fun you have, and I bet your friends and family will be incredibly grateful for the thoughtful gifts. So go ahead, gather those supplies, and let the cozy aromas fill your space. Whether you choose to keep them for yourself or gift them, you’ll find that these candles truly light up any room—not just with their glow, but also with the spirit of giving. Enjoy the process; you deserve it!