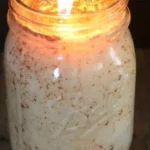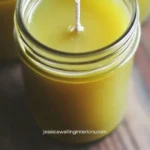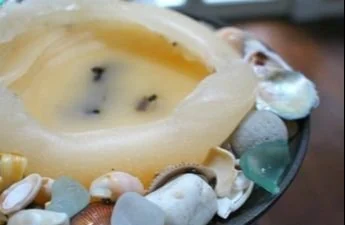

Embrace Your Inner Artisan and Revive Your Old Candles
Imagine this: you’re curling up on your cozy sofa, ready for a relaxing evening, but the unpleasant reality is that your trusty candles have melted down to less than a flicker. You love the warm ambiance they create, but the thought of tossing them out? It feels wrong, doesn’t it? Well, here’s the truth: your old candles can have a fabulous second act!
So today, I’m sharing how to turn those forgotten remnants into beautiful, new candles that’ll light up your space again. Turning old candles into new ones isn’t just a practical solution; it’s an indulgent way to engage in self-care while embracing creativity. Let’s be honest, who wouldn’t love saving money while engaging in such a soothing activity?
Why You Should Recycle Your Old Candles
You might be questioning, “Is it really worth reviving those old candles?” Absolutely! Here’s why you should totally consider this DIY project.
Sustainability: We’ve all heard of living a greener lifestyle, and reusing materials is a perfect way to do just that. By recycling your candles, you’re contributing to a more sustainable environment while enjoying the fruits of your labor.
Cost-Effective: Candles can get pricey, especially those artisanal ones with unique scents. Why spend a fortune when you can repurpose what you already have? Imagine using a $100 budget on new candles when you can transform your old ones for just a fraction of that cost.
Creative Outlet: Turning old candles into new ones allows you to express your creativity. You can mix scents, personalize jars, and even experiment with colors to fit your aesthetic. You’d be surprised at just how fulfilling these little projects can feel.
Gather Your Supplies
To get started on this lovely journey of creating new candles from your old ones, you’ll need some supplies. Here’s a handy list to set you up for success:
- Old candles: Gather those sad little remnants waiting for their moment.
- Double boiler or microwave-safe container: This will help you melt the wax safely.
- New containers: You can reuse jars or pick up some affordable options from stores.
- Wicks: You can buy these or repurpose from the old candles if they’re intact.
- Fragrance oils (optional): Want to enhance the experience? Add some delightful fragrances!
- Color dye (optional): If you’re feeling extra crafty, colored wax adds a unique twist.
Step-by-Step Guide to Re-Create Your Candles
Ready to transform your candle stubs into something truly stunning? Let’s dive into the process!
Step One: Gather Old Wax
Firstly, clean out your old candle jars. Remove any leftover wax, wicks, or labels. Don’t worry if some wax remains; it helps create a cohesive scent when you melt everything down together. You can take your old candles and chop or break them into smaller pieces, making for easier melting.
Step Two: Prepare Your Workspace
Set up your workspace by laying down some newspapers or an old tablecloth to catch any wax spills. The melting process can get a bit messy, but with the right preparation, you’ll be just fine!
Step Three: Melt the Wax
If you’re using a double boiler, fill the bottom pot with water and bring it to a gentle simmer. Place the broken pieces of wax in the top pot and stir occasionally until everything melts beautifully. Alternatively, if you’re short on time, you can microwave the wax in 30-second intervals, stirring in between to ensure it doesn’t burn.
Step Four: Add Fragrance and Color
Once your wax is melted, here’s where the magic happens. If you’re adding fragrance oils, pour them in! You typically want to use about 1 ounce of fragrance per pound of wax, but feel free to adjust based on your preferences. For color, simply add the dye gradually until you achieve the hue you love.
Step Five: Secure the Wick
Before pouring the melted wax, make sure to secure the wick to the bottom of your new container. You can use a bit of melted wax or a wick holder. This will ensure that the wick stays in place as you pour in the wax.
Step Six: Pour and Set
Carefully pour the melted wax into your container. Leave a little space at the top so it doesn’t overflow when it’s fully cooled. It’s essential to let the candle set undisturbed – this usually takes a few hours.
Step Seven: Trim and Enjoy
After your candle has completely cooled, trim the wick to about 1/4 inch above the wax. Now your new candle is ready to light! Enjoy the familiar warmth and invite your favorite scents back into your space.
Quick Tips for Candle-Making Success
- Patience is Key: Letting your candles cure properly will lead to better burn times and scent throw, so don’t rush the process.
- Store Properly: Keep any excess wax in an airtight container for future DIY projects. You never know when you might want to whip up another candle!
- Experiment: Don’t be afraid to test out different combinations of scents or colors. You’re the artist here!
Common Mistakes to Avoid
Even the most seasoned DIY-ers can slip up once in a while. Here’s what to watch out for to ensure a smooth candle-making experience.
- Using Too Much Fragrance: More isn’t always better. It could lead to issues with the wax or overpower the candle’s scent.
- Ignoring Safety Precautions: Always be cautious when melting wax, especially if you’re opting for microwave methods – it can get hot in there!
- Skipping the Wick: Never forget to secure your wick. A candle without a properly placed wick is a recipe for disappointment.
Frequently Asked Questions
Can I mix different types of wax?
Absolutely! Mixing waxes (like paraffin and soy) can create unique textures and scents. Just make sure they have similar melting points for the best results.
How long do homemade candles last?
Homemade candles can last as long as store-bought ones when made properly. However, factors like wax type, wick size, and scent concentration can influence burn time.
Do I need to use wax specifically for candle-making?
While it’s recommended to use wax specifically designed for candle-making, you can repurpose old candle stubs. Just keep in mind that certain ingredients might burn differently.
Bonus Self-Care Ideas
Feeling crafty can be therapeutic, but let’s also sprinkle in some additional self-care ideas. Here are a few to consider:
- Create a DIY Spa Day: Fill your space with your freshly made candles, indulge in a bubble bath, and pamper yourself with a facial.
- Host a Candle-Making Party: Invite your friends over! Share the love of creating and maybe even host a fun competition for the best-scented candle.
- Meditation with a Twist: Light your candles during meditation sessions for a calming environment. The flickering light adds an inspiring vibe.
Wrapping It Up
Turning your old candles into new ones isn’t just about saving a few bucks; it’s about harnessing creativity, indulging in self-care, and contributing to a more sustainable world. Plus, you get to enjoy the warm glow and delightful scents that enhance your home environment. Remember, you’re not just recycling; you’re creating something uniquely yours.
So the next time you find yourself questioning what to do with those half-burned candles cluttering up your shelf, remember this moment. You’ve got the skills now, and you can turn them into something beautiful. Who knows? This might just become your new favorite hobby.
Let’s light up our spaces and brighten our hearts, one candle at a time!