
Make Your Own Mosquito Repellent Candles With Essential Oils
Imagine this: it’s a beautiful summer evening, the sun is setting, and you’ve set up a lovely outdoor gathering with your favorite people. You’ve got the drinks flowing, delicious snacks ready, and then—bam! You’re swatting at mosquitoes like crazy, and suddenly, the mood shifts. We’ve all been there, right?
Mosquitoes can turn a blissful night into an itchy, unpleasant experience. That’s why I’m excited to share how to craft your own mosquito repellent candles using essential oils. Not only will these candles help keep those pesky bugs away, but they also add a delightful aroma to your summer evenings. So, let’s dive into this charming DIY project that will make your outdoor events a breeze!
Why Choose DIY Mosquito Repellent Candles
You might be wondering why you should even consider making your own candles. Here’s the truth: commercial candles can be packed with chemicals that aren’t just harmful to the environment but can also be a bit of an olfactory assault. DIY candles, on the other hand, let you decide what goes into them (and what doesn’t). This means you can create a natural and pleasant scent that will cater to your personal preferences while acting as an effective repellent.
Benefits of Using Essential Oils
Essential oils are not just trendy; they’re powerful! Most essential oils not only smell divine but also boast properties that naturally repel mosquitoes. Some of my favorites include:
- Lavender: Known for its calming effects, it also holds mosquito-repelling properties.
- Lemon eucalyptus: This particular oil is scientifically proven to keep mosquitoes at bay.
- Peppermint: Refreshing and invigorating, it also acts as a strong repellent.
- Tea tree oil: Great for your skin and effective in keeping bugs away.
Not to mention, making your own candles can be a fulfilling self-care activity!
What You’ll Need for the Perfect Candle
Before you roll up your sleeves, gather your materials. Here’s what you’ll need:
Ingredients
- Soy wax or beeswax: These are both great options for candle bases. Soy wax is vegan-friendly and burns cleanly, while beeswax adds a touch of luxury.
- Essential oils: Choose your preferred oils from the list above. You could even blend a few for a unique scent!
- Candle wicks: Look for cotton or wood wicks according to your style.
- Containers: You can use glass jars, tins, or even unique ceramic holders you might have lying around.
- Double boiler: This is for melting your wax safely.
- Thermometer: A must-have to ensure temperature control when adding the oils.
Step-by-Step Guide to Making Your Candles
Now that you have your materials, let’s get started!
Step 1: Prepare Your Workstation
Set up a clean, organized workspace. Cover it with newspaper or an old cloth to protect against any wax spills. Safety first, right?
Step 2: Measure and Melt Your Wax
Using a double boiler, combine about 1 cup of soy or beeswax. Heat it on low until it’s completely melted. You’ll want the temperature to reach around 170°F. Keep an eye on it and stir occasionally. The sweet aroma of melting wax is totally calming, trust me!
Step 3: Add Essential Oils
Once your wax is melted, this is where the magic happens! Remove it from the heat and let it cool for a minute or two. Then, carefully add your essential oils. A good rule of thumb is to use about 1 ounce of essential oil per pound of wax. If you want a more potent scent, feel free to add a bit more, but be cautious—too much could affect the candle’s burn.
Step 4: Secure the Wick
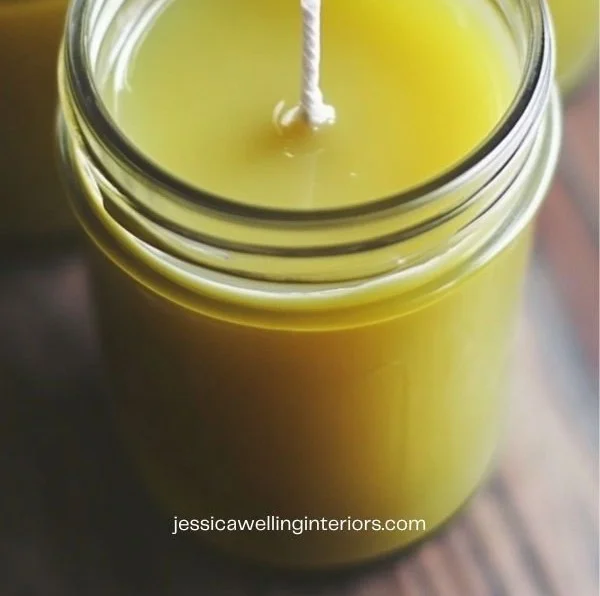
In the center of your chosen container, secure the wick using a bit of melted wax or a wick holder. This will keep it stable while you pour in the wax.
Step 5: Pour the Wax
Slowly pour the melted wax into your container, leaving a little room at the top. Aim to keep the wick centered during this process (you can use a skewer to help with this if needed).
Step 6: Cool and Set
Let your candles cool at room temperature for several hours. You might notice a bit of shrinkage as they cool—that’s completely normal.
Step 7: Trim the Wick
Once the candle has cooled completely, trim the wick to about ¼ inch above the wax. This will ensure a steady burn and control the flame size.
Common Mistakes to Avoid
While making your candles can feel straightforward, there are a few things to watch out for:
- Temperature Issues: If the wax heats too high, it could begin to smoke or change its properties. Stick to low heat.
- Wicks: Using the wrong size wick can lead to uneven burning or massive flames. Make sure you choose wicks appropriate for the size of your candle.
- Essential Oils: Adding oils while the wax is too hot can cause them to evaporate, reducing effectiveness.
Enhance Your Candle Experience
Once you’ve mastered the basics, consider experimenting! Here are some ideas to take your outdoor time to the next level:
Add Decorative Touches
You can embed herbs like rosemary or thyme into the wax for a rustic look. It’ll also give your candles a charming, garden-fresh vibe.
Create a Themed Aroma
Why not customize your blend according to the season? A mix of lavender and citrus for summer evenings, or warm cinnamon and clove for those cozy fall gatherings.
Make It a Family Affair
Crafting candles can be a fun family activity. Get the kids involved, and let everyone choose their favorite essential oils. You’ll be surprised how much they enjoy creating something together!
Enjoying Your Candles Safely
Even though you’ve made a beautiful, natural candle, there are a few guidelines to follow:
- Burn your candles on a stable surface and keep them out of reach of children and pets.
- Don’t leave candles unattended, especially in outdoor areas.
- Make sure to trim the wick regularly during use to prevent excessive smoke or flame.
Conclusion
Crafting your own mosquito repellent candles with essential oils not only enhances your outdoor experience but also adds a personal touch to your summer nights. When you light those candles, you’ll enjoy the calming aroma while keeping pesky mosquitoes at bay. So, what are you waiting for? Gather your supplies and dive into this delightful DIY project.
By dedicating some time to making these candles, you’re not just enhancing your home’s atmosphere but embracing an eco-friendly lifestyle, which is a big win in the world of self-care! Your outdoor gatherings will be transformed, and you’ll be creating memorable moments without the annoying buzzing of mosquitoes in the background. Happy candle-making!