
Imagine this peaceful scene: soft candlelight casting warm shadows on your walls, filling your space with a gentle glow and delightful scent.
We’ve all been there before—sneaking moments of calm amid the chaos of everyday life, perhaps while curling up with a good book or enjoying a quiet moment with your favorite cup of tea. That warm ambiance often comes courtesy of candles, and let’s be honest, there’s something truly magical about handmade candles. They span beyond just a craft; they can transform your space, add a touch of beauty, and even become thoughtful gifts. However, if you’ve ever tried making your own and faced the disappointment of uneven burns or waxy messes, you’re not alone.
But don’t worry! I’m here to guide you through the process of making gorgeous handmade candles that burn evenly from edge to edge. We’ll break down common mistakes, cover the essentials of pouring and curing, and dive into styling them in modern tins for that chic, clean look we all adore. Whether you’re a novice or someone who’s dabbled in candle-making before, this beginner-friendly guide is packed with all you’ll need to create custom candle designs that will have your friends asking for the secret to your success.
Understanding Candle Basics
Before we jump into crafting beautiful candles, let’s make sure we understand some key elements involved in candle making.
Types of Wax
You might be wondering which wax to choose. Here’s the lowdown:
- Soy Wax: This is a popular choice for beginners. It’s easy to work with, eco-friendly, and burns cleanly.
- Paraffin Wax: This traditional wax comes from petroleum and is great for scent throw, but it’s less eco-conscious.
- Beeswax: It’s natural and has a lovely honey scent, but can be more expensive and difficult to work with.
- Palm Wax: This supports sustainable farming but comes with a bit more of a learning curve.
For our DIY adventures, soy wax is ideal. It’s user-friendly and gives you beautiful results.
Essential Tools and Materials
Getting organized is half the battle. You’ll need:
- Wax (soy wax is recommended)
- Candle wicks (make sure they’re suitable for your chosen wax)
- Candle tins or jars (think modern chic)
- Double boiler or wax melting pot
- Thermometer
- Stirring stick (a wooden spoon works wonders)
- Fragrance oils (go wild with scents you love)
- Dye (optional, but add a beautiful personal touch)
- Scale (for precise measurements)
Having everything ready before you start means you can focus on the art of candle-making without frantic runs to the store.
Step-by-Step Candle Making
Alright, let’s dive into the fun part!
Step 1: Measure Your Wax
To get started, you’ll want to measure out your wax. A good rule of thumb is 1 pound of wax for every 20 ounces of container space. If you’re using a recipe or trying to create a specific number of candles, weighing is crucial to ensure your candles burn evenly.
Step 2: Melting the Wax
Using a double boiler, melt the wax gently. Keep it at a low to medium heat—high temperatures can cause your wax to scorch or burn, which is something we really want to avoid. This is where your thermometer comes in handy; you’re aiming for about 170-180°F.
Step 3: Adding Color and Fragrance
Here’s the exciting part—customizing your candles! If you’re using dye, add it now and stir well until it’s evenly blended. Then, add your fragrance oils. Generally, a good starting point is about 1 ounce of fragrance per pound of wax. When you pour the wax, scents can dissipate, so adding them at this stage ensures you get a lovely aroma that fills your space.
Step 4: Preparing the Containers
While your wax melts, prep your tins or jars. Make sure they’re clean and dry. You might want to secure your wicks at the bottom—using a bit of melted wax works wonders here. Just dip the bottom of the wick in the melted wax and stick it to the container.
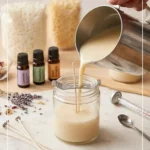
Step 5: Pouring the Wax
Once the wax is melted and you’ve added your scents, let it cool slightly to about 140-150°F before pouring. This is critical because pouring too hot can lead to holes and sinkholes in the finished product (which is such a common mistake!).
Step 6: Securing the Wicks
As you pour the wax, ensure your wicks stay centered. You can wrap the top of the wick around a stick or pencil laid across the top of the container to keep it in place.
Step 7: Curing
Patience is key here. Allow your candles to cure for at least 24 hours. This step is often overlooked, but curing helps your candles burn evenly and maximizes scent throw.
Step 8: Final Touches
After the curing period, trim your wicks to about ¼ inch above the wax. This will ensure a nice, steady burn. Now, your candles are ready for some styling!
Styling Your Candles
Now that you’ve created beautiful candles, let’s talk about styling. Having a neat aesthetic is essential if you want to display your hard work (or even give them as gifts).
Choose Modern Containers
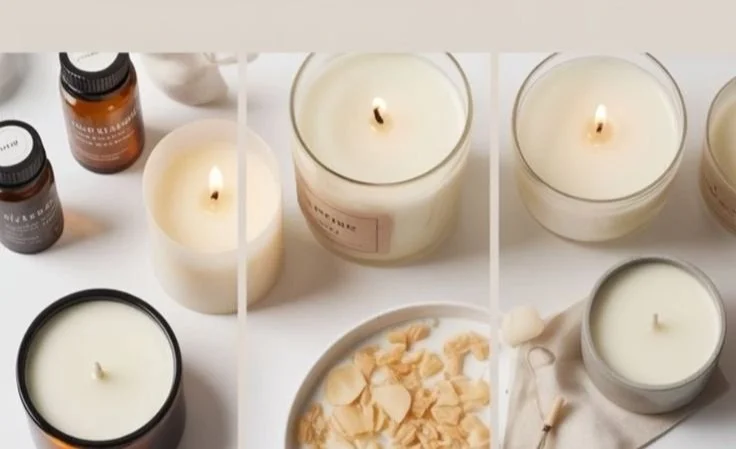
Think sleek and minimalistic. Simple metal tins or glass jars can elevate the look. Keep the colors muted or monochromatic for that clean, modern feel.
Accents and Labels
We’ve all seen those pinned posts with gorgeous labels. Maybe you want to go for a handwritten look or think about using printing for a polished finish. Crafting labels not only adds a professional touch, but it personalizes your candles, making them stand out as thoughtful gifts.
Grouping Candles
If you’re displaying them at home, try grouping different sizes together. Think about varied heights to create visual interest, and add in some greenery or decorative stones to enhance the scene.
Scent Pairings
If you’re creating a collection, consider how your scents work together. A fresh citrus next to a soothing lavender can offer variety, while still creating a cohesive theme.
Common Mistakes to Avoid
I’ve learned this the hard way. Here are some pitfalls to steer clear of while you’re crafting your beautiful candles:
- Overheating the Wax: Stick to the recommended temperatures.
- Not Securing Wicks Properly: A wandering wick can ruin an otherwise perfect candle.
- Pouring in Too Hot Wax: This leads to imperfections in the finish; aim for cooler temperatures.
- Skipping the Curing Time: This is where the magic happens—make sure you don’t cut corners.
- Ignoring Safety Precautions: Always work in a well-ventilated area and be mindful of hot wax.
Quick Beauty Tips
- Keep your workspace tidy—messy counters can lead to messy candles.
- Test your fragrance combination on a small batch before committing to larger pours.
- Let your candles cool slowly to avoid cracking on top.
FAQs
How can I troubleshoot sinkholes in my candles?
This usually happens due to pouring wax that’s too hot or cooling too quickly. Try to be patient and pour at the temperature guidelines we discussed.
What’s the best way to store my candles?
Keep them out of direct sunlight and extreme temperatures. A cool, dark closet is perfect!
Are handmade candles safe to burn?
Absolutely! As long as you’re using appropriate materials and following the right techniques, they can be even safer than many store-bought options.
Can I reuse old candle containers?
Yes! Just clean them thoroughly and remove the old wax and wick. They can be lovely little homes for your new creations.
What if I want to make larger batches?
You can scale up your ingredients as needed. Just keep an eye on the pouring process and manage your timing.
Embrace the Crafting Journey
Making handmade candles can be such a gratifying hobby that not only benefits you in creating a beautiful atmosphere but can also spark joy in others. It can be an act of self-care, providing moments of reflection as you slow down to create something unique. And let’s be honest, there’s something incredibly special about gifting a candle you made yourself.
So, enter this world of candle-making with excitement and creativity. Each pour is a step toward mastering your craft. Just remember, mistakes are part of the learning process. You’ve got what it takes to create stunning, professional-looking results right in your own home.
Here’s to lighting your path with your very own handmade candles—may they bring warmth, beauty, and endless possibilities into your life. Happy crafting!