
Making Soap Isn’t Hard
Imagine this… You’re in a cozy kitchen, the aroma of honey and oats fills the air, and you’re feeling pretty great about yourself as you whip up something special for your family. This isn’t just dinner, though; it’s a refreshing batch of homemade soap. Sounds dreamy, right? Well, here’s the truth: making soap really can be that easy, especially when you use a soap base. Today, I’m sharing a deliciously moisturizing oatmeal and honey soap recipe that’s not just good for your skin, but will also leave your bathroom smelling divine.
Why You’ll Love Soap Making
Let’s be honest; there’s something incredibly satisfying about creating beauty products from scratch. You’re in control of the ingredients that touch your skin, and you can customize scents and add-ins to fit every family member’s preferences. Plus, the joy of gifting homemade soap is unmatched. Not to mention, it’s a perfect way to indulge in a little self-care moment, even if it’s just for a few hours of relaxation at home.
You might be wondering: “Is it really that simple to make soap?” Yes! And I’ll show you how. We’ll dive into the details of this oatmeal and honey soap recipe, but first, let’s talk about why these ingredients work wonders for our skin.
Benefits of Oatmeal and Honey in Skincare
If you’ve ever heard of "nature’s miracle ingredients," oatmeal and honey are likely on that list. Here’s why they’re perfect for your soap:
Oatmeal
- Gentle Exfoliation: Oatmeal acts as a natural exfoliant, helping to buff away dry skin without irritation.
- Soothing Properties: It’s fantastic for calming itchiness or redness, which is especially beneficial if you have sensitive skin.
Honey
- Moisturizing: Honey’s humectant properties help your skin retain moisture, which means plump, hydrated skin (who doesn’t want that?).
- Antibacterial: It has natural antibacterial properties that can help maintain clear skin.
With these two powerful ingredients combined, you’re not only making something that smells enchanting; you’re also contributing to healthier skin for you and your loved ones.
Essential Oil Soap Recipe for Oatmeal and Honey Soap
Here’s a simple, step-by-step guide to creating your oatmeal and honey soap using a soap base. Don’t worry if you’ve never made soap before; I’ll walk you through it.
What You Will Need
- 1 lb of melt-and-pour soap base (goat milk or shea butter is a lovely choice)
- 1/2 cup of oatmeal (you can use ground oats for a smoother texture)
- 1/4 cup of honey
- 10-15 drops of essential oil (my favorites are lavender for a calming effect or lemon for a fresh scent)
- Soap molds (silicone molds work wonderfully)
- Microwave-safe bowl or double boiler
- Spatula or spoon
- Rubbing alcohol in a spray bottle (to eliminate air bubbles)
Step-by-Step Instructions
Cut the Soap Base: Start by cutting your soap base into small chunks. The smaller they are, the quicker and easier they’ll melt.
Melt the Soap: Place the chunks in a microwave-safe bowl. Heat in 30-second increments, stirring in between until fully melted. If you’re using a double boiler, bring water to a boil in the bottom pot, then place the soap chunks in the top pot until melted.
Mix in Honey and Oatmeal: Once the soap is melted, stir in the honey and oatmeal. This is where you can truly start to smell the magic!
Add Essential Oils: Here’s where you can get creative. Add your chosen essential oils (like lavender or lemon). Just make sure to mix well!
Prepare the Mold: Carefully pour your soap mixture into the molds. I like to spray the tops with rubbing alcohol; this helps to eliminate air bubbles and gives your soap a nice finish.
Let It Set: Now, patience is key. Let the soap sit until it hardens (usually about 1-2 hours at room temperature).
Remove from Molds: Once set, gently remove the soap from the molds. Admire your handiwork—because you made this!
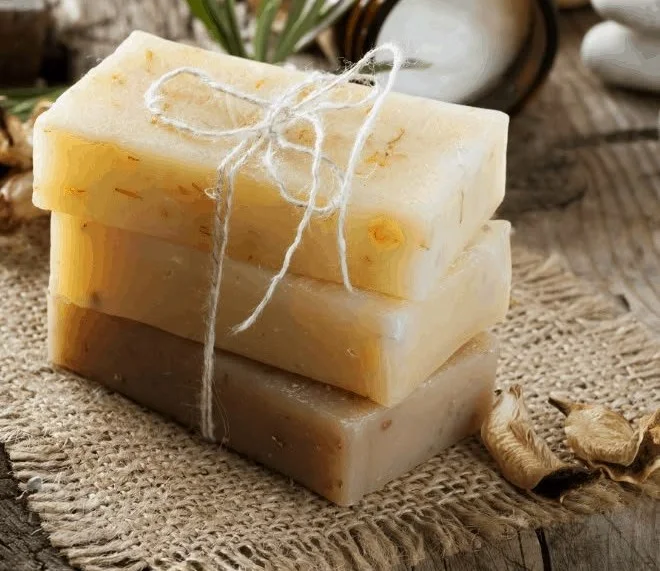
Store or Gift: You can leave them as is, wrap them up in pretty packaging, or gift them to friends and family. Trust me, they’ll be impressed!
Quick Beauty Tips
- If you want to customize further, consider adding dried herbs or flower petals to your soap mixture for beautiful texture and aesthetics.
- Make sure to store any leftover soap base properly so it doesn’t dry out. It’ll last for quite a while if you keep it in a cool, dry place.
Common Mistakes to Avoid
While making soap is straightforward, we all have our "oops" moments. Here are a few common pitfalls you might encounter:
- Overheating the Soap Base: This can cause it to turn into a weird, unworkable mess. Just be patient; your soap will melt beautifully if you go slow and steady.
- Not Stirring Enough: It’s tempting to rush, but make sure all ingredients are thoroughly mixed. You want honey and oils evenly distributed for the best results.
- Skipping the Rubbing Alcohol: If you want a smooth top, don’t forget this step! It won’t only make for prettier bars; it’ll prevent unsightly air bubbles.
Bonus Self-Care Ideas with Your Soap
Making your own soap is just one of the many ways to indulge in self-care. Here are some more ideas to complement your new, gorgeous bars:
- Create a Spa Caddy: Add your homemade soap to a basket with some bath bombs and a few candles for a quick at-home spa day.
- Set a Relaxing Routine: Pair your new soap with a calming evening ritual. Maybe a herbal tea, a good book, and some soft music to unwind after a busy day?
- Host a Soap Making Party: Grab a few friends and host a soap making evening! Set up different stations for adding scents or textures, and enjoy a night of laughter and creativity.
What Makes This Recipe Family-Friendly?
You might be wondering, “Can my kids help with this?” Absolutely! This is a great activity anyone can enjoy together, and it’s a fantastic opportunity to teach them about natural ingredients and the benefits of self-care. Plus, you can personalize the soaps to fit everyone’s unique preferences—how fun is that?
Encouraging Conclusion
Making your own oatmeal and honey soap is such a nourishing way to bond with your family while taking care of your skin. I hope you feel inspired to dive into soap making, whether it’s for yourself or to share with loved ones. Remember, self-care doesn’t have to be complicated or time-consuming. It can be as simple as mixing a few ingredients in your kitchen and creating something beautiful.
With every bar you make, you’re creating little gifts of love, wrapped in your signature scents, and that’s a beautiful thing. So go ahead, give it a try! Your skin (and your sense of aroma) will thank you. 💛