
Natural Soap Recipes: 20+ Homemade All-Natural Bar Soap Recipes
Are you ready to dive into the world of DIY soap-making? Crafting your own natural soap at home can be a rewarding and therapeutic experience. In this comprehensive guide, we’ll explore over 20 homemade all-natural bar soap recipes that are perfect for beginners, along with tips and tricks to help you master the art of soap-making. From melt and pour techniques to the more advanced cold and hot processes, there’s a soap recipe here for everyone.
Why You Will Love This Recipe
Creating your own natural soap allows you to control the ingredients, ensuring that no harsh chemicals touch your skin. Plus, handmade soaps make wonderful gifts! Imagine gifting a beautifully wrapped bar of your custom soap to a friend or loved one. Not only do you get to indulge in a creative pastime, but you also contribute to a more sustainable lifestyle by reducing waste and using natural, biodegradable ingredients.
Ingredients
Here’s a list of common ingredients used in many of the recipes:
- Base Oils: Olive oil, coconut oil, palm oil, sweet almond oil
- Butters: Shea butter, cocoa butter, mango butter
- Lye (Sodium Hydroxide): Required for cold and hot process soaps, but not used in melt and pour
- Fragrance or Essential Oils: Lavender, eucalyptus, lemon, peppermint, etc.
- Colorants: Natural options like cocoa powder, beet powder, or mica
- Additives: Oatmeal, honey, almond meal, or dried herbs
Make sure you obtain your ingredients from reputable sources. For precise recipes, the specific amounts of each ingredient will depend on the chosen soap recipe.
Equipment
Before you get started, it’s important to have the right equipment. Here’s a basic list:
- Digital Scale: To ensure accurate measurements
- Heat-Safe Containers: For melting oils or lye
- Stick Blender: For emulsifying your soap mixture
- Soap Molds: Silicone molds work best for beginner-friendly removal
- Thermometer: To check the temperatures of oils and lye
- Safety Gear: Goggles, gloves, and long sleeves for protection when handling lye
- Pipette or Droppers: For adding fragrance oils precisely
- Spatula: For mixing your ingredients
Step-by-Step Instructions
Below are simplified recipes for melt and pour, cold process, and hot process methods.
Melt and Pour Soap Recipe
Ingredients:
- 1 lb of melt and pour soap base
- 1 oz of essential oil (your choice)
- Optional: colorants, herbs, or exfoliants
Equipment:
- Glass measuring cup
- Silicone mold
- Stirring stick
- Microwave or double boiler
Instructions:
- Cut the soap base into small cubes.
- Place the cubes in a glass measuring cup and melt in the microwave (30-second intervals) or use a double boiler until fully melted.
- Remove from heat and let it cool slightly.
- Add your essential oils and stir well.
- If using colorants or additives, mix them in now.
- Pour the mixture into molds and allow to set for 1-2 hours.
- Once solid, carefully remove from the molds and store in an airtight container.
Cold Process Soap Recipe
Ingredients:
- 16 oz olive oil
- 16 oz coconut oil
- 16 oz palm oil
- 6.1 oz sodium hydroxide (lye)
- 16 oz distilled water
- 2 oz essential oils (optional)
Prep Time: 15 mins
Making Time: 2 hours
Yield: About 8 bars
Instructions:
- Safety First: Put on gloves and goggles. Work in a well-ventilated area.
- Measure the distilled water and sodium hydroxide separately.
- Slowly add the lye to the water (never the other way around) while stirring until dissolved. Be cautious as it produces heat and fumes.
- Let the lye solution cool to around 100°F.
- Measure and melt your oils until around 100°F as well.
- Combine the lye solution with the oils using a stick blender, blending until "trace" (thickened consistency).
- If desired, add essential oils and mix well.
- Pour the mixture into the molds and cover with a towel to insulate.
- Allow to set for 24-48 hours, then cut into bars and cure for 4-6 weeks.
Tips for Success
- Work with Precision: Use a digital scale for accurate measurements.
- Stay Organized: Label and organize all ingredients before starting.
- Patience is Key: Allow your soap to cure for the full recommended time for best results.
Common Mistakes to Avoid
- Not Wearing Protective Gear: Always protect yourself when working with lye.
- Skipping the Lye Calculation: Incorrect ratios can lead to caustic soap.
- Rushing the Process: Allow sufficient time for blending and curing.
Variations and Customization Ideas
- Color: Experiment with natural colorants.
- Scents: Blend different essential oils for unique fragrances.
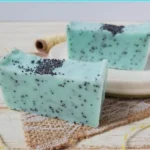
- Textures: Add ingredients like poppy seeds or dried flowers for visual appeal.
Storage and Shelf Life
Store your finished bars in a cool, dry place. Properly cured soap has a shelf life of about a year. Keep in an airtight container or wrapped in paper to avoid moisture absorption.
Safety Tips
When working with lye, it’s crucial to adhere to safety precautions:
- Always wear gloves and goggles.
- Ensure proper ventilation.
- Keep lye out of reach of children and pets.
Frequently Asked Questions
Q1: Can I substitute coconut oil with another oil?
A1: Yes, you can substitute coconut oil, but it may affect the soap’s lather. Consider using palm or olive oil for a different texture.
Q2: What if my soap doesn’t trace?
A2: If your soap hasn’t thickened after 15 minutes, reheat slightly and blend again.
Q3: Can I add colorants to melt and pour soap?
A3: Absolutely! Natural colorants can add visual appeal.
Q4: How do I know if my soap is ready to use?
A4: Cold process soap should be tested after the curing period; it should feel mild and not irritate the skin.
Q5: Is it safe to use lye in soap-making?
A5: Yes, when handled correctly. Always wear protective gear and follow safety guidelines.
Conclusion
Making your own soap can be a fulfilling and enjoyable hobby. With these 20+ natural soap recipes and tips, you’re well on your way to crafting beautiful, personalized bars of soap. Whether for personal use or thoughtful gifts, your homemade soap is sure to delight. Roll up your sleeves, channel your creative spirit, and enjoy the process! Don’t hesitate to share your soap-making journey or ask questions in the comments below. Happy crafting!