
Do You Love to Make Your Own Soap? This Coffee Scrub Soap Is So Gentle on Your Skin, and So Simple to Make!
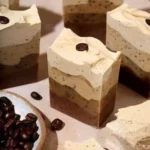
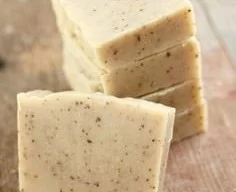
If you’re interested in making your own homemade soap, you’ve come to the right place! Today, we’re diving into a delightful project: coffee scrub soap. This DIY soap not only smells fantastic but also exfoliates your skin, thanks to the natural properties of coffee. Even if you’re a beginner, you can easily follow this recipe and create your own gorgeous coffee scrub soap right at home.
Why You Will Love This Recipe
Imagine starting your day with an invigorating coffee scrub soap that gently exfoliates your skin while leaving a rich, aromatic scent behind. Coffee is known for its natural exfoliating properties, making it perfect for a soap that not only cleans but also revitalizes your skin. It’s simple to make and perfect for gifting or treating yourself. Plus, the satisfaction of creating something beautiful with your hands is unmatched!
Ingredients
Here’s what you’ll need to gather before we start:
- Base: 1 pound of melt-and-pour glycerin soap base
- Coffee grounds: 1/2 cup (ensure they’re finely ground for a smoother texture)
- Essential oils: 1 teaspoon (recommended: coffee essential oil or vanilla for a warm scent)
- Colorant: A few drops of natural brown colorant (optional)
- Coffee: 1/4 cup brewed and cooled coffee (this adds extra richness to the soap)
Equipment
Gather the following tools to make the process smoother:
- A double boiler or microwave-safe bowl
- A soap mold (silicone molds work well)
- A mixing spoon or stick blender
- Measuring cups and spoons
- A microwave or stove (for melting the soap base)
- Safety gloves (optional but recommended)
Step-by-Step Instructions
Follow these easy steps to create your own coffee scrub soap:
Prep the Work Surface: Clear and cover your work area with newspaper or wax paper to catch any spills.
Melt the Soap Base:
- If using the microwave: Cut the soap base into cubes and place them in a microwave-safe bowl. Microwave in 30-second intervals, stirring in between until completely melted.
- If using a double boiler: Fill the bottom pot with water and allow it to simmer gently. Place the soap base in the top pot and stir until completely melted.
Add Coffee and Colorant: Once the soap base is melted, remove it from the heat and allow it to cool for a minute. Then, stir in the coffee grounds, brewed coffee, and any colorant you wish to use. Mix well to ensure everything is evenly distributed.
Add Essential Oils: Add your chosen essential oil and mix again. The scent will enhance the experience of using the soap.
Pour into Molds: Carefully pour the mixture into your soap molds. Fill them to the top but be cautious as the melted soap may be hot.
Let It Set: Allow the soap to cool and set for at least 2-4 hours at room temperature. You can speed up the process by placing the molds in the refrigerator.
Unmold and Enjoy: Once set, gently remove the soap from the molds. Your coffee scrub soap is now ready!
Tips for Success
- Keep It Gentle: If you have sensitive skin, consider using fewer coffee grounds or blending them further to create a finer texture.
- Storage: Store your finished soap in a cool, dry place. If you’ve made a large batch, consider wrapping them in plastic wrap or placing them in airtight containers to keep them fresh.
Common Mistakes to Avoid
- Don’t overheat the soap base; it can burn and change texture.
- Ensure you let the soap cool slightly before adding essential oils to prevent them from evaporating.
- Avoid using used coffee grounds, as they can harbor bacteria and affect the shelf life of your soap.
Variations and Customization Ideas
- Scent Variations: Experiment with different essential oils like peppermint or eucalyptus for a refreshing twist.
- Add Inclusions: Consider adding oatmeal or dried herbs for additional exfoliation and texture.
- Shape and Design: Use different molds to create fun shapes and sizes for your soaps.
Storage and Shelf Life
Your coffee scrub soap will last up to 6 months when stored properly. Store in a cool, dry place, away from direct sunlight to maintain the aroma and quality.
Safety Tips
- Use gloves when handling melted soap to prevent burns, especially if you’re new to soap making.
- Ensure adequate ventilation in your workspace, especially when working with strong scents.
- Keep your workspace clean to prevent contamination of your ingredients.
Frequently Asked Questions
1. Can I use regular soap instead of a melt-and-pour base?
No, traditional soap-making methods involve a chemical process with lye, which requires careful handling. For beginners, melt-and-pour is a safer option.
2. How can I enhance the scent of my coffee soap?
You can try adding more essential oils, but be mindful of the ratio as too much can affect the consistency.
3. Do I need to use distilled water for the brewed coffee?
Using distilled water can help maintain the quality of your soap, but regular brewed coffee is fine if you don’t have it on hand.
4. Can I use an electric mixer for blending the soap ingredients?
It’s not recommended as an electric mixer can introduce air bubbles, which might affect the finished texture. Stick to a spoon or a stick blender.
5. Is it safe to use this soap on my face?
While the soap is made from gentle ingredients, it’s best to do a patch test first, especially if you have sensitive skin.
6. How can I tell when the soap has fully set?
The soap should no longer be tacky and should pop out of the mold easily when gently pressed.
Conclusion
Creating your own coffee scrub soap is a rewarding and gratifying DIY project. With just a few simple ingredients and steps, you’ll have beautifully crafted soaps that not only smell great but also provide a wonderful exfoliating experience for your skin. Don’t hesitate—gather your materials and start your soap-making adventure today! Enjoy the process and the lovely results!