
Learn How to Make Beeswax Candles in a Jar with This Easy DIY Tutorial
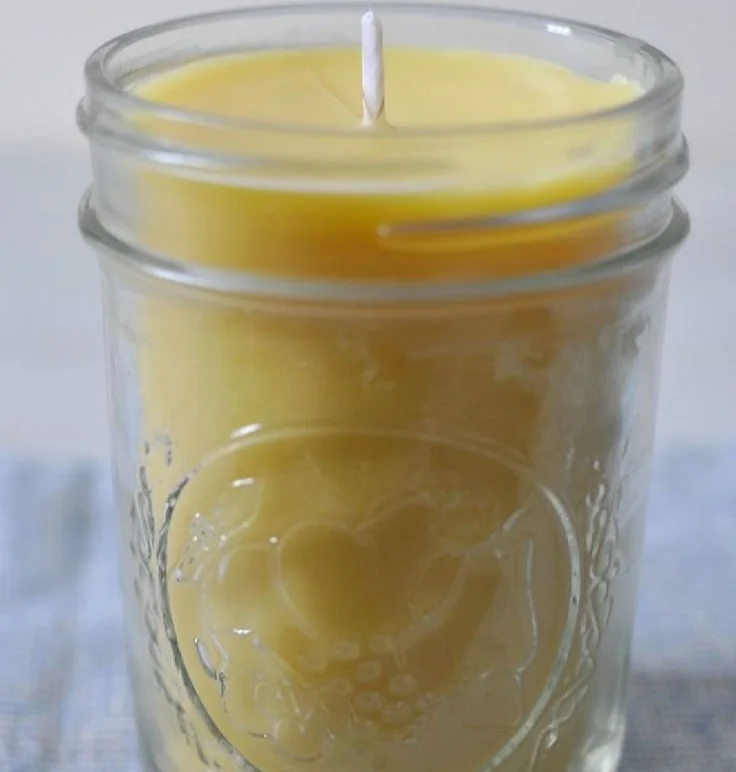
If you’re looking for a delightful and practical DIY project, making beeswax candles in jars is an excellent choice. Not only do they provide a warm glow for your home, but they also make wonderful handmade gifts for friends and family. This easy tutorial will guide you step-by-step through the process of creating your own homemade beeswax candles.
Why You Will Love This Recipe
Beeswax candles have unique qualities that set them apart. Unlike paraffin candles, beeswax is a natural substance that burns longer and produces less soot. They also emit a subtle, honey-like fragrance when burned, which can help purify the air. Plus, crafting your own candles allows you to customize scents, colors, and jar designs to your liking!
Ingredients
To make beeswax candles in jars, you will need:
- Beeswax: 1 pound (about 453 grams)
- Essential oils (optional for scent): 1-2 ounces (30-60 mL), depending on your preference
- Wicks: Pre-waxed cotton or wood wicks suitable for beeswax
- Candle jars: 4-6 small to medium jars (8 oz/240 mL is a good size)
- Dye (optional): Candle dye if you wish to color your candles
- Candle wick sustainer (optional): To help affix the wick to the bottom of the jar
Equipment
You’ll also need some essential tools:
- Double boiler or a heat-resistant container: For melting the beeswax
- Thermometer: To monitor the wax temperature
- Pouring pitcher or ladle: For pouring the melted wax
- Stirring utensil: Wooden skewer or spoon for mixing
- Scissors: For trimming the wicks
- Protective covering: Old newspaper or paper towels for easy cleanup
Step-by-Step Instructions
Follow these easy steps to create your beeswax candles:
Prepare Your Workspace
Start by laying down some old newspaper or paper towels to catch any spills. Gather all your materials and equipment so you have everything at hand during the process.Melt the Beeswax
Fill the bottom pot of a double boiler with water and bring it to a gentle simmer. Place the beeswax in the top pot or a heat-resistant container and set it over the simmering water. Stir occasionally until completely melted, which typically takes about 10-15 minutes.Add Fragrance (Optional)
If you’re using essential oils, now is the time to add them! Remove the container from heat once the beeswax has melted. Measure out your chosen essential oil and stir it into the wax. Aim for about 1-2 ounces for an 8 oz jar, adjusting based on your scent preference.Attach Wicks
While your wax cools slightly, prepare your jars by attaching the wicks. You can dip the bottom of each wick into the melted wax, then quickly press it into the bottom center of each jar. Alternatively, use a wick sustainer for better adherence.Pour the Wax
Once the wax cools to around 160°F (71°C), carefully pour it into your prepared jars. Fill each jar to about 1 inch from the top, leaving space for the wick. Ensure the wick remains centered while pouring; you can hold it or use a wick holder.Let Them Set
Allow the candles to cool and harden completely, which may take a few hours. Do not move them during this time to prevent uneven surfaces.Trim the Wicks
Once the candles are fully set, use scissors to trim the wicks to about 1/4 inch above the candle surface. This length will help ensure a good burn.
Tips for Success
- Monitor Temperature: Avoid overheating the wax, as excessive heat can alter the quality of the beeswax and diminish its natural scent.
- Wick Size: Use the appropriate wick size for your jar. A wick that’s too small may result in low flame and incomplete burning, while a wick that’s too large can produce a high flame and excessive soot.
Common Mistakes to Avoid
- Rushing the Cooling Process: If you move or pour the candles while they’re still soft, you risk creating uneven surfaces.
- Skipping the Wick Testing: Always test your wick size for optimal burning results. A small trial batch can save time and materials in the long run.
Variations and Customization Ideas
- Essential Oil Blends: Experiment with different essential oil combinations such as lavender, peppermint, or a citrus blend.
- Coloring Your Candles: If you desire a colored candle, add candle dye once the beeswax is melted. Be sure to start with a small amount and gradually adjust to achieve your desired hue.
Storage and Shelf Life
Store your beeswax candles in a cool, dry place away from direct sunlight. When kept properly, they can last for several years without losing their quality. Ensure jars are sealed to prevent dust from settling.
Safety Tips
- Be cautious when melting beeswax; always use a double boiler to avoid direct heat, which can ignite the wax.
- Handle all equipment carefully to prevent burns or spills, and avoid pouring wax at excessively high temperatures.
Frequently Asked Questions
1. Can I use other types of wax?
Yes, while this tutorial focuses on beeswax, you could substitute it with soy or paraffin wax. However, each type of wax has its unique properties, melting points, and scent characteristics.
2. How do I know what wick to use?
The wick size depends on the diameter of your candle jar. Generally, thicker jars will need thicker wicks. Reference wick sizing charts available from candle-making suppliers for guidance.
3. Can I add color to my beeswax candles?
Absolutely! Use candle dye that is specifically formulated for beeswax, and remember to add it as the beeswax melts for an even color distribution.
4. Why do my candles have a “bumpy” surface?
Bumps may occur if the wax cooled too quickly. Ensure your candles cool at room temperature and avoid placing them in drafts.
5. How can I safely burn my beeswax candles?
Always place candles on a heatproof surface away from flammable materials, and never leave them unattended while burning.
6. Are beeswax candles safe for pets?
Yes, beeswax candles are safe for pets. However, essential oils can be harmful to pets, so ensure you use pet-safe options if you decide to scent your candles.
Conclusion
Creating your own beeswax candles in jars is not only an enjoyable craft but a rewarding way to bring warmth and natural beauty into your home. With just a few simple ingredients and steps, you can make unique, homemade candles that are perfect for any occasion. So gather your supplies, give this tutorial a try, and enjoy the soft glow and gentle fragrance of your handmade creations! Happy crafting!