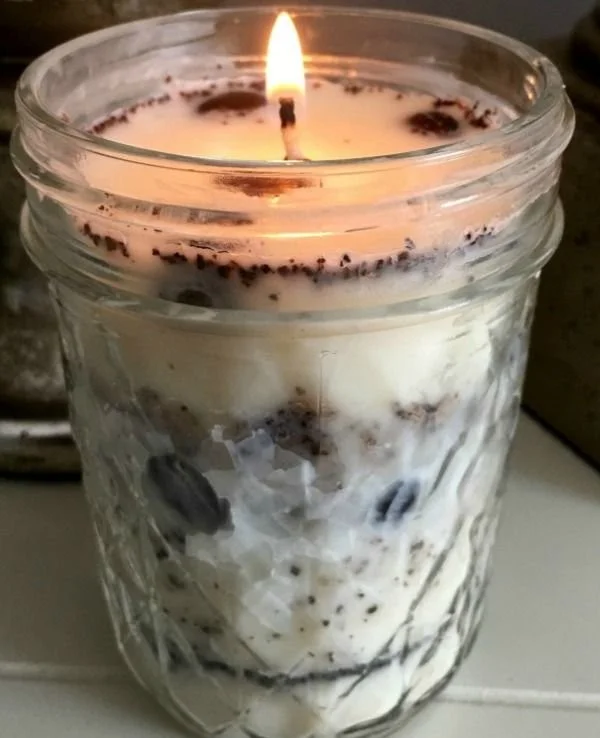

Zelfgemaakte Koffieboon Soja Kaars
Making your own candles can be a rewarding and creative experience. Today, we’re diving into a delightful DIY project that combines the rich aroma of coffee beans with the natural benefits of soy wax. This step-by-step guide will walk you through the process of creating a homemade coffee bean soy candle that not only fills your home with a cozy scent but also serves as a beautiful decorative piece.
Why You Will Love This Recipe
Creating a coffee bean soy candle isn’t just about the end product; it’s also about the process. The warm, rich aroma of freshly brewed coffee can transform your space, and crafting your own candles allows for customization in scent, appearance, and experience. Using soy wax makes this project an eco-friendly choice, as it’s renewable and burns cleaner compared to paraffin wax. Plus, it makes for an ideal handmade gift for coffee lovers in your life!
Ingredients
To create your coffee bean soy candle, you’ll need the following ingredients:
- Soy wax flakes: 10 ounces
- Coffee beans: 1 cup (whole beans)
- Fragrance oil (coffee-scented or your choice): 1 ounce
- Essential oil (optional for added aroma): a few drops of vanilla or any preferred scent
- Candle dye (optional): a few drops if you wish to color your candle
Equipment
Having the right tools makes the process smoother and more enjoyable. Gather the following equipment:
- Double boiler or a microwave-safe container
- Candle thermometer (if using a double boiler)
- Stirring stick: a wooden stick or metal spoon
- Wick: size appropriate for your candle container (typically a standard cotton wick)
- Wick holder or chopstick: to keep the wick centered
- Pouring pitcher: for easier pouring of melted wax
- Container: a small mason jar or glass container for your candle
Step-by-Step Instructions
1. Prepare Your Container
Start by ensuring your candle container is clean and dry. If you are using a glass container, make sure it can withstand heat.
2. Measure and Melt the Wax
- Measure out 10 ounces of soy wax flakes.
- Use a double boiler to melt the wax. If you don’t have one, you can place a microwave-safe container with wax in the microwave. Heat it in 30-second increments, stirring in between, until fully melted. Aim for a temperature of about 180°F (82°C).
3. Add Fragrance and Coffee Beans
- Once melted, remove the wax from heat. Allow the temperature to drop to about 160°F (71°C).
- Stir in 1 ounce of coffee fragrance oil and any essential oil you choose to add. Mix well for about 2 minutes.
- If adding dye, incorporate it now until you achieve the desired color.
- Next, add 1 cup of whole coffee beans into your melted wax. This step adds both aesthetic charm and an inviting scent.
4. Prepare the Wick
- Secure your wick to the bottom of the container using a little melted wax.
- Once the wick is in place, use a wick holder (or a chopstick) to keep it centered at the top.
5. Pour the Wax
- Carefully pour the melted wax mixture into your container, ensuring the wick remains centered.
- Leave a small amount of space at the top of the container.
- Allow the candle to cool and harden completely, which can take anywhere from 2 to 4 hours.
6. Trim the Wick
Once the candle is set, trim the wick to about ¼ inch above the wax surface. This will help your candle burn evenly.
Tips for Success
- Temperature Matters: Always keep an eye on the temperature of the wax when melting and pouring. This is key to a smooth, bubble-free candle.
- Test Your Wick: Depending on your container size and wax type, you may want to test different wick sizes to find the best one for an even burn.
Common Mistakes to Avoid
- Overheating Wax: Avoid overheating your wax. This can cause discoloration and poor burning.
- Ignoring Wick Size: Make sure to choose the correct wick size for your container to prevent tunneling or excessive soot.
Variations and Customization Ideas
- Scent Variations: Try mixing different fragrance oils, like adding a hint of vanilla for a sweeter aroma.
- Container Types: Experiment with different sizes and shapes of containers—trying tin cans or tea cups can give you a unique look.
- Decorative Additions: Consider adding colorful wax embeds, glitter, or dried flowers for extra decorative flair.
Storage and Shelf Life
Store your homemade coffee bean soy candles in a cool, dry place, away from direct sunlight to maintain their quality. When stored properly, they can last up to 1 year.
Safety Tips
- Always work in a well-ventilated area when using fragrance oils.
- Never leave melting wax unattended to prevent overheating or fire hazards.
- Handle hot wax and containers with care to avoid burns.
Frequently Asked Questions
1. Can I use different types of wax?
Yes, although this recipe specifically uses soy wax, you can also use beeswax or paraffin wax. Just keep in mind that the melting points and burning characteristics may vary.
2. How can I test my candle for safety?
Burn your candle for a short while to observe how it burns. Check for even burning, excess soot, or any unusual smells that may indicate improper wax or wick pairing.
3. What if my candle won’t take fragrance?
Make sure you’re using the right ratio of fragrance oil to wax. If your candle is not scenting as expected, try increasing the fragrance oil slightly (ensure you don’t exceed the recommended usage rate).
4. Can I reuse wax from old candles?
Yes, you can melt down old candles, but make sure to remove any leftover wick, soot, or contaminants before reusing.
5. How do I ensure my candle burns evenly?
Using the correct wick and maintaining correct pouring temperatures can help, as well as ensuring that the wick is trimmed to the right length before lighting.
Conclusion
Making your own homemade coffee bean soy candle is not only a fun DIY project, but it also brings warmth and a delightful aroma to your space. With a few simple ingredients and tools, you can create something special that enhances your home or makes a thoughtful gift for loved ones. I hope this guide inspires you to gather your supplies and embark on your candle-making journey. Happy crafting!