
Best DIY Candles You Will Want to Make
There’s something so inviting about flickering candlelight that can instantly warm up any space. Whether it’s a cozy fall evening or a festive gathering, homemade candles add a unique touch to your decor. In this article, you’ll discover some of the best DIY candles that are not only easy to make but also budget-friendly. With clear instructions, helpful tips, and customizations, you’ll be crafting beautiful candles in no time!
Why You Will Love This Recipe
Making your own candles is a fulfilling creative project that allows you to personalize scents, colors, and styles. It’s also a fantastic way to give thoughtful handmade gifts to friends and family. Plus, you can ensure all ingredients are natural or safe for your home environment. From simple water candles to intricately scented jar candles, there’s a project for everyone!
Ingredients
Here’s a list of common ingredients you’d typically need for various DIY candle projects:
- Wax: Choose from paraffin, soy, beeswax, or palm wax. For these recipes, we’ll focus on soy wax for its clean burn and easy availability.
- Fragrance Oil: Approximately 1 oz per pound of wax is standard, but you can adjust according to preference.
- Color Dyes: Candle dyes are optional; liquid or block dyes work fine.
- Wicks: Choose cotton or wood wicks that suit the size of your container.
Equipment
Here’s what you’ll need to get started:
- Double boiler or microwave-safe container for melting wax
- Thermometer: To monitor wax temperature
- Stirring utensil: Wooden spoon or silicone spatula
- Scale: For weighing wax and fragrance oil
- Containers: Glass jars, metal tins, or silicone molds
- Wick holder: To keep wicks centered while pouring
Step-by-Step Instructions
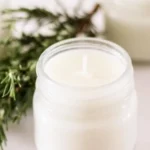
Let’s dive right into making a simple and delightful Soy Jar Candle!
Preparation Time
- 10 minutes
Making Time
- 30 minutes
Yield
- Approximately 2 candles (8 oz each)
Instructions
Prepare Your Workspace: Cover your work surface with newspaper or disposable cloth, as melting wax can get messy.
Measure the Wax: Use a scale to weigh 1 pound of soy wax flakes. This should yield about 2 jars of candle.
Melt the Wax:
- If using a double boiler, fill the bottom pot with water and bring it to a light simmer.
- Place your wax in the top pot and stir occasionally until it reaches around 185°F (85°C).
- Alternatively, use a microwave-safe container, heating the wax in 30-second increments until fully melted.
Add Fragrance: Once the wax is melted, remove it from the heat. Add 1 oz of fragrance oil and stir well. Remember, adding fragrance at too high a temperature can degrade the scent.
Add Dye (Optional): If desired, add a few drops of candle dye and mix until you achieve the desired color.
Prepare the Wicks: While the wax cools slightly to around 140°F (60°C), attach wicks to the bottom of your containers using a bit of melted wax or wick stickers.
Pour the Wax: Carefully pour the melted wax into the containers, leaving about half an inch from the top.
Center the Wicks: Use a wick holder to keep your wicks centered as the wax hardens.
Cool the Candles: Allow them to cool completely at room temperature, which may take several hours.
Trim the Wicks: Once set, trim the wick to about 1/4 inch above the wax surface to reduce smoking when burned.
Tips for Success
- Measure Accurately: For consistent results, always weigh your ingredients using a kitchen scale.
- Choose the Right Wick: Different sizes and types of wicks burn differently, affecting how well your candle will burn. Test different wicks if you’re unsure.
- Safety First: Never leave melting wax unattended, and be cautious not to overheat it.
Common Mistakes to Avoid
- Incorrect Wax Temperature: Pouring wax at the wrong temperature can lead to unsightly surfaces or incomplete sets.
- Too Much Fragrance: Overloading with fragrance can cause the candle to burn poorly; stick to recommended amounts.
- Skipping Wick Testing: Testing wicks in small batches helps you find the perfect match for your candles.
Variations and Customization Ideas
- Scent Blending: Experiment with combining different fragrance oils for unique scents. A blend of vanilla and pumpkin is perfect for fall!
- Decorative Elements: Add dried flowers, herbs, or cinnamon sticks to your candle for extra visual appeal.
- Use Different Containers: Explore various shapes and materials like teacups, bowls, or jars for unique presentations.
Storage and Shelf Life
Store your finished candles in a cool, dry place away from direct light. When properly stored, homemade candles can last up to a year. Before lighting, ensure any dust has been removed from the surface for a cleaner burn.
Safety Tips
- Always work in a well-ventilated area when melting wax.
- Use heat-resistant containers to prevent breakage.
- Never leave burning candles unattended, and keep them out of reach of children and pets.
Frequently Asked Questions
1. Can I use essential oils instead of fragrance oils?
Yes! However, keep in mind that some essential oils have lower scent throw and may not adhere well to wax. You may need to adjust the amount.
2. How do I know what wick to use?
Wick size depends on the diameter of your container and the type of wax used. Many suppliers provide wick size charts to guide you.
3. What can I do if my candles have a frosted appearance?
Frosting is common in soy candles. To minimize it, ensure your wax is pre-melted to the right temperature and poured at a slightly cooler temperature.
4. Are handmade candles more eco-friendly?
They can be, especially if you choose natural waxes like soy or beeswax and use essential oils for scenting. It’s all about your ingredient choices.
5. How can I fix a candle that won’t stay lit?
This may be due to an incorrectly sized wick, wax that is too hard, or too much fragrance. Try testing a different wick or adjusting the wax blend.
Conclusion
Candle making is an enjoyable and rewarding craft that enhances your home while allowing you to express your creativity. Whether you’re preparing for a cozy night in or creating thoughtful gifts for loved ones, these DIY candles are sure to impress. Follow the steps outlined above, and don’t be afraid to experiment with your unique flair. So gather your supplies, embrace your inner artisan, and get ready to fill your space with warmth and fragrance!