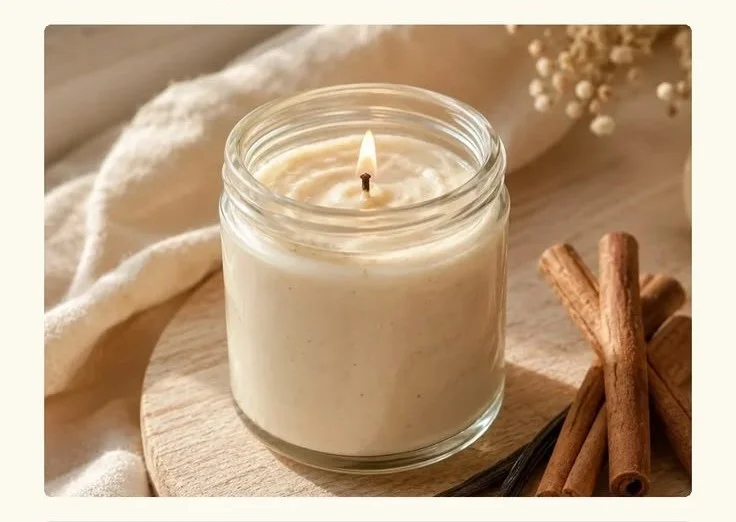

Create a Cosy Soy Candle in a Teacup Scented with Cinnamon and Vanilla
If you’re looking to create a warm and inviting atmosphere in your home, a homemade candle is the perfect touch. This DIY soy candle recipe, featuring delightful scents of cinnamon and vanilla, is not only easy to make but also a charming addition to your decor. Using repurposed teacups, you’ll create candles that look beautiful and spread a wonderful fragrance throughout your space. Let’s dive into the step-by-step process to make your own cosy soy candle!
Why You Will Love This Recipe
Making your own candles can be a fulfilling and enjoyable experience. This recipe is perfect for beginners, offering simple steps and readily available materials. Here are a few reasons to love this project:
- Eco-Friendly: Using soy wax is a sustainable alternative to paraffin wax, ensuring a cleaner burn.
- Personal Touch: Scent your candle however you like, and customize it to fit your home or gift it to loved ones.
- Creative Outlet: Use your creativity to choose different teacup styles and colors, making each candle unique.
Ingredients
For this cosy soy candle recipe, you’ll need the following ingredients:
- Soy Wax: 300 grams (about 10.5 oz)
- Cinnamon Essential Oil: 15 ml (1 tablespoon)
- Vanilla Essential Oil: 15 ml (1 tablespoon)
- Teacups: 2 (heat-resistant)
- Candle Wick: 2 (preferably cotton or wood wicks)
- Wick Sustainer: 2 (if not using clip-on wicks)
Equipment
To make your candle, gather the following equipment:
- Double boiler or a microwave-safe bowl
- Stirring utensil (wooden spoon or spatula)
- Thermometer (optional, but recommended)
- Wick holder or chopsticks (to keep the wick centered while the wax sets)
- Scale for accurate measurements
- Heat-resistant surface for pouring
Step-by-Step Instructions
Preparation Time: 15 minutes
Making Time: 1 hour
Yield: 2 teacup candles
Set up Your Work Area
- Make sure you have a clean, flat surface to work on, free from clutter. Lay down newspaper or a cloth to catch any spills.
Measure the Wax
- Weigh out 300 grams of soy wax. This will give you enough wax to fill two teacups.
Melt the Wax
- Double Boiler Method: Fill the bottom pot of the double boiler with water and bring to a gentle simmer. Place the soy wax in the top pot and stir occasionally until fully melted.
- Microwave Method: Place the wax in a microwave-safe bowl and heat in 30-second intervals, stirring in between, until melted.
Add Fragrance
- Once the wax has melted, allow it to cool slightly (to about 70°C or 160°F). Add your cinnamon and vanilla essential oils (15 ml each) to the wax and stir gently for about 2 minutes to ensure the oils are evenly dispersed.
Prepare the Wicks
- Attach the wick sustainer to the bottom of each wick (if applicable). Then, secure the wick to the bottom center of each teacup, using a small amount of melted wax or hot glue.
Pour the Wax
- Slowly and carefully pour the melted wax into each teacup, leaving a small space at the top. Use your wick holder or chopsticks to keep the wicks centered as the wax begins to solidify.
Let the Candles Set
- Allow the candles to cool at room temperature for about an hour. They will harden as they cool.
Trim the Wick
- Once fully cooled, trim the wick to about 1/4 inch above the wax surface. This will ensure a steady burn.
Cure the Candles
- For the best fragrance throw, let the candles cure for at least 24-48 hours before burning. This helps the scent fully bind with the wax.
Tips for Success
- Use a Thermometer: If you want to be precise with your temperature, a thermometer will help you know when to add the fragrance oils and when to pour.
- Stir Gently: When adding the fragrance, stir slowly to avoid bubbles; this helps maintain a smooth candle surface.
- Wick Variety: Test different wick sizes for the best burn. If your candle burns too quickly, you may need a larger wick, while a thinner wick can help slow down the burn.
Common Mistakes to Avoid
- Pouring Temperature: Don’t pour the wax while it’s too hot (above 80°C or 176°F) or too cold (below 60°C or 140°F) to avoid defects.
- Overusing Fragrance Oils: Stick to the recommended amount of fragrance—too much can result in soot or an uneven burn.
- Ignoring Wick Placement: Ensure your wick is centered; an off-center wick can lead to uneven burning and excessive wax waste.
Variations and Customization Ideas
- Change the Scents: Feel free to experiment with different essential oils like orange, eucalyptus, or lavender to create unique blends.
- Use Different Containers: Beyond teacups, you can use mason jars, decorative tins, or unique found objects that fit your decor.
- Add Color: Use candle dye or crayon shavings to add color to your candles, making them visually pleasing.
Storage and Shelf Life
Store your candles in a cool, dry place away from direct sunlight to preserve their scent and appearance. Properly stored, these candles can last up to 1 year without significant loss of fragrance.
Safety Tips
- Always use the candle in an appropriate holder on a heat-resistant surface.
- Keep the candle away from drafts, flammable materials, and out of reach of children and pets.
- Never leave a burning candle unattended.
Frequently Asked Questions
Can I use paraffin wax instead of soy wax?
Yes, you can, but note that soy wax is more eco-friendly and tends to burn cleaner than paraffin wax.
How do I know if my custom scent mix works?
Start with small batches to test the fragrance before making larger candles.
How do I fix a candle that has a hole in the top?
Melt a bit more wax and pour it into the hole once it has cooled, or you can use a heat gun to smooth the surface if needed.
What should I do if my candle burns too quickly?
If your wick is too large, switch to a smaller one. Alternatively, you can try trimming the wick shorter for a slower burn.
Can I use food-grade essential oils?
While some food-grade oils can be used, stick to candle-safe fragrance oils for the best results and safety.
Conclusion
Creating your own cosy soy candle in a teacup is a delightful DIY project that can light up any room with warmth and scent. With this step-by-step guide, you can enjoy the process and result in beautiful, fragrant candles tailored to your tastes. So gather your materials, ignite your creativity, and let the aroma of cinnamon and vanilla fill your home with joy! Happy candle making!