
The Coziest DIY Beeswax Candles for Winter Nights
As winter envelopes us in its chilly embrace, there’s nothing quite like the warm glow of a candle to create a cozy atmosphere in your home. The flickering flame, the soft scent in the air, and the way it casts shadows on the walls make candlelight one of the most enchanting forms of illumination during these cold months. Today, I’m excited to share a simple yet fulfilling project that will allow you to make your own homemade beeswax candles. With just a few ingredients and some straightforward techniques, you can craft beautiful, natural candles that will add charm to your space.
Why You Will Love This Recipe
Beeswax candles are not only stunning but also offer various benefits. They burn longer than traditional paraffin candles, produce less soot, and even purify the air by releasing negative ions. Plus, they have a subtle honey scent that is delightful! This DIY project is perfect for beginners, and the warmth of your handmade candles will bring a personal touch to your home or make thoughtful handmade gifts for your loved ones.
Ingredients
To make your own beeswax candles, you’ll need the following ingredients:
- 100% Beeswax: 1 pound (approximately 450 grams)
- Candle Wicks: Medium-sized wicks, pre-waxed and tabs
- Optional: Essential oils for scent (up to 1 ounce or 30 ml)
Equipment
Gather the following equipment before you start:
- Double boiler or a heat-safe bowl and pot
- Thermometer (optional but recommended)
- Stirring utensil (wooden spoon or silicone spatula)
- Candle molds or jars (glass jars work beautifully)
- Wick holder (a pencil or chopstick can work)
- Safety gear (gloves and goggles, if desired)
Step-by-Step Instructions
Making your own homemade beeswax candles is incredibly easy. Just follow these steps:
Step 1: Prepare Your Workspace
Find a clean, flat surface and cover it with newspaper or old towels to catch any spills. Set up your double boiler: fill the bottom pot with water, and place your beeswax in the top pot or bowl.
Step 2: Melt the Beeswax
Heat the water over medium heat until it simmers. Add the beeswax to the top pot or bowl, allowing it to melt completely. Stir occasionally to help it along. Use a thermometer to monitor the temperature; you want it to stay around 145°F to 185°F (63°C to 85°C).
Step 3: Add Fragrance (Optional)
If you want to add a lovely scent, this is the time to stir in your essential oils. About 1 ounce (30 ml) per pound of beeswax is a good guideline. Mix thoroughly.
Step 4: Prepare the Wick
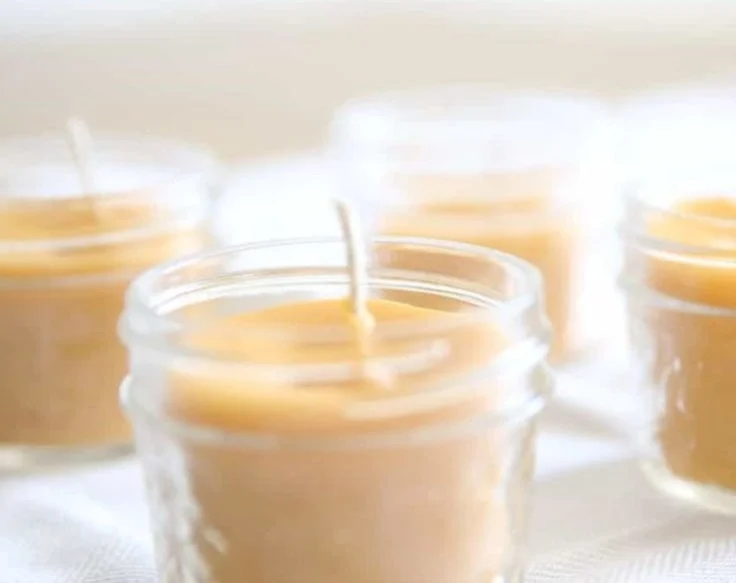
While your beeswax is melting, attach the wick tab to the bottom of your jar or mold. You might want to use a wick holder to keep it centered while pouring. Simply place a pencil or chopstick across the top of your container and hang your wick from it.
Step 5: Pour the Beeswax
Once the beeswax is fully melted, allow it to cool for a couple of minutes. Carefully pour the melted wax into your prepared container or mold, leaving about half an inch of space at the top. Ensure the wick remains centered.
Step 6: Let it Cure
Allow your candles to cool completely, which can take a few hours. If you find that the surface has a few divots or holes when cooled, you can gently re-melt a bit of wax to fill in any imperfections.
Step 7: Trim the Wick
Once your candles are fully cooled and hard, trim the wick to about 1/4 inch above the wax surface.
Tips for Success
- Test First: If you’re new to candle-making, start with a small batch to test your methods before committing to larger quantities.
- Be Patient: Don’t rush the melting process; too high a temperature can spoil your wax.
- Keep it Clean: Beeswax can be sticky, so make sure to clean up any spills promptly.
Common Mistakes to Avoid
- Overheating Beeswax: This can change the properties of the wax and cause uneven burning.
- Wrong Wick Size: Using a wick that’s too small will cause tunneling (a hole in the middle). Ensure your wick is appropriate for the size of your container.
- Not Allowing Candles to Cure: Rushing this step can lead to poor burns and unsatisfactory results.
Variations and Customization Ideas
- Mixed Wax: You can blend beeswax with soy or palm wax for different textures and burn times.
- Coloring Agents: You can add candle dyes designed for beeswax to create colored candles.
- Scent Variations: Try different essential oils for unique fragrances; lavender, citrus, or cinnamon can elevate your candle experience.
Storage and Shelf Life
Store your finished beeswax candles in a cool, dry place away from direct sunlight. They should last indefinitely if stored properly. However, keep them out of high heat to prevent melting or warping.
Safety Tips
- Always supervise candles while burning.
- Place candles on a flat, stable surface away from flammable materials.
- Never leave a candle unattended when lit.
- Ensure proper ventilation if using any essential oils.
Frequently Asked Questions
Can I use other types of beeswax for candle-making?
Yes, you can use filtered beeswax pellets or sheets; just keep in mind that sheets will require additional preparation.
How do I know which wick to use?
Wick sizing can depend on the diameter of your candle jar. Use a wick size guide to help you determine the best match.
Can I add color to my beeswax candles?
Definitely! Just use dyes specifically made for candle-making to ensure they mix well with beeswax.
What if my candle burns unevenly?
If your candle does not burn evenly, it might be due to the wick size or the way it was poured. Ensure that you’ve chosen the appropriate wick and poured slowly.
What’s the ideal burn time for beeswax candles?
Beeswax candles can burn for approximately 30 to 50 hours, depending on their size and wick type.
Are DIY beeswax candles safe for children and pets?
Yes, beeswax candles are a natural option without harmful chemicals, but always supervise children and pets around open flames.
Conclusion
Making your own DIY beeswax candles is a rewarding and relatively simple process that adds warmth and charm to your winter evenings. With these homemade candles, not only can you enjoy their beautiful glow and subtle scent, but you’re also creating something special that speaks to your crafting spirit. I encourage you to gather your materials and begin this delightful project. Enjoy the cozy atmosphere your homemade candles will bring, whether for yourself or as thoughtful gifts for others. Happy crafting!