
Learn How to Make Beeswax Candles with This Easy Tutorial!
Are you ready to light up your home with the warm, inviting glow of homemade beeswax candles? Not only do they provide a cozy atmosphere, but beeswax candles also burn cleaner than many store-bought options, making them an excellent choice for a DIY project that enhances your living space naturally. In this tutorial, I will guide you through the simple and satisfying process of crafting your own beeswax candles.
Why You Will Love This Recipe
- Natural Ingredients: Beeswax is a beautiful, natural product that has been used for centuries. It’s non-toxic, hypoallergenic, and emits negative ions when burned, purifying the air in your home.
- Customization: You can customize the scent, color, and shape of your candles, making them perfect for gifts or personal use.
- Easy to Make: Even if you’re new to DIY projects, you’ll find this process straightforward and enjoyable.
Ingredients
To get started with your beeswax candles, here’s what you’ll need:
- Beeswax: 1 pound (you can use beeswax pastilles for easier measuring and melting)
- Candle Wicks: Choose a wicking that is appropriate for the diameter of your candle. For a standard jar candle, a medium or heavy-duty wick works well.
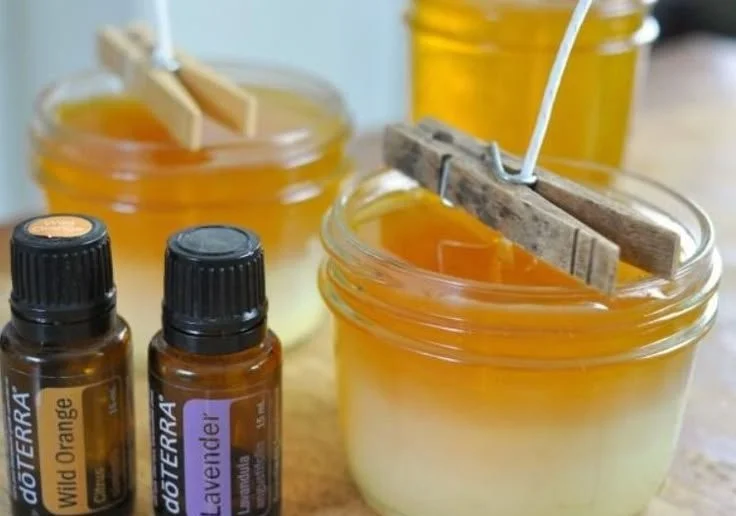
- Essential Oils (Optional): 1-2 ounces (lavender, lemon, or eucalyptus are great options)
- Colorant (Optional): Candle dye suitable for beeswax (if you want to add color)
Equipment
Gathering the right equipment makes your candle-making experience much smoother. Here’s what you’ll need:
- Double Boiler: If you don’t have a double boiler, you can create one using a metal bowl placed over a pot of simmering water.
- Thermometer: A candy or candle thermometer to monitor the wax temperature.
- Pouring Pitcher: This makes transferring melted wax into your molds or containers easier.
- Molds or Containers: Glass jars, metal tins, or silicone molds work beautifully for beeswax candles.
- Stirring Spoon: A wooden or silicone spoon will help you mix in any fragrances or colorants.
- Wick Holders (Optional): You can use chopsticks or clothespins to hold your wicks in place while the wax sets.
Step-by-Step Instructions
Ready to make your beeswax candles? Let’s dive into the process!
Step 1: Prepare Your Workspace
Ensure your workspace is clean and well-ventilated. Lay down newspaper or a silicone mat to catch any wax spills.
Step 2: Measure the Beeswax
If you’re using beeswax blocks, grate or chop it into smaller pieces to help it melt evenly. Measure out 1 pound of beeswax.
Step 3: Melt the Beeswax
- Fill the bottom pot of your double boiler with water and bring it to a simmer.
- Place the beeswax into the top pot or bowl.
- Stir the beeswax gently as it melts, monitoring the temperature. You want the beeswax to reach about 145°F (63°C).
Step 4: Add Fragrance and Color (Optional)
Once the beeswax is melted, remove it from heat and let it cool for a minute. If you’re using essential oils, now’s the time to stir them in. Generally, use about 1 ounce of oil per pound of beeswax. If you want to add color, introduce the dye and stir until you achieve a uniform shade.
Step 5: Attach the Wick
Place your wick at the center of your mold or container. If the wick doesn’t stay upright, use a wick holder or a bit of melted wax to secure it at the bottom.
Step 6: Pour the Wax
Carefully pour the melted beeswax into your mold or container, ensuring the wick remains centered. Leave a little space at the top if you’re making pillars or jars.
Step 7: Let It Set
Allow the beeswax to cool and harden completely. This might take several hours, depending on the size of your candle.
Step 8: Trim the Wick
Once your candle is set, trim the wick to about 1/4 inch above the candle surface for optimal burning.
Tips for Success
- Testing Wicks: For larger candles, test different wick sizes to ensure an even burn.
- Additions: If you want to make layered candles, let each layer cool slightly before pouring the next.
- Storage: Always store your candles in a cool, dry place away from direct sunlight.
Common Mistakes to Avoid
- Overheating the Wax: Keep an eye on the temperature while melting. Overheating can cause the wax to lose some its natural properties and smell.
- Neglecting Wick Size: Using the wrong wick can lead to tunneling or excessive soot.
- Pouring Too Hot: If the wax is too hot when poured, it may crack upon cooling.
Variations and Customization Ideas
- Scent Variations: Experiment with different essential oils like vanilla, cinnamon, or citrus for unique blends.
- Shapes and Sizes: Use various molds, like flower shapes or votive shapes, for a fun variety.
- Layering: Create layered candles by pouring in sections and allowing cooling in between.
Storage and Shelf Life
Beeswax candles can last for years if stored properly. Keep your candles in a cool, dry environment and out of direct sunlight. Avoid stacking them to prevent deformation.
Safety Tips
- Avoid Open Flames: Always supervise burning candles and never leave them unattended.
- Ventilation: Ensure good airflow while melting the beeswax to avoid inhaling vapors.
- Handling Hot Wax: Use protective gear (oven mitts or gloves) if needed, especially when handling hot containers.
Frequently Asked Questions
1. Can I use beeswax sheets instead of blocks?
Yes, beeswax sheets can be melted down or rolled to create candles. They are a great way to make rolled taper candles.
2. How can I remove the candle from the mold?
For silicone molds, gently press on the sides to release the candle. For harder materials, placing the mold in a freezer for a short while may help.
3. Can I reuse leftover wax?
Absolutely! Gather scraps and melt them down for new candles. Just ensure the wax is clean and free of any contaminants.
4. What should I avoid when making beeswax candles?
Avoid using synthetic fragrances or dyes not meant for candle making, as they can affect burning quality and scent throw.
5. How do I adjust the scent strength?
If the scent is too weak, try adding more essential oil. While too much can lead to poor combustion, do some testing to find the right balance for your taste.
Conclusion
Making your own beeswax candles is not only a rewarding DIY experience, but it also allows you to personalize your space with natural, beautiful lighting. Whether you keep them for yourself or share them as thoughtful gifts, you’ll take pride in knowing you’ve crafted something special. So gear up, gather your materials, and start creating! Once you see how easy and fun it is, you’ll be inspired to experiment with new scents and styles. Happy candle making!