
Candles Are a Great Way to Create an Inviting Home: Here’s How to Make Your Own!
Creating a warm and inviting atmosphere in your home is as easy as lighting a few candles. However, did you know that making your own candles can not only elevate the ambiance but also provide a fun DIY project? In this guide, we’ll walk you through the steps to making homemade candles, allowing you to customize scents, colors, and styles to perfectly suit your space.
Why You Will Love This Recipe
Making your candles can be incredibly rewarding. You can experiment with different fragrances, colors, and container designs, ensuring that each candle is unique. Handmade candles also make wonderful gifts for friends and family, allowing you to share your creativity while providing a personalized touch. Plus, with a few basic supplies, you can create beautiful, scented candles that enhance the atmosphere of any room.
Ingredients
- Wax: 1 pound (16 oz) of soy wax, beeswax, or paraffin wax
- Fragrance oil: 1 oz (adjust according to preference)
- Dye (optional): Candle dye chips or liquid dye (follow package instructions for amounts)
- Wicks: 3-6 (size depends on container diameter)
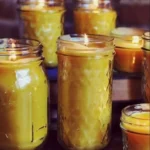
- Container: Glass jar, metal tin, or any heatproof container of your choice
Equipment
- Double boiler or a microwave-safe container
- Thermometer
- Stirring utensil (wooden or stainless steel)
- Wick holder or adhesive (hot glue, glue dots)
- Scale (for measuring ingredients)
- Pouring pitcher (optional, but helpful)
- Safety gloves and goggles (for safety)
Step-by-Step Instructions
Preparation Time: 15 minutes
Making Time: 1 hour
Approximate Yield: 3-4 candles (depending on container size)
Prepare Your Workspace: Ensure you have a clean and organized area. Lay down newspaper or paper towels to catch any spills.
Measure the Wax: Weigh out 1 pound of wax using a scale. If you’re using multiple containers, consider how much wax will be needed for each.
Melt the Wax:
- Using a Double Boiler: Fill the bottom pot with water and bring it to a simmer. Place the wax in the top pot, stirring occasionally until fully melted.
- Microwave Method: Place wax in a microwave-safe container and heat in 30-second intervals, stirring between each until melted.
Prepare the Wick: Secure the wick to the bottom of your container using adhesive or hot glue. Use a wick holder to keep it centered while pouring.
Add Fragrance and Color: When the wax reaches about 185°F (85°C), remove it from the heat. Add your fragrance oil and dye, stirring well to ensure even distribution.
Pour the Wax: Allow the wax to cool to around 140°F (60°C), then carefully pour the wax into your prepared container, leaving about half an inch from the top. Make sure the wick remains centered.
Cool and Set: Let the candles cool at room temperature for several hours until they solidify completely.
Trim the Wick: Once the candle is solid, trim the wick to about ¼ inch above the wax surface.
Curing: Allow your candles to cure for at least 24 hours before burning to enhance the scent throw.
Tips for Success
- Wick Size: Make sure to choose the right wick size for your container. If you have a larger diameter container, opt for a thicker wick to ensure a proper melt pool.
- Fragrance Oil: The amount can be adjusted depending on how strong you want the scent. Generally, 1 oz per pound of wax is ideal.
- Test a Burn: Always test your candle before gifting or selling. Light it to see how well it burns and smells; this allows you to adjust for future batches.
Common Mistakes to Avoid
- Overheating Wax: Never exceed 185°F (85°C) as overheating can lead to poor fragrance retention and unsafe conditions.
- Not Letting It Cure: Don’t skip the curing time! It might be tempting, but allowing your candles to sit improves scent throw when burning.
- Using Non-Heatproof Containers: Avoid containers that can’t withstand heat as they could crack or break.
Variations and Customization Ideas
- Layered Candles: Create visual interest by pouring different colors in layers. Allow each layer to set slightly before adding the next.
- Herb Infusions: Add dried flowers or herbs to the wax for a rustic look, but ensure they are heat-resistant.
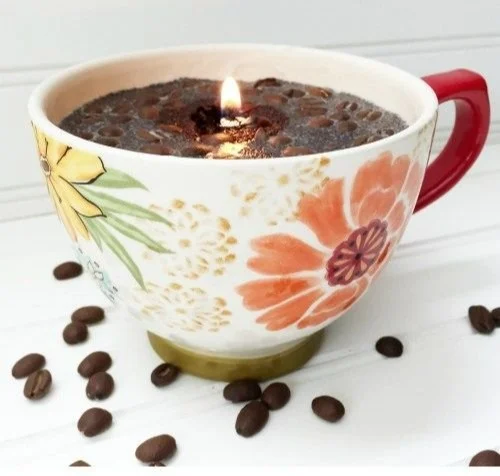
- Creative Containers: Use unique containers like teacups, mason jars, or ceramic bowls for a eclectic display.
Storage and Shelf Life
Store your candles in a cool, dry place away from direct sunlight. Properly stored, they should last for up to a year. Ensure lids or covers are placed on them to keep dust away.
Safety Tips
- Always work in a well-ventilated area when melting wax and handling fragrance oils.
- Wear gloves and goggles to avoid skin contact and protect your eyes.
- Never leave melting wax unattended and keep flammable materials away from the stovetop.
Frequently Asked Questions
1. Can I use any type of wax for my candles?
Yes, you can use soy, beeswax, or paraffin wax depending on your preference. Each has its own properties that affect burn time and scent throw.
2. How do I choose the right wick size?
Wicks come in various sizes. A rule of thumb is to select a wick that matches the diameter of your container. If unsure, refer to a wick sizing guide based on the wax type.
3. Why is my candle not burning evenly?
Improper wick size, adding too much fragrance, or not allowing sufficient cooling time can cause uneven burns. Test different sizes and fragrance amounts to find the perfect balance.
4. Can I reuse old candle wax for new candles?
Yes! Old candle wax can be melted down and reused, although you may need to add new fragrance oils.
5. What should I do if my candle has a sinkhole?
If you see a sinkhole after cooling, reheat some extra wax and pour it over the area to fill in the hole for a smooth finish.
Conclusion
Making your own candles is not just a fun and rewarding project, it’s a way to infuse your home with warm, personalized scents that reflect your style. With simple ingredients and a little creativity, you can craft beautiful, fragrant candles that will light up your space. So, gather your supplies and start experimenting—there’s no limit to what you can create! Enjoy your candle-making adventure!