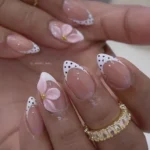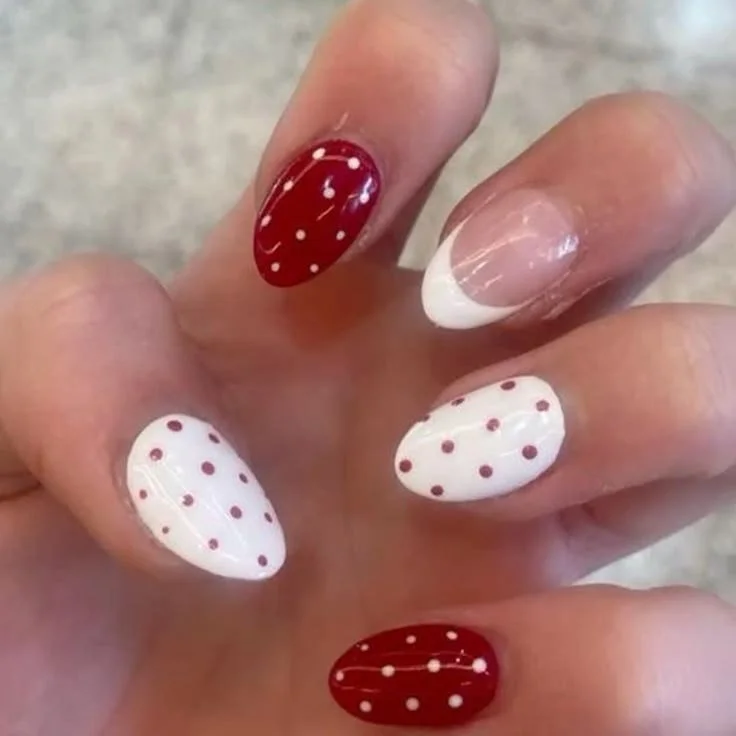

Red and White Polka Dot Nails That You Will Adore
Nail art often reflects how we express ourselves, and what better way to show off your playful side than with a fun and dainty red and white polka dot nail design? This chic yet easily wearable nail art can fit any occasion—from casual outings to festive events—making it a must-try for your next manicure. If you’re looking for inspiration that combines creativity with a touch of sweetness, dive into the world of polka dots!
Why You Will Love These Nails
There’s something inherently joyful about red and white polka dot nails. Their vibrant color palette paired with playful patterns attracts attention while maintaining an air of sophistication. Whether you’re gearing up for a summer picnic or sprucing up for a holiday gathering, this nail design is not only versatile but also a great conversation starter!
The Playful Color Palette
- Red: The color of passion, red is bold and eye-catching, making it the perfect base for your polka dot adventure.
- White: A fresh and clean color, white beautifully complements red, creating that classic polka dot look that is both timeless and trendy.
What You Need
To recreate the stunning red and white polka dot nails, here’s a list of essential items you’ll find helpful:
- Red nail polish
- White nail polish (nail art pen is a great alternative too!)
- Top coat for shine and protection
- Dotting tools (or a toothpick for a simple DIY version)
- Base coat for lasting wear
- Nail remover and cotton pads for cleanup
How to Recreate the Look
Creating beautiful red and white polka dot nails doesn’t require a professional nail technician. Follow these simple steps to achieve your desired look:
- Prep Your Nails: Start by trimming and shaping your nails to your preferred length and shape (choose between almond or square).
- Apply Base Coat: Use a base coat to protect your natural nails and help your polish adhere better.
- Choose Your Base Color: Apply two coats of red nail polish, allowing each layer to dry thoroughly.
- Add Polka Dots: Using a dotting tool or a toothpick dipped in white polish, carefully create polka dots on each nail. Vary the sizes for a playful touch!
- Accent Nails: For added flair, consider applying polka dots only on a couple of accent nails and leaving the rest solid red.
- Top it Off: Seal your design with a glossy top coat to enhance shine and durability.
Best Nail Shapes for This Design
While red and white polka dot nails look fantastic on any shape, certain styles can accentuate their playful nature:
- Almond Nails: The soft, rounded shape allows for an elegant look that pairs beautifully with whimsical designs like polka dots.
- Square Nails: A chic choice, square nails provide a modern twist while offering ample space for dot placement.
Best Nail Length
When selecting the best length for your polka dot nails, consider the following:
- Short Nails: Ideal for an understated yet chic look. Polka dots will still stand out and make an impact without overwhelming smaller nail beds.
- Medium Length Almond: Provides the perfect canvas for creativity while remaining practical for daily wear.
Cute Variations to Try
Variations on red and white polka dot nails can give you an entirely fresh look. Here are some fun ideas:
- Metallic Accents: Add some gold or silver metallic accents alongside your polka dots for an extra touch of glamour.
- Colorful Tips: Instead of a solid red base, try a French tip with red on the ends and white polka dots on the main nail surface.
- Ombre Effect: Start with a solid red base and create an ombre effect that fades into white with polka dots on the white side.
Nail Designs for Different Occasions
Red and white polka dot nails can be a delightful choice for various occasions:
- Casual Days: Perfect for brunches, coffee dates, or day trips.
- Holiday Celebrations: Spice up your holiday gatherings with this festive design.
- Themed Parties: Bring out your playful side at summer picnics or Fourth of July celebrations.
Seasonal Ideas
While this design is certainly year-round, consider how you can tweak it for various seasons:
- Spring/Summer: Keep the bright red and white tones and incorporate floral elements.
- Fall/Winter: Opt for a deeper red with added glitter accents to complement cooler seasons.
Beginner Tips
If you’re new to nail art, here are some beginner-friendly tips for successful red and white polka dot nails:
- Practice Makes Perfect: If you’re unsure about your dotting technique, practice on a piece of paper before attacking your nails.
- Keep Your Tools Clean: Clean your dotting tool or toothpick frequently to ensure even and consistent dots.
- Start Small: If you’re nervous about applying dots, start with fewer dots or smaller sizes.
How to Make Your Manicure Last Longer
Nothing is worse than chipped nail polish soon after your glamorous manicure! Here are tips to keep your design looking fabulous longer:
- Use a Base and Top Coat: Always start with a base coat and finish with a top coat. This provides a protective layer.
- Avoid Hot Water: Minimize exposure to hot water for the first few hours after application to help set your polish.
- Moisturize Your Cuticles: Keep your cuticles healthy by applying cuticle oil regularly.
Frequently Asked Questions
Can I use gel polish for red and white polka dot nails?
Absolutely! Gel polish provides durability and a beautiful finish, though the same techniques apply.
What are the best nail beds sizes for a polka dot look?
Nail beds come in sizes ranging from XS to L. Smaller beds work well with shorter nails and fewer dots, while larger beds can carry more extensive designs.
Conclusion
Red and white polka dot nails are an exciting and adaptable design that anyone can appreciate. Whether you opt for a simple dot accent or go all out with a full polka dot manicure, you’re sure to make a stylish statement. So why wait? Gather your supplies, choose your preferred nail shape and length, and embark on your nail art journey. Don’t forget to save these ideas for your next manicure! Happy manicuring!