
Light Up Your Life: A Beginner’s Guide to Making Homemade Candles
If you’ve ever walked into a room filled with the warm glow of candlelight and the tantalizing scents wafting through the air, you understand just how transformative a candle can be. Making your own candles is a rewarding project that allows you to customize scents and colors while ensuring that the ingredients are safe and natural. Dive into this guide to learn how to create your own homemade candles, and discover the joy of candle-making as both a rewarding hobby and a thoughtful gift-giving option.
Why You Will Love This Recipe
Creating your own scented candles at home can be an incredible experience. Not only do they fill your space with delightful aromas, but they also add a cozy ambiance to any setting. Homemade candles are perfect for self-care routines, gifts for friends and family, or even just to enhance your own living space. Plus, making candles at home is often more economical than buying pre-made options, especially when you can control the quality of the ingredients you use.
Ingredients
To make your own candles, you’ll need:
- Wax:
- 16 ounces Soy wax (or Paraffin wax if desired)
- Fragrance Oil (optional):
- 1-2 ounces, depending on how strong you want the scent.
- Dye (optional):
- Candle dye chips or liquid dye for coloring.
- Wicks:
- 2-3 Cotton or wood wicks, depending on the size and type of your containers.
- Container:
- Heat-resistant containers or jars for your candles.
Equipment
Gather the following equipment before you start:
- Double boiler or microwave-safe bowl
- Thermometer (preferably a candy thermometer)
- Stirring utensil (like a wooden spoon or stick)
- Wick holder or chopstick (to keep the wick centered)
- Scale (for accurate measurement)
- Safety gloves (optional)
Step-by-Step Instructions
Step 1: Prepare Your Workspace
- Clean your area: Ensure you have a clean, flat surface to work on.
- Lay out your equipment and ingredients: Have everything within reach.
Step 2: Measure and Melt the Wax
- Weigh the wax: Measure out 16 ounces of soy wax (or your chosen wax) using your scale.
- Melt the wax:
- If using a double boiler: Fill the bottom pot with water and place it on the stove over medium heat. Place your wax in the top bowl and allow it to melt slowly.
- If using a microwave: Heat the wax in 30-second increments, stirring in between, until fully melted.
Step 3: Add Color and Fragrance
- Check the temperature of the wax: Use your thermometer to ensure it’s between 170°F and 180°F before adding any dye.
- Add dye: If you want colored candles, add dye chips or liquid dye and stir until fully dissolved.
- Incorporate fragrance: Once the wax has reached approximately 185°F, add your fragrance oil and mix well.
Step 4: Prep the Wick
- Attach the wick: Use a bit of melted wax or a wick sticker to secure the wick to the bottom of your container.
- Center the wick: Use a chopstick or wick holder to keep the wick centered while you pour.
Step 5: Pour the Wax
- Let the wax cool slightly: Allow it to cool to about 150°F before pouring.
- Pour the wax into the container: Slowly pour the wax into your prepared container, being careful not to splash.
Step 6: Allow to Set
- Let the candle cool: Allow the candle to cool completely at room temperature, which may take several hours.
- Trim the wick: Once cool, trim the wick to about 1/4 inch above the surface of the candle.
Tips for Success
- Choose the right wick size: The size of your wick will affect how well the candle burns. If you’re unsure, refer to a wick sizing chart for guidance.
- Test burn: If you plan to make multiple candles, consider testing a small batch first to see how well they burn.
- Temperature control: Pay attention to the temperatures when adding fragrance and pouring. This ensures even burning and scent throw.
Common Mistakes to Avoid
- Pouring at too high a temperature: This can create sinkholes or uneven tops in your candle.
- Overloading with fragrance: Too much fragrance can cause poor burning and smoking.
- Using the wrong wick size: This can lead to drowning the wick or excessive soot.
Variations and Customization Ideas
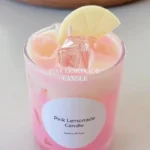
- Layered Candles: Create multiple layers by pouring in different colors or scents once each layer has set slightly.
- Scent Blending: Experiment with blending fragrance oils. Try mixing vanilla with citrus for a fresh twist.
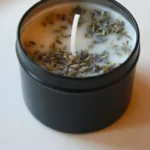
- Add Natural Elements: For an extra touch, embed dried flowers or herbs into the candle wax.
Storage and Shelf Life
Store your finished candles in a cool, dry place away from direct sunlight. They typically have a shelf life of 6 months to a year if kept properly.
Safety Tips
- Always melt wax in a well-ventilated area.
- Be cautious with hot wax and equipment; burns can occur.
- Don’t leave burning candles unattended, and keep them away from flammable materials.
Frequently Asked Questions
1. Can I use essential oils instead of fragrance oils?
Yes! However, note that essential oils may have a weaker scent when burned compared to synthetic fragrance oils. Test for desired strength.
2. How do I know what wick size to use?
Refer to a wick size chart based on the diameter of your container and the type of wax you’re using.
3. What should I do if my candle won’t burn?
Check that the wick is trimmed to the correct height and that the wax isn’t pooling or drowning the wick. You might also need a larger wick.
4. Can I reuse old candles?
Yes, you can melt down old candles and pour them into a new container, adding fragrance if necessary.
5. Why is my candle uneven?
This could be due to uneven pouring temperatures or wicks that are too small for the size of your container. Always ensure your wick is appropriately sized and your temperatures are correct.
6. What’s the best wax for beginners?
Soy wax is a great choice for beginners as it’s easy to work with, burns cleanly, and holds scent well.
Conclusion
Making your own homemade candles is not only fun but also incredibly satisfying. You control everything from scent to color, allowing for complete customization. Plus, homemade candles make thoughtful gifts, perfect for any occasion. So gather your materials, roll up your sleeves, and illuminate your space with your very own DIY creations! Happy candle-making!