
Homemade Soap and Candle-Making: A Beginner’s Guide
Creating your own homemade soap and candles can be an exciting and rewarding hobby. Not only does it allow you to express your creativity, but it also enables you to craft personalized gifts for friends and family. In this comprehensive guide, you will learn various soap-making and candle-making techniques, with easy-to-follow instructions and tips. So let’s dive in!
Why You Will Love This Recipe
Making soap and candles is not just about creating beautiful products; it’s about designing something uniquely yours. You can customize scents, shapes, and colors to create items that reflect your style or the preferences of your loved ones. Additionally, your handmade gifts are often seen as more thoughtful and personal. Plus, you’ll enjoy the satisfaction of using your creation in your daily life or giving them as special gifts.
Ingredients for Homemade Soap
For this guide, we will focus on the cold process method for making natural soap. Cold process soap is made by mixing oils with sodium hydroxide (lye) to create saponification. Here’s what you will need:
Soap Ingredients
- Lye (Sodium Hydroxide): 4 oz (113 grams)
- Distilled Water: 12 oz (340 grams)
- Olive Oil: 8 oz (227 grams)
- Coconut Oil: 8 oz (227 grams)
- Palm Oil: 8 oz (227 grams)
- Essential Oils (for scent): 1 to 2 oz (28-56 grams, optional)
- Colorants (optional): Mica powders or natural colorants in desired quantities
Ingredients for Homemade Candles
For candle-making, we’ll focus on creating basic scented soy candles, an ideal choice for beginners because of their ease of use and good scent throw.
Candle Ingredients
- Soy Wax Flakes: 1 lb (450 grams)
- Fragrance Oil: 1-2 oz (28-56 grams, depending on the strength desired)
- Candle Wicks: Appropriate for your container size (use cotton or wood wicks)
- Containers: Glass jars or metal tins (ensure they can withstand heat)
Equipment Needed
Soap-Making Equipment
- Digital Scale: For precise measurements
- Thermometers: To monitor temperature
- Mixing Bowls: For combining your ingredients
- Stick Blender: For mixing oils and lye
- Soap Mold: Silicone molds or any container
- Safety Gear: Gloves and goggles for lye handling
Candle-Making Equipment
- Double Boiler: For melting the wax, or a microwave-safe container
- Wick Holders: To keep the wick centered while pouring
- Thermometer: For checking wax temperature
- Stirring Utensil: A wooden spoon or silicone spatula.
Step-by-Step Instructions for Cold Process Soap
Preparation Time: 15 minutes
Making Time: 24 hours (includes curing)
Approximate Yield: About 10-12 bars of soap
Prepare Your Workspace: Ensure your work area is clean, and gather all your ingredients and equipment. Put on your safety gear (gloves and goggles).
Measure the Ingredients: Use a digital scale to measure your lye and distilled water separately. Make sure to do this in a well-ventilated area.
Mix the Lye Solution: Carefully add the lye to the distilled water (never the other way around), stirring gently until dissolved. This mixture will heat up and emit fumes, so allow it to cool in a well-ventilated area.
Measure and Melt the Oils: Weigh your olive, coconut, and palm oils. Melt the coconut oil in a saucepan on low heat. Once melted, combine it with the other oils in a mixing bowl.
Combine the Mixtures: Wait until the lye solution and the oils are both around 100°F (38°C). Slowly pour the lye mixture into the oils. Use a stick blender to mix until it reaches "trace," a light pudding-like consistency.
Add Scents and Colors: If desired, mix in your essential oils and colorants. Blend thoroughly.
Pour into Mold: Transfer the soap mixture into your mold, smoothing the top as needed. Cover with plastic wrap and a towel to insulate.
Cure: Let it sit for 24-48 hours until hardened. Once solid, remove from the mold and cut into bars.
Cure Again: Place the bars on a drying rack and allow them to cure for 4-6 weeks for the lye to fully neutralize.
Step-by-Step Instructions for Homemade Candles
Preparation Time: 10 minutes
Making Time: 2 hours
Approximate Yield: 4-5 candles (depending on container size)
Prepare Your Workspace: Choose a flat, clean surface and lay out all materials. Use old newspaper or a silicone mat for easy cleanup.
Measure the Wax: Weigh out 1 lb (450 grams) of soy wax flakes.
Melt the Wax: Using a double boiler, heat the wax on low to medium heat. Stir occasionally until completely melted. Alternatively, you can use a microwave-safe container, heating in 30-second intervals.
Add Fragrance Oil: Once melted, remove the wax from heat and let it cool slightly (about 140°F to 150°F or 60°C to 65°C) before adding your fragrance oil. Stir well to incorporate.
Secure the Wick: Attach your wick to the bottom of the container using a bit of melted wax or a wick sticker. Ensure it stands upright, ideally using a wick holder.
Pour the Wax: Carefully pour the wax into the containers, leaving a small space at the top. Hold the wick in place to keep it centered.
Cool and Set: Allow the candles to cool at room temperature. They may take a few hours to harden completely.
Trim the Wicks: Once cooled, trim the wicks to ¼ inch above the wax surface.
Tips for Success
Cold Process Soap: Ensure your lye is fresh and accurate measurements are taken. Monitor temperatures closely.
Candle Making: Choose the right wick size for your container and wax. Testing a small batch is wise before making larger amounts.
Common Mistakes to Avoid
- Using Additional Water: Avoid adding extra water beyond what the recipe calls for in soap making; it can alter your batch.
- Skipping Safety Gear: Always wear gloves and goggles when working with lye, and work in a well-ventilated area.
Variations and Customization Ideas
For Soap: Experiment with different oils (like almond or avocado), natural colorants (like turmeric or activated charcoal), or even add botanicals like dried lavender or oatmeal for texture.
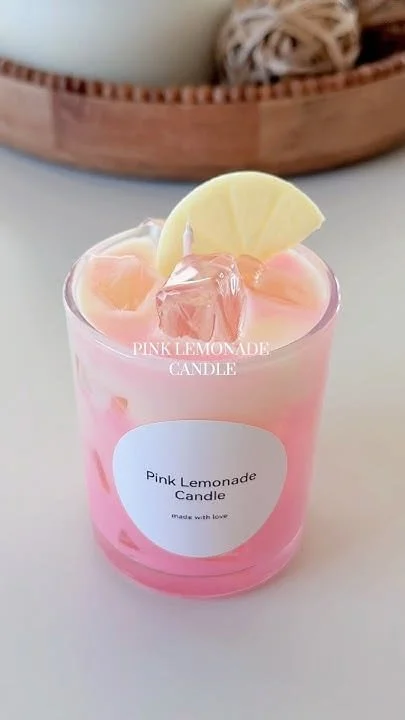
For Candles: Get creative with layering different colored waxes, using essential oils for unique scents, or adding dried flowers to the wax.
Storage and Shelf Life
Soap: Store your finished and cured soap bars in a cool, dry place away from direct sunlight. Properly made soap can last for over a year.
Candles: Store candles in a cool, dark place. Heat can affect the fragrance and the wax. Properly poured soy candles can have a shelf life of around 1-2 years.
Safety Tips
- Always mix lye in a well-ventilated area and wear protective goggles and gloves. Store lye away from children and pets.
- When pouring candles, ensure the temperature of the wax is safe. Too hot can lead to smoking or fire risks.
Frequently Asked Questions
1. Can I use essential oils instead of fragrance oils in candles?
Yes, but check their compatibility; not all essential oils work well for scent retention in candles.
2. How can I fix soap that didn’t trace?
You can reheat the soap and blend it again if it hasn’t traced fully.
3. What should I do if my candle has a lumpy top?
This is usually due to cooling too quickly; try remelting the top layer and smoothing it out.
4. Can I use kitchen oils for soap making?
Yes, but some oils are better than others. Make sure to check how they behave in saponification.
5. Why did my soap turn out too soft?
Your lye measurement might be off or too much water could have been used. Be sure to measure accurately.
6. How do I know if my candles are unsafe to burn?
Always conduct a wick test: if the candle smokes excessively or the wick keeps burning down too fast, it may not be safe.
Conclusion
Making homemade soap and candles is a fantastic way to explore your creativity while crafting functional and personal items. By following these simple steps, tips, and guidelines, you can easily dive into the world of DIY soap and candle-making. So gather your supplies, unleash your creativity and enjoy the sweet satisfaction of creating something truly special!