
Melt and Pour Soap with Sweet Orange and Cinnamon Oil
Creating your very own melt and pour soap infused with sweet orange and cinnamon oil is a delightful DIY project that offers both a rewarding experience and a wonderful product. This homemade soap adds warmth and cheer to any room, making it a great choice for showers, weddings, or thoughtful hostess gifts. Let’s dive into this easy-to-follow recipe that even beginners can master!
Why You Will Love This Recipe
This melt and pour soap recipe not only smells incredible; it also embodies the cozy ambiance we often seek in our homes. The bright citrus notes of sweet orange combined with the warm spiciness of cinnamon create a comforting and inviting atmosphere. Plus, this simple technique requires no complicated equipment or prior soap-making experience—just melt, pour, and let set!
Ingredients
To get started, gather the following ingredients:
- Melt and Pour Soap Base: 1 pound (choose glycerin, shea butter, or goats milk based on your preference)
- Sweet Orange Essential Oil: 1 teaspoon
- Cinnamon Essential Oil: ½ teaspoon
- Optional Colorant: A few drops of orange or brown soap colorant (if desired)
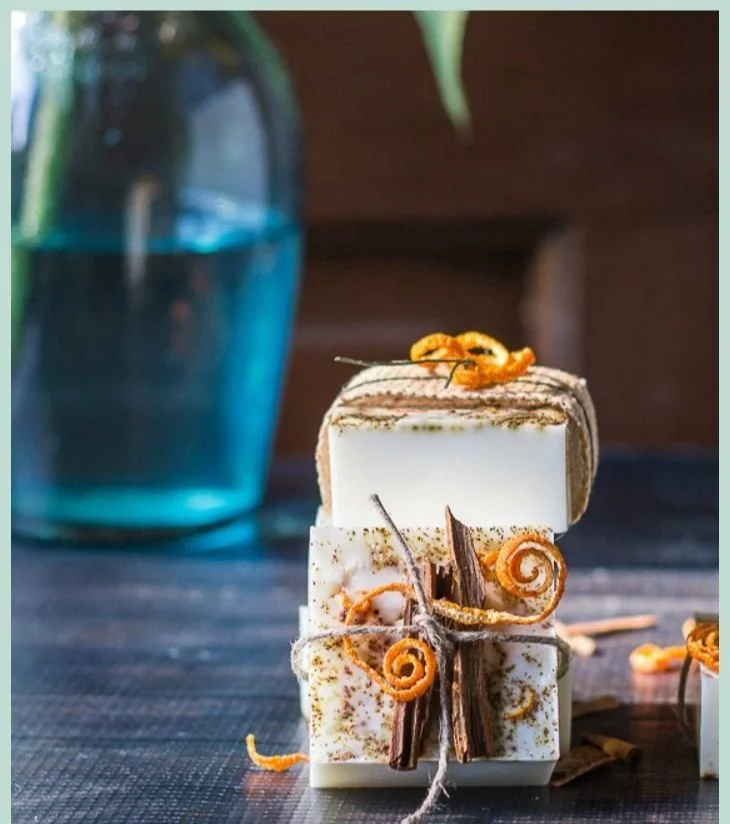
- Optional Add-ins: Dried orange peel, cinnamon powder, or other botanicals for decoration (use sparingly)
Equipment
Here’s what you need for this project:
- Microwave-safe measuring cup or bowl
- Soap mold (silicone molds work well)
- Stirring utensil (a wooden stick or spoon)
- Digital scale (to measure the soap base accurately)
- Safety goggles and gloves (for protection)
Step-by-Step Instructions
Follow these straightforward steps to create your melt and pour soap:
Step 1: Prepare Your Work Area
Clean your workspace and gather all your ingredients and equipment. It’s essential to have everything on hand for a smooth workflow.
Step 2: Cut the Soap Base
Using a digital scale, measure 1 pound of your chosen melt and pour soap base. Cut it into small cubes (about 1-inch) to help it melt more evenly.
Step 3: Melt the Soap Base
Place the soap cubes into a microwave-safe measuring cup or bowl. Heat the soap base in the microwave in 30-second intervals, stirring in-between until it is completely melted. Be cautious not to overheat; if small bubbles form, it may be too hot.
Step 4: Add Fragrance and Color
Once melted, remove the bowl from the microwave. Allow it to cool slightly before adding sweet orange and cinnamon essential oils. Stir gently to combine. If you’re using soap colorant, add a few drops and mix thoroughly.
Step 5: Add Optional Ingredients
If you opt for dried orange peel, a pinch of cinnamon powder, or other botanicals, add them at this stage. This is also the time to customize your soap with natural exfoliants or vibrant colors!
Step 6: Pour into Molds
Carefully pour the mixture into your prepared soap molds. Be mindful of bubbles forming on the surface. If they do, you can use a toothpick to poke them out.
Step 7: Let It Set
Allow the soap to sit at room temperature for about 3-4 hours until fully set. If you’re in a hurry, you can place the molds in the refrigerator for quicker solidification (approximately 30 minutes).
Step 8: Unmold
Once the soap is completely solid, gently pop it out of the molds. Be cautious if using harder molds; flexing them slightly may help release the soap.
Step 9: Cure and Store
Although melt and pour soap doesn’t require curing like cold process soap, it’s best to store your finished product in a cool, dry place, away from direct sunlight.
Tips for Success
- Measure Accurately: Accurate measurements ensure consistent results—invest in a digital scale for best practices.
- Avoid Overheating: High temperatures can damage the soap base and alter its texture. Always melt in intervals, stirring in between.
- Customize Wisely: If you want to play with colors or fragrances, add them sparingly and incrementally.
Common Mistakes to Avoid
- Rushing the Process: Patience is key. Allow the soap to cool and set completely before unmolding to avoid damage.
- Using Too Much Fragrance: Scent can be potent! Stick to recommended amounts for a balanced aroma without being overwhelming.
- Ignoring Safety Precautions: Always wear protective gear when handling essential oils, especially if you have sensitive skin.
Variations and Customization Ideas
- Scent Variations: Instead of sweet orange, try using lemon or lavender essential oils for a different aromatic experience.
- Color Themes: Create multi-layer soaps by pouring different colored bases in layers or adding a swirl effect.
- Holiday Editions: Add seasonal spice blends or colorants to align with holiday themes.
Storage and Shelf Life
Once your soap is made, store it in a cool, dry place. Wrapped in plastic wrap or kept in an airtight container, your melt and pour soap can last for up to 6 months. Keep it away from moisture to maintain its quality.
Safety Tips
- Always work in a well-ventilated area when using essential oils.
- Store your soap out of reach of children and pets due to added ingredients like whole spices or botanicals that could pose a risk.
Frequently Asked Questions
1. Can I use any type of soap base?
Absolutely! There are various types of melt and pour bases available— glycerin gives clear soap, while shea butter or goat’s milk adds moisturizing properties.
2. How do I fix soap that has bubbles on the surface?
If bubbles form while pouring, use a toothpick to pop them. Alternatively, a quick blast of heat from a heat gun can help eliminate surface bubbles.
3. Can I use fragrance oils instead of essential oils?
Yes, most fragrance oils are safe for use in melt and pour soap, but always check the manufacturer’s guidelines.
4. What do I do if my soap doesn’t set?
If your soap remains soft after cooling, it may not have been heated or mixed properly. Re-melting it slightly may help achieve a firmer texture.
5. How can I make my soap extra special as a gift?
Wrap the bars in decorative paper or tie them with twine. Add a personalized label with the ingredients and a simple care note.
Conclusion
Melt and pour soap with sweet orange and cinnamon oil is a fun, satisfying project that allows you to create personalized gifts or indulge yourself at home. Whether you’re a beginner or a seasoned DIY enthusiast, this easy recipe offers a cozy touch to your soap-making endeavors. Don’t hesitate to adapt it to your preferences—experiment with fragrances and designs to make it truly your own! Now it’s time to gather your supplies and start creating your fragrant masterpiece. Happy soaping!