
How to Make Your Own Homemade Irish Spring Soap
Creating your own homemade soap is a delightful experience that not only allows you to enjoy beautiful fragrances but also gives you the satisfaction of crafting something unique. If you love the invigorating scent of Irish Spring soap, you’re in for a treat! In this article, I’ll guide you through making your own version of this refreshing soap using the melt and pour method. This straightforward technique is perfect for beginners and will result in stunning, fragrant bars that will elevate your bath or shower routine.
Why You Will Love This Recipe
Irish Spring soap is known for its iconic, crisp fragrance and appealing green color. By making your own, you can control the ingredients, customize the scent, and add natural elements that suit your skincare needs. Plus, homemade soap makes a thoughtful, personal gift for friends and family. Whether you’re looking to pamper yourself or create beautiful gifts, this recipe will deliver both beauty and functionality.
Ingredients
To make your homemade Irish Spring soap, gather the following ingredients:
- Melt and Pour Soap Base (1 pound): You can choose a glycerin base, shea butter base, or a goat milk base depending on your preferences.
- Fragrance Oil (1 ounce): Look for a fragrance oil specifically inspired by Irish Spring or one that has a fresh, clean scent.
- Soap Colorant: About 5-10 drops (green color to capture the essence of Irish Spring).
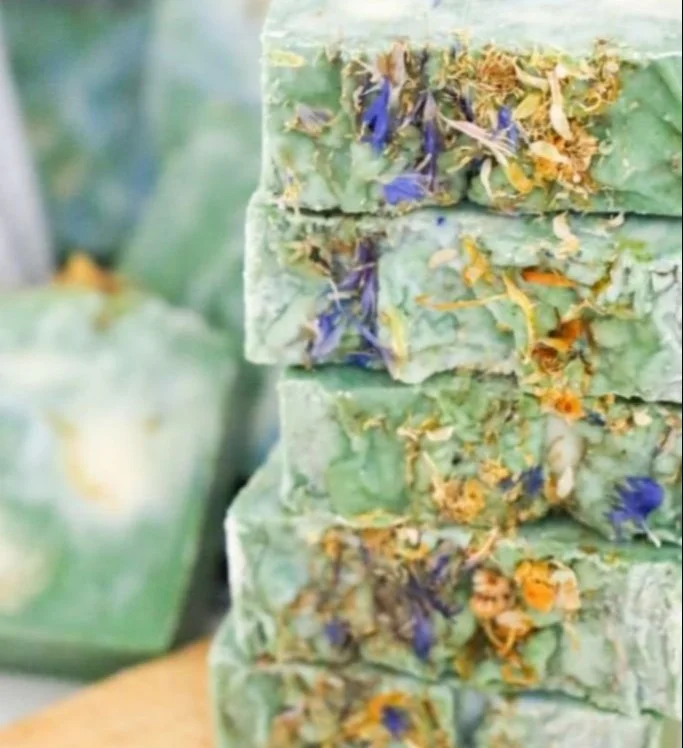
- Add-ins (optional): Dried herbs like peppermint or eucalyptus for added texture and aroma, a tablespoon of coconut oil for added moisture.
Equipment
Before you start the soap-making process, ensure you have the following tools:
- Microwave-safe bowl or double boiler: For melting the soap base.
- Soap mold: Silicone molds work best for easy release.
- Stirring spoon: A spatula or spoon for mixing.
- Measuring spoons: For precise ingredient measurements.
- Dropper: For adding colorant (if necessary).
- Thermometer: To check the temperature of the soap.
Step-by-Step Instructions
Follow these simple steps to create your homemade Irish Spring soap:
Prepare your workspace: Ensure your workspace is clean, and all your materials are within reach.
Melt the soap base:
- Cut the melt and pour soap base into small cubes to allow for even melting.
- Place the cubes in a microwave-safe bowl or a double boiler. If using a microwave, heat in 30-second increments, stirring in between, until fully melted. If using a double boiler, stir constantly until the soap base has melted completely.
Add fragrance and color:
- Once melted, remove the bowl from heat. Add the fragrance oil and stir well for an even distribution.
- Add the green soap colorant, a few drops at a time, while stirring until you achieve your desired shade.
Incorporate optional add-ins:
- If you are using coconut oil or any dried herbs, add them now and mix well.
Pour the soap into molds:
- Carefully pour the soap mixture into your chosen molds. Tap the mold gently to release any air bubbles.
Let the soap cool:
- Allow the soap to sit at room temperature until fully solidified, which usually takes about 1-2 hours. For quicker results, you can place the molds in the fridge for about 30 minutes.
Remove from molds:
- Once set, gently pull the soap bars from the molds. If you used silicone molds, they should pop out easily.
Tips for Success
- Temperature matters: Avoid overheating your soap base as it can cause a burnt smell or alter the properties of the soap.
- Stir well: Make sure to stir thoroughly after adding fragrance and color. This ensures an even scent and color distribution throughout your soap.
- Use a thermometer: If you’re unsure, aim for a temperature between 120°F to 140°F for adding scent and color.
Common Mistakes to Avoid
- Adding fragrance too early: Fragrance oils can evaporate if added while the soap base is too hot.
- Not mixing properly: Inadequate stirring can lead to streaks in the final product, resulting in uneven coloring and scent.
- Rushing the cooling process: Allow adequate time for the soap to harden completely before attempting to remove it from the molds.
Variations and Customization Ideas
Feel free to customize your Irish Spring soap recipe with these ideas:
- Different fragrances: Experiment with other essential oils like lemon or lavender for a unique twist.
- Layered soap: Pour different colored soap layers by allowing each to set slightly before pouring the next layer on top.
- Add textural elements: Mix in oatmeal or poppy seeds for a gentle exfoliating effect.
Storage and Shelf Life
Once your soap is complete, store it in a cool, dry place. Properly wrapped, the soap can last up to 6 months. Use parchment paper or tissue to wrap individual bars and place them in an airtight container to protect them from moisture.
Safety Tips
- Work in a well-ventilated area: This is particularly important when working with fragrance oils, which can have strong scents.
- Wear gloves: While melt and pour is generally safe, it’s always a good habit to protect your skin from potential irritants.
Frequently Asked Questions
1. Can I use essential oils instead of fragrance oils?
Yes! Essential oils can be used, but they may have a milder scent compared to concentrated fragrance oils.
2. Is there a specific type of soap base I should use?
It depends on your skin type and preferences. Glycerin is good for hydration, while goat milk is excellent for sensitive skin.
3. How can I fix my soap if it doesn’t harden properly?
If your soap appears too soft or greasy, it might not have had enough time to cool, or it may need to be melted down and remixed if the proportions are off.
4. Can I re-melt the soap base if I mess up the initial batch?
Absolutely! Melt and pour soap bases can be melted down several times if necessary.
5. How do I know if my fragrance oil is skin-safe?
Always check the supplier’s guidelines for each fragrance oil to determine if it’s suitable for soap-making.
6. Can I use molds that aren’t meant for soap making?
While you can use various containers, using silicone molds specifically for soap will yield the best results due to easy release.
Conclusion
Making your own homemade Irish Spring soap is not only a fun and creative DIY project but also a fantastic way to personalize your bathing experience. With its fresh, clean scent and beautiful appearance, you will love using your soap or gifting it to others. Follow the outlined steps, keep the tips in mind, and get crafting! You’ll find that once you dive into the world of soap-making, the possibilities are endless. Enjoy your crafting journey!