
Handmade Honey & Oatmeal Soap with Vanilla Essential Oil
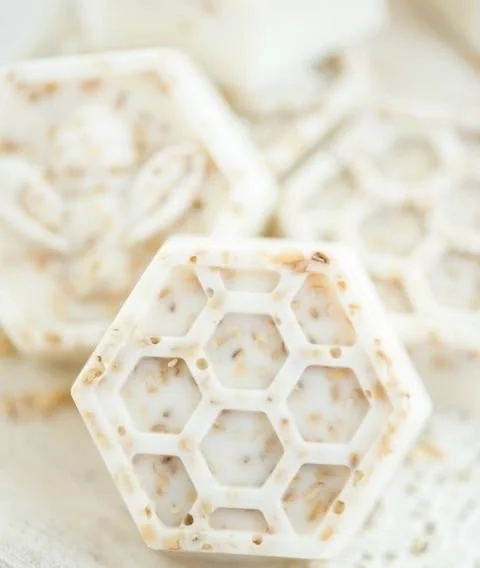
Making your own soap can be a rewarding and creative experience, especially when you infuse it with nourishing ingredients like honey and oatmeal. This particular recipe for handmade honey and oatmeal soap, shaped like adorable bees and honeycombs, will not only make your skin feel fantastic but also look delightful in your bathroom or as a thoughtful gift. Plus, the hint of vanilla essential oil gives it a soothing, sweet scent that will uplift your spirits.
Why You Will Love This Recipe
Creating your own soap allows you to control the ingredients, ensuring you use only natural and skin-loving components. Honey has hydrating properties, while oatmeal provides gentle exfoliation and soothes irritated skin. The added vanilla essential oil offers a warm, comforting aroma. This soap is perfect for all skin types and can serve as a beautiful gift for birthdays, holidays, or just because!
Ingredients
- Melt and Pour Soap Base (Goat’s Milk or Shea Butter): 1 pound
- Honey: 2 tablespoons (preferably raw for added nutrients)
- Ground Oatmeal: 2 tablespoons (ensure it’s finely ground for even texture)
- Vanilla Essential Oil: 10-15 drops (adjust for fragrance strength)
- Soap Colorant (optional): A few drops (choose yellow or amber for a honey-like appearance)
Equipment
- Microwave-safe bowl or double boiler for melting the soap base
- Soap molds: Honeycomb and bee-shaped molds (silicone works best)
- Stirring utensil (silicone spatula or a wooden spoon)
- Rubbing alcohol in a spray bottle: To eliminate bubbles on the surface
- Measuring spoons
- Digital thermometer (optional, but helpful for advanced users)
- Kitchen scale (if weighing specific amounts of ingredients is needed)
Step-by-Step Instructions
Prepare Your Workspace: Clean and dry your working surface. This keeps your soap-making process hygienic and efficient.
Cut the Soap Base: Chop the melt and pour soap base into small, even chunks for quicker melting.
Melt the Soap Base:
- Microwave: Place the chunks in a microwave-safe bowl and heat in 30-second intervals, stirring between each, until fully melted (usually takes about 1-3 minutes).
- Double Boiler: Heat gently over simmering water until melted, stirring occasionally.
Add Honey and Oatmeal: Once melted, remove from heat and quickly stir in the honey and ground oatmeal until fully combined.
Incorporate Essential Oil: Add the vanilla essential oil and stir thoroughly. If you’re using colorant, add it here until your desired hue is reached.
Pour into Molds: Carefully pour the soap mixture into your molds. Pour slowly to avoid creating air bubbles.
Spray Surface: Lightly spritz the tops of your soap molds with rubbing alcohol to eliminate any surface bubbles.
Let It Set: Allow the soap to cool completely. This can take around 1–2 hours at room temperature or can be hastened in the refrigerator.
Remove from Molds: Once solidified, gently pop the soaps out of their molds.
Cure the Soap: Although melt and pour does not need curing like cold-process soap, letting them sit for a day helps the scents to settle.
Tips for Success
- Work Quickly: The soap base can cool down and solidify fast once removed from heat, so be ready to add your ingredients and pour.
- Customize Fragrance: Feel free to mix essential oils such as lavender or citrus for a unique fragrance.
- Layering: If you want different layers, allow the first layer to set partially before pouring another color or mixture on top.
Common Mistakes to Avoid
- Overheating the Soap Base: This can cause the soap to burn or create a thick, unworkable texture.
- Not Mixing Well: Ensure the honey and oatmeal are fully integrated into the melted soap to avoid clumping.
- Skipping Alcohol Spray: Forgetting to spray for bubbles can leave an unappealing finish on your soap.
Variations and Customization Ideas
- Add Exfoliants: Besides oatmeal, you can use finely ground coffee or dried lavender buds for texture.
- Color Variations: Try different natural colorants such as turmeric for a yellow hue or spirulina for green.
- Herbal Infusion: Infuse your oils with herbs like chamomile or calendula for added benefits.
Storage and Shelf Life
Store your handmade honey and oatmeal soap in a cool, dry place, away from direct sunlight. An airtight container or a breathable soap dish is ideal. These soaps should last up to six months if stored properly.
Safety Tips
- Work in a well-ventilated area: If using any essential oils in larger quantities, ensure your area is well-ventilated.
- Protect your workspace: Cover surfaces with newspaper or work on a cutting board to facilitate easy cleanup.
Frequently Asked Questions
Can I use any type of honey?
While you can use any honey, raw honey is preferred because it retains more nutrients that can benefit the skin.
How do I know if my soap is fully set?
Soap is ready to be demolded when it is cool to the touch and firm enough to hold its shape without being sticky.
Can I make this soap in bulk?
Yes! You can easily multiply the ingredient quantities to make larger batches. Just make sure to keep an eye on the melting volume.
Is it safe to use on sensitive skin?
This soap is gentle and contains natural ingredients, making it suitable for most skin types. However, always perform a patch test if you have sensitive skin or allergies.
What can I do if my soap doesn’t fully harden?
If the soap remains tacky, it may not have cooled fully or may need to be remelted and poured again.
Conclusion
Handmade honey and oatmeal soap shaped like bees and honeycombs is a delightful project that not only beautifies your skin but also your home or as a handmade gift for someone special. With this easy guide, you can enjoy the satisfaction of creating your very own natural soap. Get started with this fun DIY project, and don’t forget to share your creations with family and friends! Enjoy your soapy adventure!