
A Fun Take on a Classic Treat: DIY Ice Cream Bar Artisan Soap
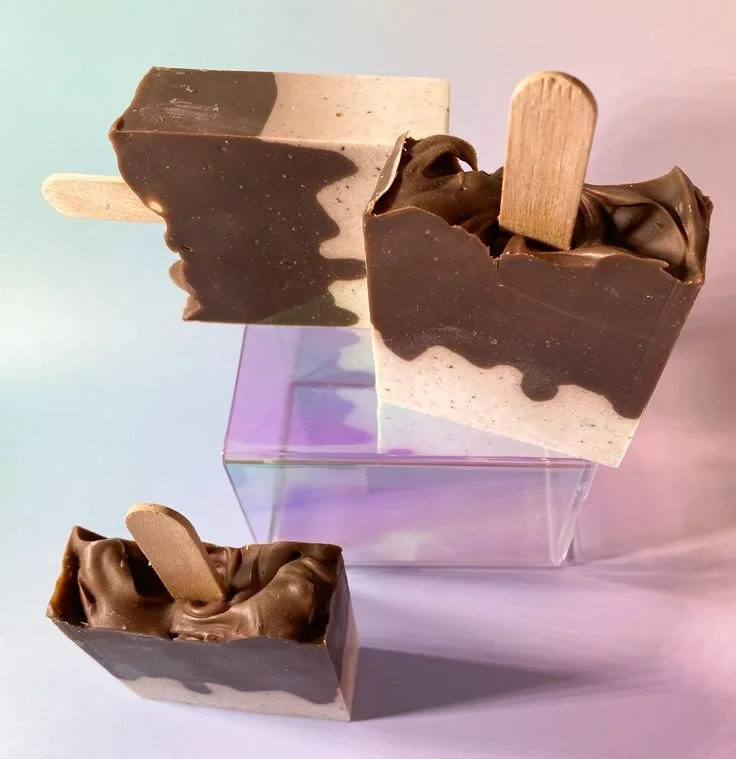
Creating your own artisan soap can be a delightful and rewarding experience, especially when it evokes the sweet memories of summer treats. In this guide, we’ll teach you how to make an ice cream bar artisan soap, infused with the decadent scent of chocolate, hints of sugary vanilla, and a sprinkle of coconut husk for mild exfoliation. This recipe is perfect for both hot and cold days, and includes a real popsicle stick for added charm. Not only will you learn the crafting process, but you’ll also discover tips, variations, and safety considerations for a successful soap-making experience.
Why You Will Love This Recipe
This homemade soap recipe brings together the joy of childhood treats and the therapeutic benefits of natural soap. With its fabulous scent and gentle exfoliating properties, you’ll love how your skin feels after using it. Plus, making your own soap is a wonderful way to personalize gifts for friends and family, allowing you to share a sweet piece of your DIY creativity.
Ingredients
Before diving in, gather the following ingredients:
- Organic Unrefined Coconut Oil: 10 oz (provides moisture and lather)
- Olive Oil: 8 oz (nourishes and softens the skin)
- Sustainable Palm Oil: 8 oz (adds hardness to the soap)
- Sunflower Oil: 6 oz (lightweight oil that absorbs quickly)
- Sodium Hydroxide (Lye): 4 oz (be sure to handle with care)
- Distilled Water: 10 oz (for mixing with lye)
- Coconut Milk: 4 oz (adds creaminess and nourishment)
- Avocado Oil: 4 oz (rich in vitamins for healthy skin)
- Shea Butter: 4 oz (moisturizes and nourishes)
- Castor Oil: 2 oz (creates a bubbly lather)
- Fragrance Oil: 1 oz (a mix of chocolate and vanilla)
- Coconut Husk: 2 tablespoons (for mild exfoliation)
- Kaolin Clay: 2 tablespoons (adds silkiness and absorbs oil)
- Sodium Lactate: 1 teaspoon (helps produce a firm bar)
- Mica & Titanium Dioxide: for coloring (optional)
Equipment
To make your ice cream bar artisan soap, you will need the following equipment:
- Digital scale: for precision in measuring ingredients
- Stick blender: to mix the oils and lye
- Thermometer: to monitor temperatures
- Glass or heat-resistant pitcher: to mix lye with water
- Safety goggles and gloves: for protective gear
- Soap mold: to shape your soap (a rectangular mold works well)
- Stirring spoon: for mixing
- Popsicle sticks: as fun additions to your soap
Step-by-Step Instructions
Prepare Your Work Area: Cover your workspace with newspaper or a drop cloth to catch any spills. It’s essential to have good ventilation.
Safety First: Put on gloves and goggles. Carefully measure the distilled water into a heat-resistant pitcher. We will add lye next, which can be dangerous if mishandled.
Mix the Lye Solution: Slowly add the sodium hydroxide to the distilled water, stirring gently until dissolved. Never add water to lye; always add lye to water. This mixture will get hot; let it cool to around 100°F.
Measure and Heat Oils: While your lye solution cools, measure out your oils (coconut, olive, palm, sunflower, avocado, and castor) and combine them in a separate pot. Heat the oils gently until they reach about 100°F.
Combine Lye and Oils: Once both the lye solution and oils are at the right temperature, slowly pour the lye solution into the oils while using the stick blender to blend them together. Blend until you reach a light trace (the mixture should thicken slightly).
Add Additives: Stir in the coconut milk, shea butter, kaolin clay, coconut husk, and sodium lactate. Mix well until fully combined.
Add Fragrance: Pour in the fragrance oil and mix thoroughly.
Coloring (Optional): If you wish to add color with mica or titanium dioxide, mix it in now to give your soap a fun hue.
Pour into Molds: Carefully pour the soap mixture into your mold. Gently tap the mold on the counter to remove air bubbles.
Insert Popsicle Sticks: Allow the soap to sit until it starts to harden slightly; then, insert your popsicle sticks.
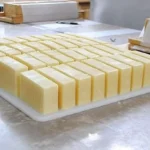
Cure: Cover the mold with a towel to insulate it and let it sit for 24-48 hours. Once solid, remove from the mold and cut into bars.
Tips for Success
- Accurate Measurements: Ensuring the weight of each ingredient is accurate is crucial for a successful soap batch.
- Temperature Monitoring: Aim for both your lye solution and oils to be around the same temperature (100°F) for proper emulsification.
- Check Trace: Light trace is ideal for pouring into molds; avoid mixing too long to prevent reaching a thick trace before pouring.
Common Mistakes to Avoid
- Inaccurate Lye Handling: Always use a lye calculator to ensure proper measurements. Incorrect ratios can lead to unsafe soap.
- Skipping Safety Gear: Never neglect proper safety equipment when handling lye. It’s critical for protection.
- Not Curing Properly: Ensure your soap cures for at least 4-6 weeks before using; this time allows the saponification process to complete and makes your soap milder on the skin.
Variations and Customization Ideas
Feel free to customize your soap by:
- Changing Fragrance: Experiment with different fragrance oils like mint, peach, or citrus.
- Adjusting Exfoliation: Substitute coconut husk with oatmeal, ground coffee, or poppy seeds for a different texture.
- Using Different Oils: You can adjust the base oils according to availability or personal preference.
Storage and Shelf Life
Store your finished soap in a cool, dry place away from direct sunlight. Wrap bars in paper or store them in a cardboard box. Properly cured and stored, your soap can last for up to a year.
Safety Tips
- When working with lye, always have vinegar nearby; it can neutralize lye in case of spills.
- Ensure good ventilation in your workspace, as the fumes from lye can be irritating.
- Never leave lye unattended, especially if there are children or pets around.
Frequently Asked Questions
Q: Can I make this soap without using lye?
A: No, lye is essential in the saponification process. Without it, soap cannot be produced. However, you can use a melt-and-pour base if you prefer to avoid lye.
Q: How can I make my soap more colorful?
A: You can add natural colorants like beet powder, activated charcoal, or various micas to get vibrant hues in your soap.
Q: Is it safe for sensitive skin?
A: Yes, but always do a patch test first with any new soap product, especially if you have sensitive skin.
Q: What is the best way to cut my soap into bars?
A: Use a sharp, straight knife or a soap cutter for clean edges. Let it dry a bit before cutting to make it easier.
Q: How should I label my soap for gifts?
A: Include the ingredients, scents, and a caution about the lye for those with sensitivities. A classy label adds a personal touch!
Conclusion
Crafting your own ice cream bar artisan soap is not only a fun and creative outlet but also an excellent way to embrace DIY beauty projects. With its delightful aroma and unique exfoliating properties, this soap is bound to become a favorite. Whether you’re using it at home or gifting it to loved ones, the charming popsicle stick adds an extra layer of whimsy to the experience. Enjoy your soap-making adventure, and don’t forget to share your creations with others! Happy crafting!