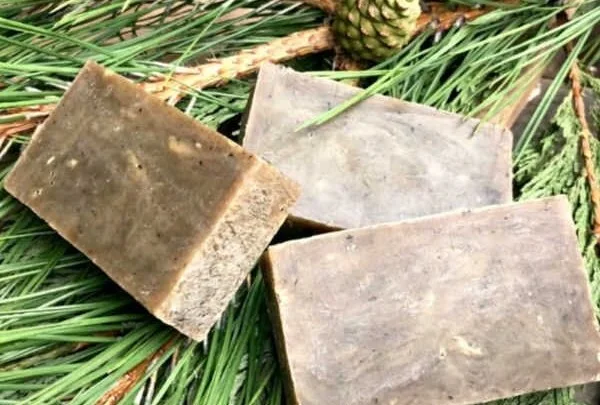

Homemade Soap Recipe Your Man Will Love: Pine and Cedarwood
Making homemade soap can be a rewarding experience, especially when you can craft a bar that resonates with someone special. This recipe for pine and cedarwood soap incorporates woodsy scents that many men adore. It’s not only a thoughtful gift but also a way to introduce him to the world of natural self-care. Let’s get started!
Why You Will Love This Recipe
This pine and cedarwood soap recipe blends rich, earthy fragrances with nourishing oils, making it perfect for a man who loves nature. You’ll enjoy the process of creating a thoughtful gift while exploring the art of soap-making. With a few easy steps, you can produce a luxurious, handmade soap that’s free from synthetic ingredients and packed with skin-loving benefits.
Ingredients
For this pine and cedarwood soap, you will need:
- Base Oils
- 12 oz Olive Oil
- 8 oz Coconut Oil
- 8 oz Palm Oil
- Essential Oils
- 1 oz Pine Essential Oil
- 1 oz Cedarwood Essential Oil
- Sodium Hydroxide (Lye)
- 4.5 oz (Note: the exact amount of lye must be calculated based on the exact weight of your oils using a safe soap calculator.)
- Water
- 11 oz Distilled Water
Equipment
To make this soap, gather the following equipment:
- Safety goggles
- Gloves
- Kitchen scale
- Stick blender
- Glass or heat-resistant plastic container for lye
- Plastic or stainless-steel mixing bowl
- Soap mold
- Thermometer
- Measuring spoons
- Plastic spatula
- Optional: Apron to protect clothing
Step-by-Step Instructions
Preparation Time: 15 minutes
Making Time: 2 hours
Yield: Approximately 10 bars of soap
Prepare Your Workspace: Ensure that your work area is clean and well-ventilated. Put on your gloves and goggles for safety.
Measure Ingredients: Using your kitchen scale, measure out the oils and lye separately. It’s essential to be precise in these measurements.
Mix the Lye Solution:
- In a heat-resistant container, add the lye to the distilled water (never the other way around). Stir gently until the lye is fully dissolved. This mixture will heat up and release fumes, so do this in a well-ventilated area.
- Let this sit until it cools to about 100-110°F.
Melt the Oils:
- In a mixing bowl, combine the olive, coconut, and palm oils.
- Heat the oils until they are just melted, then allow them to cool to about 100-110°F, similar to the lye solution.
Combine Lye and Oils:
- Once both the lye solution and oils are at the right temperature, slowly pour the lye into the oils while blending with a stick blender. Mix until you reach “trace,” which means the soap has thickened to a pudding-like consistency.
Add Essential Oils:
- At trace, stir in the pine and cedarwood essential oils. Mix thoroughly to ensure the scent is evenly distributed.
Pour into Mold:
- Pour the soap mixture into your mold. Gently tap the mold to remove any air bubbles.
Insulate:
- Cover the mold with a towel or blanket to allow the soap to saponify. Let it sit for 24-48 hours.
Unmold and Cut:
- Once the soap has hardened, remove it from the mold. Cut it into bars using a sharp knife.
Cure the Soap:
- Place the cut bars on a drying rack or in an airy box for 4-6 weeks. This allows the soap to fully cure and become milder on the skin.
Tips for Success
- Patience is Key: Allow the soap to cure completely. Cutting or using it too soon can lead to skin irritation.
- Accurate Measurements: Use a reliable soap calculator to adjust lye amounts based on the oils used. It’s the safest approach.
- Keep It Simple: If you’re new to soap-making, try this recipe first before experimenting with additives like colorants or herbs.
Common Mistakes to Avoid
- Rushing: Don’t skip the waiting period after making the lye solution. Always allow it to cool down.
- Using Metal Containers: Avoid using metal containers for mixing lye, as it can cause a reaction; stick to glass or heat-resistant plastic.
- Ignoring Safety: Always use protective gear when handling lye, and keep it away from children and pets.
Variations and Customization Ideas
- Add Color: Use natural colorants like spirulina or activated charcoal for added visual appeal.
- Herbal Additions: Consider incorporating dried herbs like rosemary or pine needles for texture and additional scent.
- Different Essential Oils: Substitute with other woody scents like sandalwood or patchouli for a different aromatic profile.
Storage and Shelf Life
Store your completed soap bars in a cool, dry place away from direct sunlight. When kept properly, they should last for up to a year.
Safety Tips
- Always wear safety goggles and gloves when working with lye.
- Work in a well-ventilated area to avoid inhaling lye fumes.
- Store lye and sodium hydroxide safely, keeping them out of reach of children and pets.
Frequently Asked Questions
1. Can I use scented oils instead of essential oils?
Yes, but do ensure that the oils are soap-safe and will work well in cold process soap.
2. What if my soap is too soft?
This can occur if it hasn’t cured long enough or if there wasn’t enough lye. Let it cure fully and check measurements next time.
3. Can I make this soap without lye?
No, lye is essential in the saponification process needed to create soap from oils. It’s crucial for making traditional soap.
4. How can I tell if my soap has reached trace?
When you lift the blender out of the mixture, the soap should remain on the surface for a few seconds before sinking back in.
5. Can I freeze leftover soap scraps?
Yes, you can save soap scraps for future projects, but ensure they are dry and free of moisture before freezing.
6. How do I know if my soap is safe?
If you’ve calculated everything accurately, used proper safety equipment, and followed a reliable recipe, your soap should be safe to use.
Conclusion
DIY soap-making is an enjoyable and creative endeavor. This pine and cedarwood soap recipe offers a unique way to craft a personal gift that your man will love. With attention to detail and safety, you’ll gain confidence in your soap-making skills. So gather your materials, follow the steps, and enjoy the process of creating something beautiful and functional! Happy crafting!