
Artisan Cocktail-Inspired Melt and Pour Soap Project
Introduction
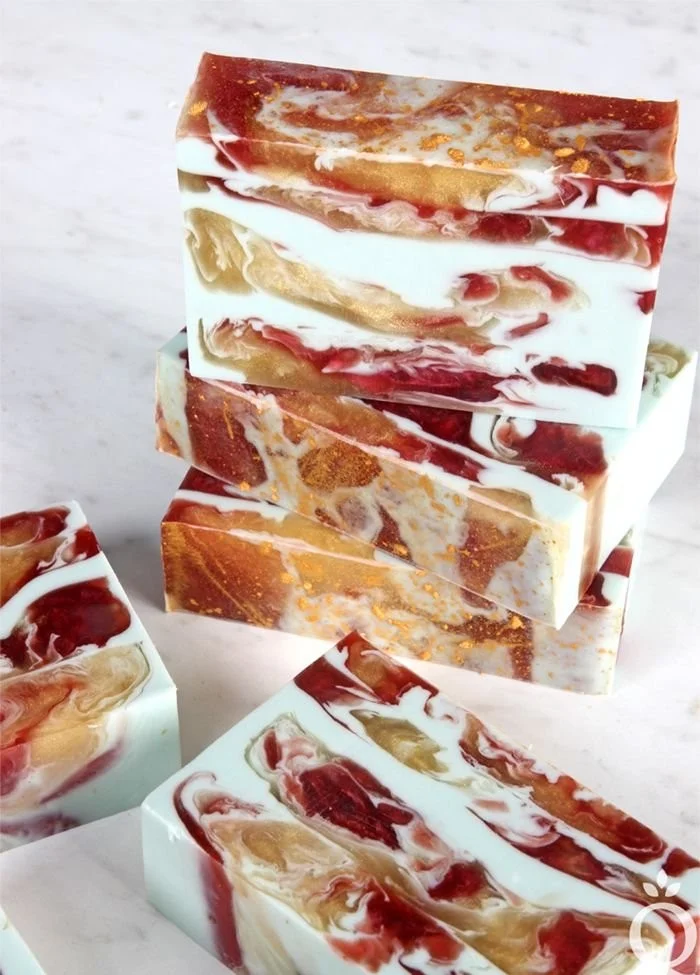
Inspired by the vibrant artisan cocktails that grace the menus of Bellingham’s restaurants, this melt and pour soap project combines unique flavors, colors, and textures reminiscent of those creative drinks. Imagine a soap that not only looks delightful but also evokes the refreshing essence of thyme and peach, perfectly swirled together. This beginner-friendly project will guide you step-by-step through the process of making your own cocktail-inspired soaps, making them not just practical but also a lovely artisan gift.
Why You Will Love This Recipe
Creating homemade soap is not only a fun and creative process, but it also allows you to personalize your products. With simple ingredients and equipment, you can craft something beautiful and functional. This particular project embraces the aesthetics and inspirations of cocktail culture, making your soap-swirling experience both thrilling and satisfying.
Ingredients
To make your artisan cocktail-inspired melt and pour soap, you will need the following ingredients:
- Clear melt and pour soap base: 1 pound (16 oz)
- Thyme essential oil: 1 teaspoon
- Peach fragrance oil: 1 teaspoon
- Colorants:
- Yellow soap colorant (for peach)
- Green soap colorant (for thyme)
- Isopropyl alcohol: for preventing glycerin dew
- Optional additives: Dried thyme leaves for texture
Equipment
Make sure you have the following equipment ready before you start:
- Microwave-safe bowl or double boiler: For melting soap
- Thermometer: To monitor the temperature of melted soap
- Mixing spoon or spatula
- Soap mold: Silicone molds work best for easy removal
- Spray bottle: Filled with isopropyl alcohol
- Small whisk or stick blender: For mixing
- Measuring spoons: For precise measurements
- Cutting board and knife: For cutting the soap base
Step-by-Step Instructions
Prepare Your Workspace
- Clear a clean workspace and gather all your ingredients and tools.
Melt the Soap Base
- Cut the melt and pour soap base into small cubes for faster melting. Place the cubes into a microwave-safe bowl or double boiler.
- Microwave method: Heat on high in 30-second intervals, stirring in between, until fully melted. The temperature should reach about 150°F.
- Double boiler method: Fill the bottom pot with water and heat. Place the bowl on top, stir occasionally until melted.
Add Color and Fragrance
- Once melted, take the bowl off the heat and let it cool slightly, checking the temperature with a thermometer (ideally around 130°F).
- Divide the melted soap into two parts. In one bowl, mix in yellow soap colorant (for peach) and peach fragrance oil; in the other, add green soap colorant (for thyme) and thyme essential oil. Mix thoroughly.
Layering the Soap
- Spray the soap mold generously with isopropyl alcohol to prevent layers from separating.
- Pour the yellow peach soap mixture into the mold first, filling it partially.
- Allow it to cool for about 15-20 minutes until it starts to set but is still slightly tacky on the surface (around 120°F).
- Lightly spray the surface again with isopropyl alcohol, then pour the green thyme soap mixture on top. Add dried thyme leaves if desired.
- Repeat the spray and pour process to create additional layers as desired, alternating colors.
Cooling and Setting
- Allow the soap to cool completely. This may take about 1-2 hours at room temperature. You can place the mold in the fridge to speed up the process.
Unmold the Soap
- Once fully set, gently press the silicone mold from the bottom to release the soap. Cut it into bars as needed.
Tips for Success
- Check Temperatures: Always monitor the temperature of your soap. Too hot, and it can burn; too cool, and it won’t pour easily.
- Spraying Alcohol: This is crucial for ensuring that your layers stick together. Don’t skip this step!
Common Mistakes to Avoid
- Not Checking Temperatures: Melting soap at too high of a temperature can affect its texture and color.
- Layer Separation: Skipping the alcohol spray between layers can lead to separation, making your finished soap less visually appealing.
Variations and Customization Ideas
- Different Fragrances: Try using lavender, eucalyptus, or citrus scents to create unique flavors.
- Additives: Incorporate different exfoliants like oatmeal or coffee grounds for added texture.
- Color Blending: Create swirls by stirring colors together before pouring.
Storage and Shelf Life
Store your finished soap bars in a cool, dry area away from direct sunlight. Properly stored, they can last for up to 6 months. Keep them wrapped in paper or in a container to prevent them from attracting moisture.
Safety Tips
- Isopropyl Alcohol: Always use isopropyl alcohol in a well-ventilated area and avoid inhaling its fumes.
- Melted Soap: Handle melted soap with care as it can be hot and cause burns.
- Allergies: Always do a patch test with any fragrances or essential oils you use to avoid skin reactions.
Frequently Asked Questions
Q1: Can I use other types of soap bases?
Yes, feel free to experiment with goat’s milk, shea butter, or olive oil soap bases for different properties and textures.
Q2: What should I do if my soap doesn’t harden properly?
Make sure you’ve melted it completely and allowed it to cool adequately before pouring into the mold. If your soap remains soft, it may have been contaminated with water or oils during the process.
Q3: Can I add colorants I have at home?
It’s best to use soap-specific colorants to ensure they blend and behave correctly. Regular food colorings may not offer the best results.
Q4: What’s the best way to store the excess soap?
Wrap any leftover soap in plastic or wax paper to keep it dry and store it in a cool area.
Q5: How long will the soap take to cure?
Melt and pour soaps are technically ready to use once they’ve cooled and set. There’s no curing time like with cold process soaps.
Conclusion
Making artisan cocktail-inspired melt and pour soap is a delightful craft that blends creativity with practicality. With this step-by-step guide, you’ll be well on your way to mastering this DIY project. Whether for yourself or as handmade gifts, these soaps are sure to impress with their fascinating layers and refreshing fragrances. Gather your ingredients, and let your hands bring cocktail-inspired art to life! Enjoy your soap-making journey, and don’t forget to share your creations with friends and family!