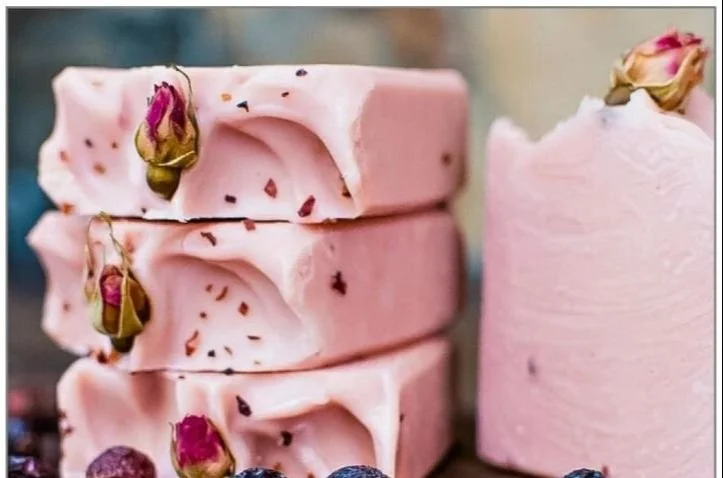

Interested in cold process soap making? Create Rosehip Cold Process Soap with Lye!
If you’ve been looking to dive into the delightful world of cold process soap making, you’re in for a treat with this Rosehip Cold Process Soap recipe. Not only does this DIY soap help nurture delicate skin, but it also embodies the vibrant properties of rose hips, giving your skin a youthful glow. Whether you’re a beginner or fairly new to soap making, this guide will walk you through each step with warmth and encouragement.
Why You Will Love This Recipe
Creating homemade soap is a rewarding endeavor that combines creativity with practical benefits. This Rosehip Cold Process Soap features luxurious ingredients that can help soothe and nourish your skin. Rose hips are renowned for their high vitamin C content and antioxidants, making them a fantastic addition to your skincare routine. By making this soap, you’re not just crafting a product—you’re embracing self-care.
Ingredients
To make your Rosehip Cold Process Soap, gather the following ingredients:
- Olive Oil: 12 oz (provides hydration and soothing properties)
- Coconut Oil: 8 oz (adds lather and hardness)
- Palm Oil: 8 oz (helps with firmness and stability)
- Rosehip Seed Oil: 2 oz (rich in vitamins for skin nourishment)
- Lye (Sodium Hydroxide): 4 oz (must be handled carefully)
- Distilled Water: 8 oz (to dissolve the lye)
- Rose Essential Oil: 1 oz (for a fragrant note, optional)
- Colorants (optional): such as natural clay or mica (for visual appeal)
Equipment
Before you begin, ensure you have the following equipment:
- Digital Scale: for accurate measurements
- Safety Gear: goggles, gloves, and a mask for lye handling
- Heat-Resistant Container: like a glass or stainless steel bowl
- Stick Blender: essential for mixing oils and lye
- Soap Mold: silicone molds work well
- Thermometer: for measuring temperatures
- Whisk or Spatula: for stirring
- Parchment Paper: for lining your soap mold if not silicone
Step-by-Step Instructions
Preparation Time: 15 minutes
Making Time: 1 hour
Yield: Approximately 10-12 bars of soap
Safety First: Put on your goggles, gloves, and mask. Ensure good ventilation in your workspace.
Measure Water and Lye: Carefully measure 8 oz of distilled water in a heat-resistant container. Gradually add 4 oz of lye (sodium hydroxide) to the water. Never add water to lye, as this can cause a dangerous reaction. Stir gently until the lye is completely dissolved. Set it aside to cool.
Melt Your Oils: In a separate pot, measure and melt the coconut oil over low heat. Once melted, add the olive oil and palm oil. Warm until combined and melted.
Combine Temperatures: Allow both the lye mixture and the oils to cool to around 100-110°F.
Mix Lye and Oils: Once the temperatures match, carefully add the lye mixture to the oils. Use a stick blender to mix until "trace" is achieved; this is when the mixture thickens to a pudding-like consistency.
Add Rosehip Seed Oil and Essential Oils: Stir in the rosehip seed oil and any essential oils or colorants you desire, mixing thoroughly.
Pour into Mold: Gently pour the soap mixture into your mold. Tap the mold lightly to release any trapped air bubbles.
Cure the Soap: Cover the mold with a towel to insulate for 24-48 hours. Once the soap is firm, gently remove it from the mold and cut it into bars.
Cure the Soap Bars: Place the bars on a drying rack in a cool, dry area for 4-6 weeks. This allows the soap to fully saponify.
Tips for Success
- Use Distilled Water: This avoids impurities that could affect the soap’s clarity and quality.
- Measure Accurately: Soap making is a science. Make sure to weigh everything precisely.
- Keep Notes: Document your process; it helps to record adjustments and outcomes for future batches.
Common Mistakes to Avoid
- Not Wearing Safety Gear: Always prioritize safety when handling lye.
- Not Allowing Full Cure Time: Soap that hasn’t cured long enough can cause irritation or be too harsh on the skin.
- Ignoring Measurements: Using incorrect measurements can result in a failed batch.
Variations and Customization Ideas
- Add Exfoliants: Consider adding oatmeal, poppy seeds, or dried rose petals for texture.
- Change Essential Oils: Substitute rose oil with lavender, eucalyptus, or any favorite scent to create a personalized aroma.
- Use Natural Colorants: For a unique look, incorporate herbs, clays, or natural oxides.
Storage and Shelf Life
Store your finished soap bars in a cool, dry place. Keep them in a well-ventilated area to avoid moisture retention. When stored correctly, your homemade soap can last for up to a year.
Safety Tips
- Handle Lye with Care: Always work in a ventilated area, and wear protective gear.
- Know Your Environment: If you have small children or pets, ensure they are away from your workspace.
- Use Accurate Lye Measurements: Always calculate the necessary lye quantity using a reliable soap calculator tailored to your ingredients.
Frequently Asked Questions
1. Can I use different oils in this soap recipe?
Yes, feel free to substitute other oils, but be sure to calculate the proper amount of lye needed for those oils.
2. What should I do if my soap is too soft?
If your soap doesn’t harden, it may mean it was not mixed long enough or the wrong lye calculations were made. This is why accurate measurements are crucial.
3. Is it safe to use chemical dyes in soap making?
While some commercial dyes are safe, natural alternatives are recommended, especially for sensitive skin.
4. How can I tell if my soap has cured properly?
Properly cured soap will feel firm and have a neutral pH. You can perform a zap test by touching it lightly to your tongue; if it shocks you, it needs more curing time.
5. Can I use tap water instead of distilled water?
While it’s possible, using distilled water is recommended to avoid impurities that can affect the soap’s quality.
Conclusion
Now that you’ve learned how to create your own Rosehip Cold Process Soap, it’s time to gather your supplies, put on your safety gear, and embrace the joy of soap making! This recipe not only nourishes your skin but also brings a sense of accomplishment and delight. Dive into the process and remember, practice makes perfect! Happy soap making!