
How to Make Jiggly Jelly Soaps at Home Using Ingredients You Already Have!
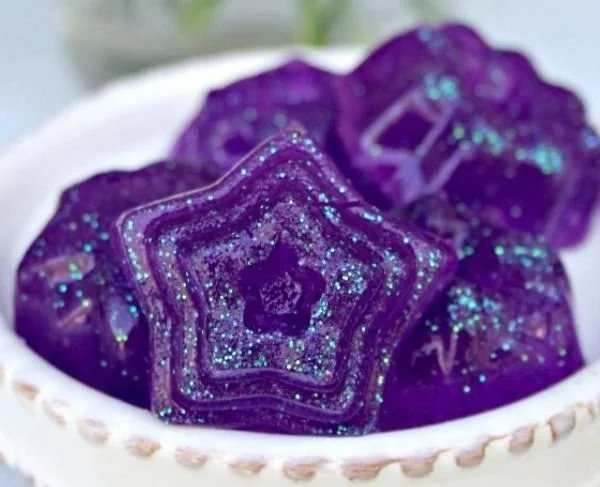
Making homemade soap is a fun and creative way to add a personal touch to your bathtime routine. Jiggly jelly soaps are particularly exciting for kids, as they’re squishy, colorful, and aromatic! Not only can they transform bath time into a delightful experience, but they also make fantastic homemade gifts. This guide will walk you through the step-by-step process of creating your own jiggly jelly soaps using simple ingredients you likely have at home.
Why You Will Love This Recipe
- Fun for Kids: Jiggly jelly soaps make washing hands and taking baths an enjoyable activity. Their squishy texture and vibrant colors can engage children in personal hygiene.
- Easy and Safe: This DIY project uses a melt-and-pour soap method, which is beginner-friendly and requires no experience.
- Endless Customization: You have the freedom to create unique fragrances, colors, and shapes that reflect your personality or the recipient’s taste.
- Perfect Gifts: Handmade soap is a thoughtful and personalized gift that anyone would appreciate, particularly when beautifully packaged.
Ingredients
For this recipe, you’ll need just a few simple ingredients:
1 cup of melt-and-pour clear glycerin soap base
This is the primary ingredient; it forms the basis of your jelly soap. Look for it at craft stores or online.1/4 cup of water
Water is used to help create the jelly-like consistency.2 tablespoons of gelatin
Unflavored gelatin provides the jiggly texture.Soap colorant (optional)
Add this to achieve your desired shade. Liquid or gel colorants work well.Essential oils or fragrance oils (optional)
A few drops of your favorite scent can enhance the experience. Be sure to choose skin-safe options.Mold
Silicone molds or any other candy mold you have at home will work perfectly.
Equipment
Gather the following equipment to assist with the soap-making process:
- Microwave-safe bowl
- Whisk or spoon for mixing
- Measuring cups and spoons
- Silicone molds
- Spray bottle with rubbing alcohol (optional)
This can help remove air bubbles from your finished soaps.
Step-by-Step Instructions
Prepare the Gelatin Mixture:
In a microwave-safe bowl, combine 2 tablespoons of gelatin and 1/4 cup of water. Let it sit for about 5 minutes to bloom.Melt the Soap Base:
Cut 1 cup of glycerin soap base into small cubes and place them in another microwave-safe bowl. Heat in the microwave in 30-second intervals until completely melted. Stir between intervals to ensure even melting.Mix the Gelatin and Soap:
Once the soap base is melted, add the bloomed gelatin mixture to the soap. Whisk thoroughly to combine.Add Color and Fragrance:
If you’re using soap colorant, add it now and mix until you achieve your desired color. Add a few drops of essential or fragrance oil if desired.Pour into Molds:
Carefully pour the soap mixture into your silicone molds. If you see any air bubbles, lightly spray the surface with rubbing alcohol and let it settle.Let It Set:
Allow your jelly soaps to cool and set at room temperature for about 1-2 hours, or place them in the refrigerator for quicker results.Unmold the Soaps:
Once fully set, gently remove the soaps from the molds.
Tips for Success
- Use High-Quality Ingredients: Check the quality of your glycerin soap base and fragrance oils. Higher quality will yield better results.
- Avoid Overheating the Soap Base: Keep an eye on the soap while melting, as overheating can cause it to scorch.
- Experiment with Textures: Try adding small exfoliants like sugar or ground oatmeal for added texture if desired.
Common Mistakes to Avoid
- Skipping the Blooming Step: Always let gelatin bloom before melting. This prevents clumping.
- Too Much Colorant: Start with a little; you can always add more if needed.
- Rushing the Cooling Process: Avoid putting your molds in the freezer, which can cause condensation and affect the texture.
Variations and Customization Ideas
- Layering Colors: For a fun visual effect, pour different colors of soap mixture in layers, letting each layer set before adding the next.
- Adding Shapes: Use cookie cutters or themed molds for seasonal or holiday-themed soaps.
- Incorporate Scents: Explore various essential oils like lavender, orange, or eucalyptus to create custom aromas.
Storage and Shelf Life
Store your jiggly jelly soaps in a cool, dry place. Use airtight containers to prolong their shelf life, approximately 2-3 months. Avoid exposing them to direct sunlight, which can degrade the color and quality.
Safety Tips
- Keep Ingredients Away from Young Children: Some fragrance oils and colorants may not be appropriate for young kids.
- Allergy Awareness: Test a small area on the skin to check for reactions to any new ingredients, especially fragrances.
Frequently Asked Questions
1. Can I use flavored gelatin instead of unflavored?
Yes, but be cautious! Flavored gelatin may impact the soap’s scent and possibly its texture, resulting in a less effective jelly soap.
2. How can I make my jelly soap firmer?
You can adjust the amount of gelatin added or experiment with different soap bases (some may have a firmer texture than others).
3. What should I do if my soap mixture is too dense?
Add a little more water to thin the mixture or adjust gelatin levels, as too much can make it overly thick.
4. Can I reuse melted soap?
Yes! If you have leftover soap, simply re-melt and incorporate any extras you like.
5. Is it safe to use essential oils in soaps for kids?
Generally, yes, but stick to well-researched, kid-friendly oils and always dilute them properly.
6. How can I give my jelly soap a longer shelf life?
Store in an airtight container and avoid humidity, which may promote mold growth on your soap over time.
Conclusion
Making jiggly jelly soaps at home is not just an effective way to keep kids entertained, but also a delightful gift for any occasion. With minimal ingredients and steps, you can create fun, colorful, and fragrant soaps that evoke creativity. We hope this guide inspires you to dive into the world of DIY soap making. Gather your supplies, roll up your sleeves, and let the fun begin—happy crafting!