
Discover Simple Steps to Craft Beautiful Homemade Candles
Creating your own candles at home is a delightful, fulfilling hobby that can brighten up any space, making it perfect for holidays like Christmas or for everyday decor. Homemade candles not only serve as elegant decorations but also provide a charming aroma that can transform your ambiance. Whether you’re a beginner looking to dive into candle making or someone seeking to expand their DIY skills, this article will guide you through the simple steps to craft beautiful homemade candles.
Why You Will Love This Recipe
- Customization: You get to choose your colors, scents, and even the containers.
- Affordability: Homemade candles can save you money compared to store-bought candles.
- Perfect Gifts: Personalized candles make thoughtful gifts for friends and family.
- Relaxing Hobby: Candle making can be a calming activity, allowing you to unwind and be creative.
Ingredients
For this homemade candle recipe, you’ll need the following ingredients:
- Wax: 1 pound of soy wax flakes (eco-friendly and easy to work with)
- Fragrance Oil: 1 ounce (ensure it’s suitable for candle making)
- Color Dye: Optional (candle dye suitable for wax)
- Wicks: Pre-made cotton wicks (size will depend on the diameter of your container)
Equipment
Here’s what you need to gather before you start:
- Double boiler or microwave-safe container
- Thermometer (for wax temperature)
- Stirring utensil (wooden spoon or silicone spatula)
- Candle containers (glass jars, tin containers, or silicone molds)
- Wick holder (a chopstick or pencil to hold the wick in place)
- Pouring pitcher (if using a double boiler)
Step-by-Step Instructions
Follow these easy steps to create your candles:
Step 1: Prepare Your Work Area
Set up a clean, flat work surface. Lay down some newspaper or a silicone mat to catch any spills. Ensure that your containers are clean and dry.
Step 2: Measure the Wax
Weigh 1 pound of soy wax flakes. This amount can typically fill two standard-sized jars (approximately 8 ounces each).
Step 3: Melt the Wax
- Double Boiler Method: Fill the bottom pot with water and place it on the stove. In the top pot, add the wax. Heat over medium heat until melted, stirring occasionally.
- Microwave Method: Place the wax flakes in a microwave-safe container. Heat in 30-second intervals, stirring after each, until fully melted.
Tip: Keep an eye on the temperature; the wax should reach about 170-180°F (77-82°C) for optimal blending with fragrance oils.
Step 4: Add Color (Optional)
If you’d like to add color to your candles, carefully mix in your candle dye once the wax is melted. Stir until the color is evenly distributed.
Step 5: Incorporate Fragrance
Remove the melted wax from heat and let it cool slightly (to about 160°F or 71°C). Add 1 ounce of your chosen fragrance oil and stir thoroughly for about 2 minutes to ensure it’s well blended.
Step 6: Wicking the Containers
Secure the wick to the bottom of the container using a dab of melted wax or a wick sticker. Use a wick holder to keep the wick centered.
Step 7: Pour the Wax
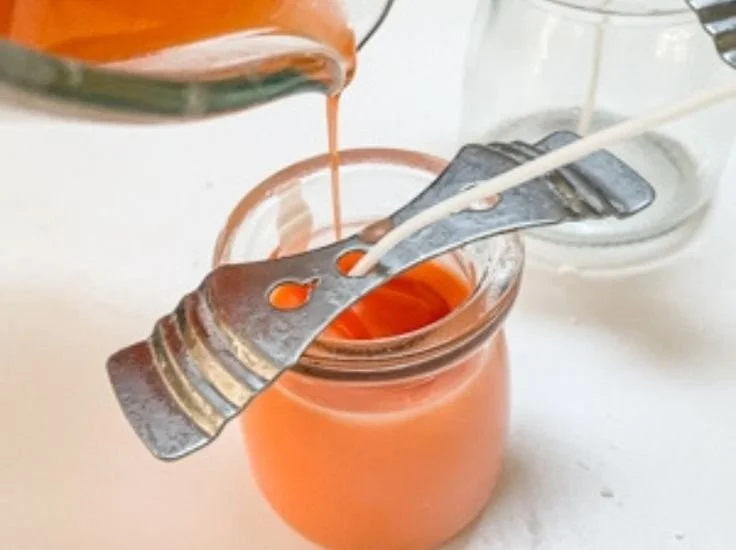
Once the wax is prepared, carefully pour it into your candle containers. Leave a little space at the top (about ½ inch) to avoid overflow.
Step 8: Secure the Wicks
Ensure the wicks remain centered and straight as the wax begins to cool. Let the candles cool completely, which may take a few hours.
Step 9: Trim the Wicks
Once the candles are fully cooled, trim the wick to about ¼ inch above the wax surface.
Tips for Success
- Use a thermometer to monitor wax temperature; this ensures proper blending of fragrance.
- Experiment with different wax-to-fragrance ratios to find your preferred scent strength.
- Allow your candles to cure for at least 48 hours before burning for the best scent throw.
Common Mistakes to Avoid
- Overheating the Wax: Wax can become too hot, which can degrade fragrance quality and affect the burning process.
- Skipping Wick Testing: Different wick sizes can change the combustion; ensure you test them for proper burning.
- Pouring Too Hot: Pouring wax that’s too hot can create air bubbles or cause the container to crack.
Variations and Customization Ideas
- Scent Combinations: Experiment with different fragrance oils—try blends like vanilla and cinnamon for a cozy feel or eucalyptus and mint for a refreshing scent.
- Container Choices: Use unique containers like teacups or bowls for a vintage look.
- Seasonal Colors: Change dye colors to match seasonal themes—pastels for spring, vibrant hues for summer, or deep reds and greens for Christmas.
Storage and Shelf Life
Store your finished candles in a cool, dark place. Properly made soy candles have a shelf life of up to 2 years. Make sure to keep them away from direct sunlight and heat sources to preserve their fragrance and appearance.
Safety Tips
- Always work in a well-ventilated area when melting wax and adding fragrance oils.
- Avoid direct contact with hot wax; be mindful of spills.
- Keep candles away from flammable materials and never leave burning candles unattended.
Frequently Asked Questions
Q1: Can I use paraffin wax instead of soy wax?
Yes, you can use paraffin wax, but soy wax is more eco-friendly and burns cleaner.
Q2: What should I do if my candle won’t burn evenly?
This can be due to a wick that’s too small or uneven pouring. Make sure to test different wick sizes and pour carefully.
Q3: How can I fix cracks that form on the candle’s surface?
You can reheat the candle’s top surface and reseal it with melted wax to smooth it out.
Q4: How do I know how much fragrance oil to add?
A general guideline is to use 1 ounce of fragrance oil per pound of wax, but you can adjust based on personal preference.
Q5: Can I reuse leftover wax?
Yes, leftover wax can be melted and reused in future candle-making projects. Just ensure it’s free from any contaminants.
Conclusion
Making homemade candles is a wonderfully rewarding activity that allows you to express your creativity while producing beautiful, aromatic gifts for yourself and loved ones. With just a few simple steps and the right ingredients, you can craft personalized candles that brighten any space and fill it with delightful scents. Don’t be afraid to experiment with different colors, fragrances, and techniques as you embark on this DIY journey. Happy candle making!