
How to Make Citronella Candles from Upcycled Tin Soup Cans
Creating your own citronella candles is not only an enjoyable DIY project but also a fantastic way to repurpose tin soup cans into beautiful and functional pieces. These candles act as natural mosquito repellents, making your outdoor summer nights much more pleasant. In this guide, I’ll walk you through the process step-by-step, perfect for both beginners and seasoned DIY enthusiasts.
Why You Will Love This Recipe
- Eco-Friendly: By upcycling tin cans and using recycled candle wax, you’re contributing to a more sustainable lifestyle.
- Natural Repellent: Citronella oil is known for its mosquito-repelling properties, making these candles perfect for outdoor gatherings.
- Customizable: You can easily personalize your candles with different fragrances or colors.
- Budget-Friendly: Making your own candles is a cost-effective way to enjoy beautiful, scented candles without the high price tag.
- Great Gifts: These homemade candles make thoughtful gifts for friends and family.
Ingredients
- Candle Wax: 16 oz of recycled candle wax (you can use paraffin, soy, or beeswax).
- Citronella Oil: 2 oz (about 10% fragrance).
- Tin Soup Cans: 4-5 upcycled cans (each can will make one candle).
- Wicks: Pre-tabbed wicks suitable for the size of your container (make sure they are at least 6 inches long).
- Colorant (optional): Candle dye in your preferred color (if you want to color the wax).
Equipment
- Double Boiler: For melting the wax. If you don’t have one, you can create a makeshift double boiler using a pot and a heat-safe bowl.
- Thermometer: A candy or candle thermometer to measure the wax temperature.
- Stirring Spoon: Use a spatula or wooden spoon.
- Wick Holder: A pencil or chopstick to hold the wick in place while the wax cools.
- Safety Gear: Gloves and eyewear to protect yourself during the process.
Step-by-Step Instructions
Preparation Time: 15 minutes
Making Time: 45 minutes
Yield: Approximately 4-5 candles
Prepare Your Workspace: Lay down newspaper or a protective covering in your workspace to catch any spills.
Prepare the Cans: Remove labels from tin cans and clean them thoroughly. If any residue remains, soak them in warm water.
Melt the Wax:
- Fill the bottom pot of your double boiler with water and place it on the stove over medium heat.
- Add the candle wax to the top pot and allow it to melt slowly. Stir occasionally until fully melted. Use the thermometer to monitor the temperature; aim for around 170-180°F (76-82°C).
Add Citronella Oil: Once the wax has melted, remove it from heat and add the citronella oil. Stir thoroughly to ensure the fragrance is evenly distributed.
Add Color (Optional): If you want to add color to your candles, this is the time to add your candle dye. Start with a small amount and gradually add more until you achieve your desired shade.
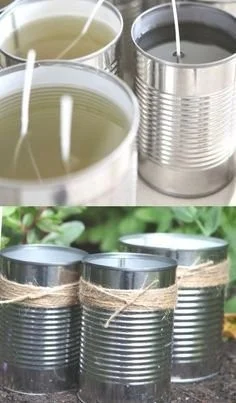
Attach the Wick: While the wax cools slightly, attach the wick to the bottom of the soup can. You can use a dab of hot glue or melted wax to secure it. Make sure the wick is centered.
Pour the Wax: Carefully pour the melted wax into the cans, leaving about half an inch from the top. Use a funnel if necessary.
Secure the Wick: To keep the wick straight while the candle hardens, rest a pencil or chopstick across the top of the can, securing the wick in the center.
Let Them Cool: Allow the candles to cool and harden for several hours at room temperature. Once fully hardened, trim the wick to about 1/4 inch above the wax.
Tips for Success
- Temperature Awareness: Be mindful of the wax temperature when adding fragrance; too hot, and it may evaporate; too cold, and it may not mix well.
- Wick Testing: If you’re unsure about the wick size, it’s crucial to do a wick test to ensure it burns correctly without excess smoking or tunneling.
Common Mistakes to Avoid
- Overheating the Wax: This can lead to burns and also degrade the quality of the wax.
- Not Securing the Wick: A misaligned wick can cause uneven burning and affect the candle’s lifespan.
- Skipping Drying Time: Rushing the cooling process can lead to surface imperfections.
Variations and Customization Ideas
- Different Essential Oils: Experiment with various essential oils for different scents, such as lavender, eucalyptus, or lemon balm.
- Layering Candles: Create layered candles by pouring colored wax in layers for visual effects. Just let each layer cool slightly before adding the next.
- Decorative Elements: Add dried flowers, herbs, or glitter for added aesthetics.
Storage and Shelf Life
Store your finished candles in a cool, dark place away from direct sunlight. When kept properly, they can last up to two years. Always ensure the lid (if using containers with lids) is off when not in use to prevent moisture buildup.
Safety Tips
- Work Under Ventilation: Ensure your work area is well-ventilated, especially when working with fragrances.
- Melt Wax Carefully: Never leave melting wax unattended, and do not put water into hot wax. It can cause dangerous splattering.
- Use Caution with Flames: Always place lit candles on heat-resistant surfaces and never leave them burning unattended.
Frequently Asked Questions
Q1: Can I use any type of wax for my candles?
A: While you can use various types of wax, recycled wax might have different melting points. Paraffin, soy, and beeswax are all popular options, and they differ in scent throw and burn time.
Q2: How do I know if my wick is the right size?
A: A properly sized wick will burn evenly and produce a consistent flame. If it smokes or doesn’t stay lit, it may be too large or too small.
Q3: Can I use other containers instead of soup cans?
A: Absolutely! Any heat-safe container can work as long as it’s suitable for holding hot wax.
Q4: How long will the candles burn?
A: Typically, a candle made from 16 oz of wax will burn for approximately 15-30 hours, depending on the wick size and thoroughness of the pour.
Q5: What should I do if my candles have a rough top?
A: You can use a heat gun or a heat source to slightly melt the top layer and smooth it out.
Conclusion
Making citronella candles from upcycled tin soup cans is a fulfilling DIY project that not only benefits you but also supports eco-friendly practices. With these simple steps, you can create stunning and practical candles that serve as natural mosquito repellents for your outdoor gatherings. I hope you found this guide helpful and feel inspired to try making these beautiful candles yourself. Happy crafting!