
DIY Chocolate Brownie Candle: A Sweetly Scented Craft for Your Home
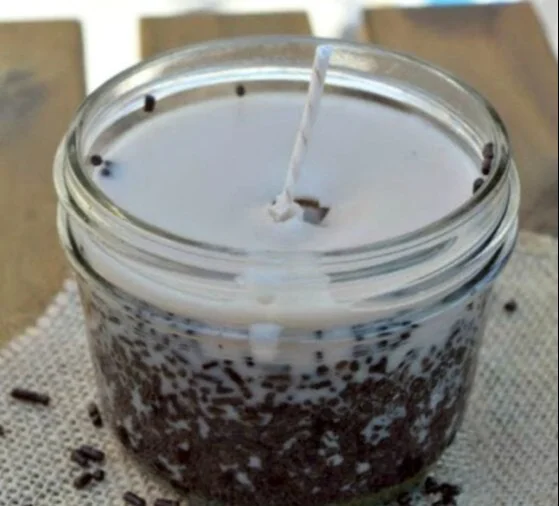
Creating your own candles can be an incredibly rewarding and enjoyable project, particularly when you can infuse your home with delightful scents like chocolate brownies. This DIY Chocolate Brownie Candle will not only give you that warm, sweet aroma but also serve as a charming decoration or an excellent handmade gift. Let’s dive into this easy, step-by-step guide that beginners can follow with ease.
Why You Will Love This Recipe
Making your own candles is a satisfying way to express your creativity while filling your home with a personalized scent. The Chocolate Brownie Candle captures the essence of freshly baked brownies—the rich and decadent aroma that evokes cozy feelings and nostalgia. Plus, this project is great for gifting, adding a personal touch for birthdays, holidays, or as a “just because” treat.
Ingredients
Wax Type:
- 1 pound of soy wax (this will provide a clean burn and great scent throw)
Fragrance Oil:
- 1 oz of chocolate fragrance oil (for that authentic brownie aroma)
- 0.5 oz of vanilla fragrance oil (to add depth and sweetness)
Wicks:
- 2 cotton wicks (ensure they are appropriate for the size of the container)
Dyes (optional):
- Brown candle dye (if you want to color your candle to resemble real brownies)
Equipment
- Double boiler or a microwave-safe container
- Stirring spoon or spatula
- Thermometer (for checking wax temperature)
- Candle containers (mason jars or small glass containers will work well)
- Wick holder or chopsticks (to keep wicks centered while the wax sets)
- Scale (for measuring wax and fragrance oils)
- Pouring pitcher (optional, but helpful for pouring hot wax)
Step-by-Step Instructions
Preparation Time: 10 minutes
Making Time: 1 hour (plus curing time)
Yield: 2 small candles (8 oz)
Step 1: Set Up Your Work Area
Prepare your workspace by ensuring it’s clean and free from clutter. Gather all your ingredients and tools to streamline the process.
Step 2: Measure Your Wax
Using a scale, measure 1 pound of soy wax. If you’re making two candles, this amount should fit nicely in two 8 oz containers.
Step 3: Melt the Wax
Double Boiler Method:
- Fill the bottom pot with water and heat it on medium.
- Place the wax in the top pot and allow it to melt, stirring gently. Monitor the temperature with your thermometer until the wax reaches about 170°F (77°C).
Microwave Method:
- Place the wax in a large, microwave-safe container.
- Heat in 1-minute intervals, stirring in between until melted, ensuring it doesn’t exceed 170°F (77°C).
Step 4: Add Dyes (Optional)
If you wish to dye your candle, add a few shavings of brown dye to the melted wax and stir until completely dissolved.
Step 5: Add Fragrance Oils
Once your wax is melted and at around 160°F (71°C), stir in your chocolate and vanilla fragrance oils. Mix thoroughly to ensure an even scent distribution.
Step 6: Prepare the Containers
While the wax cools a bit, attach the wick to the bottom of each candle container using a dab of melted wax or a wick sticker. Use a wick holder or chopstick to keep the wick centered.
Step 7: Pour the Wax
When the wax temperature cools to about 140°F (60°C), carefully pour it into your prepared containers, leaving a little space at the top.
Step 8: Secure the Wicks
Ensure the wicks remain centered while the wax cools. You may need to adjust them a few times to keep them straight.
Step 9: Let the Candles Cool
Allow the candles to cool completely for at least 4-6 hours. Try not to move them during this time to avoid any imperfections.
Step 10: Trim the Wicks
Once the candles are fully set, trim the wicks to about 1/4 inch above the wax surface for optimal burning.
Tips for Success
- Temperature Control: Keep a close eye on wax temperatures; adding fragrance at the right temperature allows for better scent retention.
- Wick Size: The size of your wick should match the diameter of your container. If you’re unsure, consider testing with different wick sizes.
- Stirring: Stir well after adding fragrances but avoid over-mixing after pouring to help prevent bubbles.
Common Mistakes to Avoid
- Not Measuring Accurately: Use a scale to measure wax and oils for consistent results.
- Ignoring Safety: Always work in a well-ventilated area to avoid inhaling fumes from the wax or fragrance oils.
- Pouring Too Hot: Pouring wax that is too hot can lead to surface imperfections and cracks as it cools.
Variations and Customization Ideas
- Additional Scents: Mix in a touch of caramel or hazelnut fragrance oils for a more complex aroma.
- Layering: Create layered candles by pouring different colored wax in stages once each layer has set.
- Decorative Add-Ins: Add a spoonful of eco-friendly glitter or dried herbs—the scent will not transfer to the finished candle but will add a unique touch to the aesthetics.
Storage and Shelf Life
Store your finished candles in a cool, dry place away from direct sunlight. Properly stored, they can last up to a year. If they become dusty, gently clean them with a soft cloth.
Safety Tips
- Never leave burning candles unattended.
- Keep candles away from flammable objects and always trim the wick to prevent high flames.
- Ensure the room is well-ventilated when working with fragrance oils.
Frequently Asked Questions
1. What type of wax is best for beginners?
Soy wax is recommended for beginners as it’s easy to work with and provides a clean burn.
2. Can I use essential oils instead of fragrance oils?
Yes, but they might not provide as strong of a scent throw and can be more expensive.
3. How do I fix a candle that has a rough top or cracks?
Melt the top layer slightly and smooth it over or pour a thin layer of new wax on top after the candle has cooled.
4. What if my candle burns unevenly?
This can be due to an incorrect wick size. Make sure to choose a wick that matches the diameter of your container.
5. How do I know when to stop adding fragrance?
Follow the manufacturer’s recommendations on the fragrance oil bottle; typically, 1 oz per pound of wax is a good basis.
Conclusion
Making your DIY Chocolate Brownie Candle is a fun project that yields deliciously scented results. Not only does it add warmth to your home, but it also serves as a delightful gift or a charming decorative item. With practice, you can explore endless variations and customization to create candles that reflect your personality or the preferences of your loved ones. So gather your ingredients, follow these simple steps, and start creating your own aromatic masterpieces! Happy crafting!