
Get Inspired: Craft Your Own Handmade Candles Using Granulated Wax
Creating your own handmade candles is a delightful and fulfilling DIY project that can illuminate your home and warm your heart. Whether you’re celebrating a special occasion or simply want to enjoy some cozy ambiance, crafting candles from granulated wax is an excellent way to express your creativity. In this guide, we will explore how to make beautiful scented candles using heatproof jars or cups. Perfect for natural living lovers and DIY enthusiasts alike, let’s get started on this fun candle-making adventure!
Why You Will Love This Recipe
Homemade candles are not just about fragrance; they offer a personal touch to your space and make wonderful gifts for friends and family. Here are a few reasons why you’ll love making your own candles:
- Customization: Choose your favorite scents, colors, and containers.
- Natural Ingredients: Using high-quality wax and scents allows you to avoid harmful additives.
- Satisfaction: The joy of creating something with your own hands is unmatched.
- Inexpensive: Making candles at home is cost-effective, especially when compared to store-bought versions.
Ingredients
To make your own handmade candles, you will need the following ingredients:
- Granulated Wax: 2 cups (approximately 1 pound) of your choice (soy wax, paraffin, or beeswax)
- Fragrance Oil: 0.5 to 1 ounce, depending on your preference (ensure it’s candle-safe)
- Dye (optional): Candle dye to customize the color (use according to the dye package instructions)
Equipment
Before starting, gather your candle-making tools:
- Heatproof Containers: Jars or cups that can withstand heat (glass or metal)
- Double Boiler: A pot for melting wax (you can also use a microwave-safe bowl)
- Thermometer: To monitor wax temperature
- Wick: Pre-tabbed cotton or wooden wicks (ensure the wick size is appropriate for your container)
- Scissors: To cut the wick
- Stirring Utensil: A wooden stick or spoon for mixing
- Protective Gloves and Eye Gear: Recommended for safety
Step-by-Step Instructions
Prepare Your Work Area: Lay down newspaper or a plastic covering to catch any wax spills. Ensure the area is well-ventilated.
Measure Your Wax: Using a kitchen scale, measure out 2 cups (about 1 pound) of granulated wax.
Melt the Wax:
- Fill the bottom pot of your double boiler with water and bring it to a simmer.
- Place the granulated wax in the top pot. Stir occasionally until the wax is fully melted (approximately 10-15 minutes). The ideal melting temperature for soy wax is around 170°F.
Add Fragrance and Color:
- Once the wax reaches the desired temperature, remove it from the heat.
- Add your chosen fragrance oil (between 0.5 to 1 ounce) and stir well. If you’re adding dye, follow the dye package instructions to achieve the desired color. Mix thoroughly to ensure even distribution.
Prepare the Containers: While the wax cools slightly (to about 160°F), secure the wick to the bottom of your container using a dab of melted wax or a wick sticker.
Pour the Wax: Carefully pour the melted wax into your prepared containers, leaving about half an inch from the top. Ensure the wick remains centered.
Secure the Wick: To keep the wick upright while the candle sets, use a pencil or chopstick to hold the wick in place across the top of the container.
Cool and Set: Allow the candles to cool completely. This can take several hours; avoid moving them during this process.
Trim the Wick: Once the candles have cooled, trim the wick to about 1/4 inch above the wax.
Tips for Success
- Experiment with Scents: Start with small amounts of fragrance oil and increase to find your preferred scent strength.
- Wick Testing: Always test different wick sizes to ensure they burn evenly without excessive smoke.
- Temperature Control: Monitor the temperature closely; adding fragrance at too high of a temperature can diminish scent strength.
Common Mistakes to Avoid
- Overheating the Wax: Wax can catch fire if overheated; always melt gently.
- Neglecting Safety: Wear protective gear, and work in a ventilated area.
- Incompatible Fragrance Oils: Ensure your fragrance oils are suitable for candle making to prevent issues like poor scent throw or burning.
Variations and Customization Ideas
Customizing your candles can make them feel even more personal. Here are some ideas:
- Blend Scents: Combine different fragrance oils for a unique scent blend. Popular combinations include lavender and vanilla or citrus and mint.
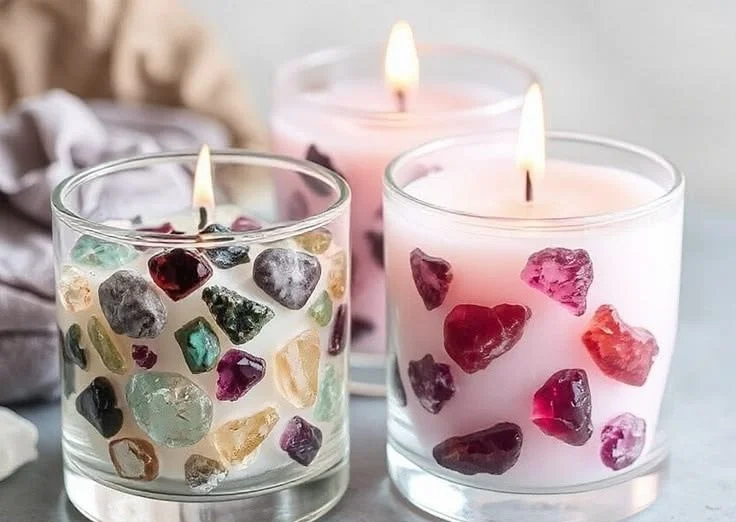
- Decorative Touches: Add dried flowers, herbs, or glitter to the melted wax before pouring for added aesthetic appeal.
- Different Containers: Use various containers like tea cups or tins for a unique look.
Storage and Shelf Life
Store your candles in a cool, dry place away from direct sunlight. Properly stored homemade candles can last up to a year or more without losing their scent or quality. To maintain their appearance, keep them in their containers when not in use.
Safety Tips
- Always work with wax in a well-ventilated area to avoid fumes.
- Never leave melting wax unattended; it can ignite if overheated.
- Use cotton or wooden wicks to reduce smoke and ensure a better burn.
Frequently Asked Questions
1. Can I use any type of wax for my candles?
Yes, you can use soy wax, beeswax, or paraffin wax, depending on your personal preferences and desired characteristics of the finished candle.
2. How can I make my candles smell stronger?
To enhance the scent, consider using a higher concentration of fragrance oil, but ensure to stay within the recommended limits to avoid issues when burning.
3. Why is my candle not burning evenly?
This can be caused by an improperly sized wick. Testing different wick sizes or adjusting the wick position can help achieve an even burn.
4. Can I add essential oils instead of fragrance oils?
Yes, but be sure the essential oils are suitable for candles, as some high-vanilla oils may not perform well or could cause the wax to burn improperly.
Conclusion
Making your own handmade candles using granulated wax is a rewarding craft that can brighten your home and delight your senses. With just a few ingredients and tools, you can create beautiful, customized candles for yourself or to share with loved ones. So gather your supplies, follow these easy steps, and let your creativity shine as you embark on this enjoyable DIY candle-making project! Happy crafting!