
Pumpkin Spice Homemade Soap: A Fall Delight for Your Skin
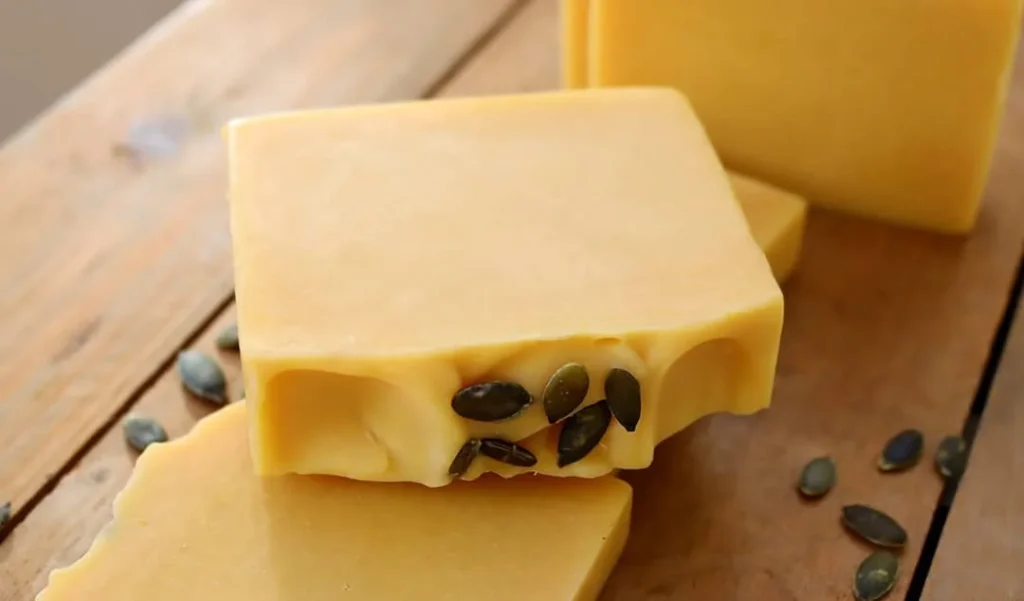
Making your own soap can be one of the most rewarding DIY projects. Today, I’m excited to share with you a fantastic recipe for pumpkin spice homemade soap that harnesses the wholesome goodness of real pumpkin. This natural soap not only smells amazing—bringing forth the warm, inviting scent of autumn—but it also contains skin-loving enzymes that energize and brighten your complexion. Let’s dive into the world of soap-making together!
Why You Will Love This Recipe
- Natural Ingredients: This recipe uses real pumpkin puree, which is packed with antioxidants and vitamins beneficial for your skin.
- Customizable Scents: You can tweak the fragrance to your liking, adding essential oils or other scents to make it uniquely yours.
- Easy to Follow: The instructions are straightforward, making it suitable for beginners.
- Fun Fall Activity: Perfect for homemade gifts, treating yourself, or getting into the festive spirit.
Ingredients
To make this delightful pumpkin spice soap, you will need the following ingredients:
- Oils & Butters:
- 10 oz. Olive Oil
- 10 oz. Coconut Oil
- 5 oz. Palm Oil
- Sodium Hydroxide (Lye):
- 4.5 oz. sodium hydroxide (always handle with care)
- Liquid:
- 10 oz. distilled water
- Pumpkin puree:
- 4 oz. (make sure it’s pure pumpkin, not pumpkin pie filling)
- Essential Oils:
- 1 oz. cinnamon essential oil (or a mix of your favorites)
- Optional: 0.5 oz. clove essential oil
- Color: Optional – a few drops of natural soap colorant, if desired.
Equipment
Before we start, gather the following equipment to ensure a smooth soap-making process:
- Safety goggles
- Rubber gloves
- Digital scale
- Two heat-safe containers (one for lye solution and one for oils)
- A stick blender
- Soap mold (silicone works great!)
- Thermometer
- Measuring spoons
- Spatula
- Stick blender
- Mixing spoons
Step-by-Step Instructions
Prep Time: 15 minutes
Making Time: 1 hour
Yield: Approximately 6-8 bars of soap
Step 1: Safety First
Start by putting on your safety goggles and gloves. Make sure you are in a well-ventilated area when working with lye.
Step 2: Prepare the Lye Solution
- In a heat-safe container, carefully measure out 4.5 oz. of sodium hydroxide.
- Measure 10 oz. of distilled water in a separate container.
- Slowly add the lye to the water (never the other way around!), stirring gently until it completely dissolves. The mixture will heat up rapidly. Set it aside to cool.
Step 3: Measure the Oils
- In your second heat-safe container, measure out your coconut oil, olive oil, and palm oil.
- Heat them gently until melted and combined, then allow them to cool to around 100°F (38°C).
Step 4: Combine the Lye and Oils
When both the lye solution and oils are at a similar temperature (around 100°F), slowly pour the lye solution into the oils.
Step 5: Blend to Trace
- Using the stick blender, mix until you reach “trace.” This is when the mixture thickens to a consistency resembling pudding.
- Add in the pumpkin puree, mixing well until it’s completely incorporated.
Step 6: Add Fragrance and Color
- Stir in your cinnamon and clove essential oils and mix well.
- If using, add in your natural soap colorant and blend until well incorporated.
Step 7: Pour into Molds
- Pour the soap mixture into your prepared molds, smoothing the top with a spatula, if necessary.
- If desired, you can sprinkle some cinnamon on top for decoration.
Step 8: Cure the Soap
- Cover the molds with a clean cloth and let them sit for 24-48 hours.
- Once firm, remove from the molds and cut into bars if necessary.
Step 9: Cure the Soap
The soap must cure for 4-6 weeks in a cool, dry place to allow the lye to fully saponify and make the soap safe to use.
Tips for Success
- Stick to precise measurements: Soap-making is a science, so accuracy matters.
- Stay organized: Prepare all your ingredients and equipment before starting to avoid any mishaps.
- Be patient: Allowing the soap to cure properly is crucial for the hardness and longevity of the bars.
Common Mistakes to Avoid
- Ignoring safety precautions: Always wear gloves and goggles when handling lye.
- Not Allowing Enough Cure Time: Rushing the cure time can lead to an unsafe product.
- Overheating your oils: This can affect the final texture and quality of your soap.
Variations and Customization Ideas
- Scents: Experiment with different essential oils like vanilla or nutmeg for a unique twist.
- Add-ins: Consider adding natural exfoliants like oatmeal or pumpkin seeds for texture.
- Design: Use different molds for unique shapes.
Storage and Shelf Life
Store your finished soap bars in a cool, dry place away from direct sunlight. Properly cured, they can last for 6-12 months. Store them in a soap dish that allows drainage to keep them dry between uses.
Safety Tips
- Always handle lye with care, and keep it away from children and pets.
- Work in a well-ventilated area.
- If lye comes in contact with skin, rinse immediately with plenty of water.
Frequently Asked Questions
Q1: Can I use canned pumpkin instead of fresh pumpkin puree?
A: Yes, but make sure it’s pure pumpkin with no additives.
Q2: Is it necessary to use essential oils?
A: No, it’s optional! You can omit them altogether or replace them with fragrance oils. Just ensure they are skin-safe.
Q3: What should I do if my soap doesn’t reach trace?
A: Blend for a bit longer. If it still doesn’t thicken, you might need to reheat the mixture slightly.
Q4: How do I know when my soap is safe to use?
A: It’s best to let your soap cure for 4-6 weeks before using it to ensure it’s safe.
Q5: Can I customize the color of my soap?
A: Yes! Use natural colorants like beet powder or activated charcoal for a unique look.
Conclusion
Making pumpkin spice homemade soap is not only a fun and rewarding project; it also gives your skin a nourishing treat. The combination of pumpkin, essential oils, and natural ingredients results in rich, aromatic soap that’s perfect for this season. I encourage you to try this recipe and let your creativity shine! Happy soaping!