
Homemade Rosemary-Mint Soap: A Step-by-Step Guide
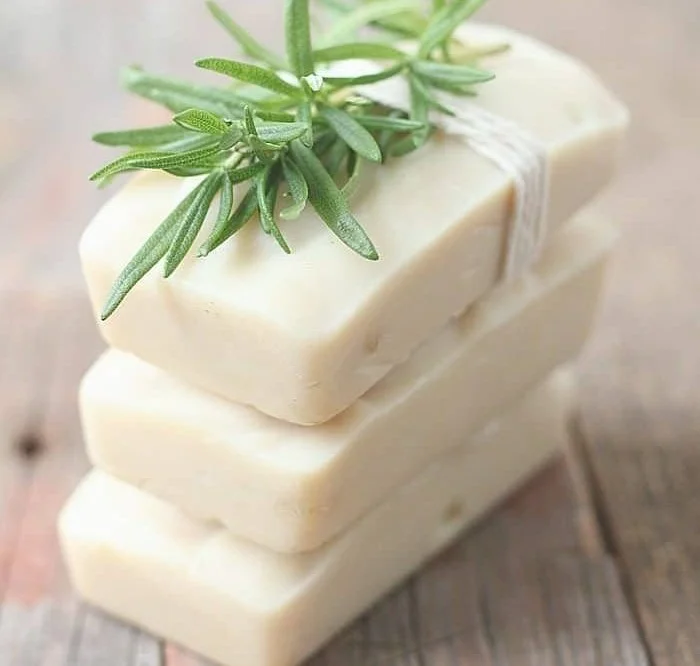
Oh man! I love the minty-freshness of this homemade rosemary-mint soap! Not to mention the creaminess of the goat milk. My skin feels so soft! Making your own soap at home not only allows you to control the ingredients but also gives you the pleasure of creating something special for yourself or as a gift.
Why You Will Love This Recipe
This rosemary-mint soap combines the refreshing scent of mint with the earthy aroma of rosemary, creating a delightful experience with each use. Goat milk adds a luxurious creaminess to the soap, making it perfect for dry or sensitive skin. Plus, making soap at home is a gratifying DIY project that can be easily customized to suit your preferences or needs.
Ingredients
For this recipe, you will need the following:
- 8 oz goat milk (preferably fresh)
- 16 oz melt and pour soap base (goat milk or shea butter base works well)
- 10 drops peppermint essential oil
- 10 drops rosemary essential oil
- 2 tsp dried rosemary leaves (optional)
- Soap colorant (optional, for aesthetic purposes)
Equipment
Before you start, gather these supplies:
- Heat-safe mixing bowl
- Double boiler or microwave-safe container
- Whisk or spoon
- Soap mold (silicone molds work best)
- Measuring spoons
- Stick blender (optional)
- Safety goggles and gloves (for safety)
Step-by-Step Instructions
Follow these steps to create your rosemary-mint soap:
Prepare Your Workspace: Make sure your area is clean and organized. Put on your safety goggles and gloves to protect yourself during the soap-making process.
Melt the Soap Base:
- Double Boiler Method: Fill the bottom pot with water and place a heat-safe bowl on top that holds your soap base. Heat over medium-low heat, stirring until melted.
- Microwave Method: Place the soap base in a microwave-safe container. Heat in 30-second intervals, stirring after each, until fully melted.
Add Goat Milk: Once your soap base is melted, slowly stir in the goat milk. Mix thoroughly until well combined.
Incorporate Scents and Color:
- Stir in the peppermint and rosemary essential oils.
- If using colorant, add a few drops and mix well until you achieve your desired shade.
Incorporate Dried Rosemary: If you wish to add texture, gently mix in the dried rosemary leaves.
Pour Into Molds: Carefully pour the soap mixture into your soap mold. You can tap the mold gently to remove air bubbles.
Let It Set: Allow the soap to cool and harden at room temperature for about 1-2 hours. For faster setting, you can place it in the fridge.
Remove from Molds: Once hardened, carefully pop the soap bars out of the molds.
Cure the Soap: Let the bars cure for an additional 24-48 hours in a cool, dry place. This helps stabilize the finished product.
Tips for Success
- Temperature Control: Avoid overheating the soap base, as it can cause scorching or the soap to seize.
- Fragrance Strength: Adjust the amount of essential oils based on your scent preference. Start with less and increase if you prefer a stronger aroma.
- Stirring Techniques: Use a whisk or stick blender to ensure proper emulsification of ingredients.
Common Mistakes to Avoid
- Skipping Safety Gear: Always wear gloves and goggles when making soap to avoid any irritation from the essential oils or soap base.
- Rushing the Cooling Process: Patience is key. Let the soap cool at room temperature before moving it to the fridge, as rapid cooling can affect the soap’s texture.
- Overmixing the Essential Oils: This can lead to evaporation of the aroma. Mix just until incorporated.
Variations and Customization Ideas
- Different Essential Oils: You can swap out peppermint and rosemary for other essential oils like lavender, eucalyptus, or citrus for a different scent profile.
- Add Exfoliants: Consider incorporating finely ground oats or sea salt for a gentle exfoliating effect.
- Color Play: Use natural colorants like turmeric for yellows or activated charcoal for darker shades.
Storage and Shelf Life
Store your finished soap bars in a cool, dry place, away from direct sunlight. They can last up to 1 year if stored properly. Remember that over time, essential oils may fade, so it’s best to use them within six months for the best scent.
Safety Tips
- Essential Oil Sensitivity: Always do a patch test on your skin with the essential oils to ensure you don’t have an allergic reaction.
- Handling Hot Materials: Be cautious when melting the soap base to prevent burns.
Frequently Asked Questions
Q1: Can I use any type of soap base?
A: Yes, you can use various melt and pour soap bases, such as glycerin or shea butter. Each will impart a different texture and moisturizing quality.
Q2: How can I ensure my soap has a good scent?
A: Use high-quality essential oils and add them at the end of the melting process to maintain their aromatic properties.
Q3: Can I use fresh rosemary instead of dried?
A: Yes, but be mindful that fresh herbs can impact the longevity of your soap and may cause it to spoil faster.
Q4: What if my soap doesn’t harden?
A: If your soap remains soft, it may need more time to cure or may have had too much moisture. Store it in a cool, dry place to help it firm up.
Q5: Can I melt and pour more than once?
A: While you can melt the soap base multiple times, excessive heating can affect the soap’s final quality. It’s best done sparingly.
Conclusion
Making your own rosemary-mint soap is a wonderful DIY project that combines creativity with self-care. This gentle, creamy soap will refresh your skin and fill your bathroom with a delightful fragrance. Whether you are new to soap-making or an experienced crafter, I hope this guide inspires you to try making your own soaps at home. Get creative, enjoy the process, and most importantly, have fun! Enjoy the minty freshness and the lovely softness of goat milk in your homemade soap!