
Making and Cutting Homemade Cold Process Salt Bar Soap in Loaf Molds
Are you ready to dive into the wonderful world of homemade soap? If you’ve been contemplating trying your hand at cold process salt bar soap, but you only have loaf molds, you’re in the right place! Although traditionally made in individual cavity molds, it is indeed possible to use loaf molds to create beautiful, high-quality salt bars. Today, we’ll guide you step-by-step through the process, using a divine Rose Clay Salt Bar Loaf recipe as our template. This creamy, gentle soap combines the benefits of salt with nourishing oils, creating a luxurious wash for your skin.
Why You Will Love This Recipe
Homemade salt bar soap is not only a treat for your skin but also a fantastic way to express your creativity. Salt bars are known for their hard texture, excellent lather, and skin-conditioning properties. Additionally, making soap in loaf molds makes for easy cutting and storage. These bars can be customized with scents, colors, and textures, ensuring that each batch reflects your unique taste. Plus, the satisfaction you’ll feel when you create something beautiful and useful is unmatched!
Ingredients
For this recipe, we’ll be using the cold process method, which involves saponification—a chemical reaction between oils and an alkaline solution. Here’s what you’ll need:
Oils:
- 16 oz (454 g) Olive Oil
- 16 oz (454 g) Coconut Oil
- 16 oz (454 g) Palm Oil
- 10 oz (283 g) Castor Oil
Lye Solution:
- 6.8 oz (193 g) Sodium Hydroxide (Lye)
- 16 oz (454 g) Distilled Water
Additives:
- 1 oz (28 g) Rose Clay (for color and gentle exfoliation)
- 1 oz (28 g) Essential Oil (like lavender, for a soothing aroma)
- 1 oz (28 g) Sea Salt (to enhance the therapeutic quality of the soap)
Equipment
Before you get started, make sure you have the following equipment:
- Safety goggles and gloves
- Digital scale
- Stick blender
- Heat-safe container for lye solution
- Stainless steel or enamel pot
- Soap molds (loaf mold)
- Measuring spoons
- Thermometer
- Spatula
- Parchment paper (for lining the molds)
Step-by-Step Instructions
Preparation Time: 15 minutes
Making Time: 1-2 hours (including saponification)
Yield: Approximately 10-12 bars of soap
Safety First: Put on your gloves and safety goggles. Make sure you’re working in a well-ventilated area.
Weigh the Lye and Water: In a heat-safe container, carefully measure 16 oz of distilled water. Slowly add 6.8 oz of sodium hydroxide (lye) to the water (never the other way around). Stir until dissolved, then set aside to cool.
Measure and Melt the Oils: Weigh out all the oils (olive, coconut, palm, and castor oils) in a large stainless-steel pot. Heat them gently until all the solid oils are melted and combined. Allow the oil mixture to cool.
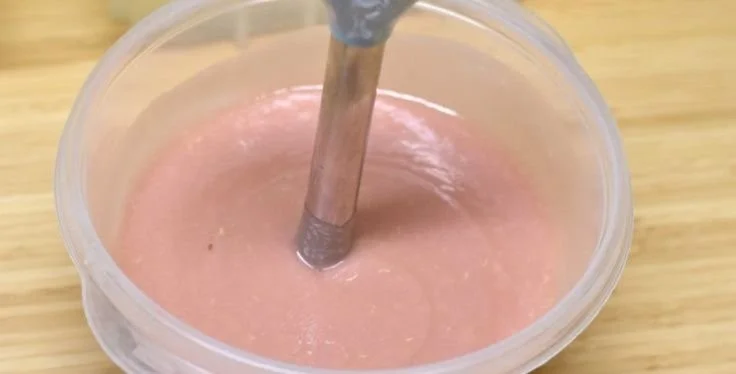
Combine Water and Oils: Once both the lye solution and oils are between 100°F and 110°F, carefully pour the lye solution into the oils. Use a stick blender to mix until you reach a light trace (the mixture should thicken slightly).
Add Clay and Essential Oil: When the soap reaches a light trace, add the rose clay and essential oil. Blend thoroughly until well incorporated.
Incorporate Sea Salt: Gently stir in the sea salt until evenly distributed throughout the soap mixture.
Pour into the Mold: Pour the soap mixture into your loaf mold, making sure to tap gently to remove air bubbles. Smooth out the top with a spatula.
Insulate and Cure: Cover the soap with a towel and leave it undisturbed for 24-48 hours to finish saponifying. After this period, check for the "zap" test to ensure it is safe to unmold.
Cutting the Soap: Once fully cured, carefully remove the soap from the mold and cut it into bars. A soap cutter or a sharp knife works well for this.
Cure Again: Allow the bars to cure in a cool, dry place for 4-6 weeks before using. This time allows the soap to harden, improving its longevity and lather.
Tips for Success
- Measuring Accurately: Use a digital scale for precise measurements to ensure your lye ratio is correct.
- Stick Blending: Avoid over-mixing; you want a light trace so that the soap retains some of its fluidity for pouring.
- Fragrance Selection: Essential oils can vary in strength; consider testing a small batch with your preferred fragrance for best results.
Common Mistakes to Avoid
- Not Wearing Safety Gear: Always prioritize your safety and wear gloves and goggles when working with lye.
- Temperature Mismanagement: Ensure that both your lye and oils are within the recommended temperature range to avoid issues during saponification.
- Not Allowing Enough Cure Time: Rushing to use your soap can result in a soft bar that may not last long.
Variations and Customization Ideas
- Coloring: Besides rose clay, you can experiment with other natural colorants like annatto seeds or activated charcoal.
- Add Ingredients: Customize your soap by adding other skin-loving ingredients like honey, oatmeal, or dried herbs.
- Essential Oils: Experiment with different essential oil blends to create unique scents that suit your preferences.
Storage and Shelf Life
Store your salt bar soap in a cool, dry area away from direct sunlight. It’s best to keep the bars in an open box or on a drying rack to allow air circulation. When properly cured, your salt bar soap can last for up to a year.
Safety Tips
- Always add lye to water, never the reverse. This helps to prevent dangerous splashes.
- Be aware of the smell that comes from lye; it should dissipate once mixed with oils.
- Keep your workspace clear of distractions, especially when handling lye and mixing ingredients.
Frequently Asked Questions
Q1: Can I substitute any of the oils in this recipe?
Yes! Feel free to substitute other carrier oils, keeping in mind that each oil has different saponification values. Use a reliable soap calculator to adjust lye amounts accordingly.
Q2: What if my soap didn’t trace?
If your soap didn’t reach trace, it may need more mixing. Continue blending until you see a light trace before pouring.
Q3: How can I tell if my soap is ready to cut?
If your soap feels firm and there’s no "zap" when you touch it with your tongue, it’s ready to be cut.
Q4: Is it okay to use scented oils instead of essential oils for fragrance?
While scented oils can be used, they may not be skin-safe. Ensure you choose ones specifically labeled for soap making.
Q5: How should I store the unused salt bar soap?
Wrap the bars in wax paper or natural fabric to help prevent them from sweating or drying out and store them in a cool place.
Conclusion
Making cold process salt bar soap in a loaf mold is a rewarding project that can yield beautiful results with a bit of patience and care. With the steps outlined above and the versatility of the recipe, you can create custom soaps that are not only functional but also a joy to use. Don’t be afraid to get creative, experiment with ingredients, and most importantly, enjoy the process! Happy soap making!