
How to Make Pumpkin Spice Soap (Cold Process Recipe)
Making your own pumpkin spice soap is a fantastic way to embrace the cozy vibes of fall—without the calories! The process of cold process soap making allows you to create beautiful, nourishing bars using natural ingredients, providing a unique project that results in delightful homemade gifts or a treat for yourself. This guide will take you through every step, from gathering ingredients to pouring your soap into molds. Let’s get started!
Why You Will Love This Recipe
Not only does this pumpkin spice soap smell divine—bringing to mind the essence of autumn spices and sweet pumpkins—but it also nourishes your skin with its natural oils and buttery texture. This recipe utilizes a rich, moisturizing blend of oils suitable for all skin types. Plus, the satisfaction of crafting something from scratch is unparalleled!
Preparation Time: 30 minutes
Making Time: 24 hours
Yield: About 8-10 bars of soap
Ingredients
To make pumpkin spice soap, you will need the following ingredients:
- 16 oz (1 lb) Olive Oil
- 10 oz (0.625 lb) Coconut Oil
- 10 oz (0.625 lb) Palm Oil
- 4 oz (0.25 lb) Castor Oil
- 6 oz (0.375 lb) Lye (sodium hydroxide)
- 14 oz (0.875 lb) Distilled Water
- 4 tablespoons Pumpkin Puree (canned or fresh)
- 1 tablespoon Pumpkin Pie Spice (for scent and color)
- Essential Oils (optional): You may choose to add about 0.5 oz (15 ml) of your favorite essential oils, such as cinnamon, clove, or nutmeg for an aromatic touch.
Equipment
Before you begin, gather the following equipment:
- Safety goggles
- Rubber gloves
- Lab scale (for precise measurements)
- Digital thermometer
- Stick blender
- Soap molds (silicone ones work best)
- Mixing bowls made of glass or stainless steel (never plastic)
- Measuring cups and spoons
- A spatula
- An apron and long sleeves (for safety)
Step-by-Step Instructions
Step 1: Prepare Your Workspace
Making soap involves lye, which can be hazardous if not handled properly. Start by ensuring your workspace is well-ventilated and free from distractions. Wear your safety goggles and gloves throughout the process.
Step 2: Measure and Mix the Lye Solution
- Weigh the distilled water in a heat-resistant bowl.
- Using a separate bowl, weigh the lye using your lab scale.
- Slowly add the lye to the water (never the other way around, as it can cause a dangerous reaction). Stir gently until the lye dissolves completely. The solution will heat up rapidly, so let it cool to about 100°F (37°C).
Step 3: Measure and Melt the Oils
- Weigh your oils: olive, coconut, palm, and castor oil into a large bowl.
- Gently heat the oils until the coconut oil is completely melted, but don’t exceed 120°F (49°C).
- Allow the oils to cool to a temperature around 100°F (37°C), similar to your lye mixture.
Step 4: Combine Lye and Oils
- Once both the lye solution and oils are at 100°F (37°C), slowly pour the lye solution into the blended oils.
- Using your stick blender, blend the mixture until it reaches "trace"—a thick pudding-like consistency. This might take several minutes.
Step 5: Incorporate Pumpkin and Spices
- Add the pumpkin puree and pumpkin pie spice to the soap mixture.
- Blend thoroughly until everything is well incorporated and homogeneous.
Step 6: Pour into Molds
- Carefully pour the soap batter into your molds, tapping the molds lightly to remove any air bubbles.
- Cover the molds with a towel or plastic wrap to insulate and allow the soap to saponify.
Step 7: Let It Cure
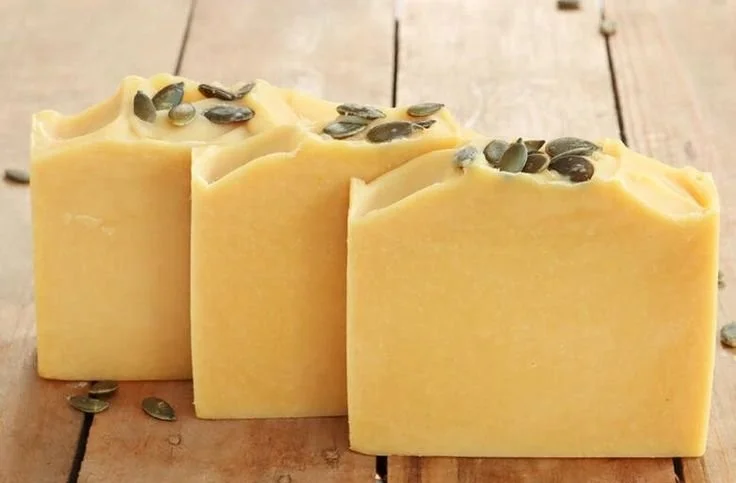
- Allow the soap to sit in the molds for 24-48 hours until it hardens sufficiently. After hardening, gently remove the soap from the molds.
- Cut the soap into bars and place them on a drying rack.
Step 8: Cure the Soap Bars
Allow your bars to cure in a cool, dry place for 4-6 weeks. This curing process is essential for the soap to complete its saponification reaction, ensuring it’s safe to use.
Tips for Success
- Use a reliable soap calculator: Lye calculations are crucial for safety and effectiveness. Services like SoapCalc can help you determine the exact amount based on the specific oils you’re using.
- Keep a consistent temperature: Maintaining similar temperatures for your lye and oil mixtures is essential for reaching trace successfully.
- Take notes: Document your process and measurements for future reference. This helps in tweaking and perfecting your recipe as you become more experienced.
Common Mistakes to Avoid
- Improper lye measurements: Always measure your lye using a digital scale for precision.
- Skipping safety gear: Never skip gloves and goggles when working with lye.
- Working too fast: It’s tempting to rush through, but take your time to ensure each step is completed properly.
Variations and Customization Ideas
Here are some ways to customize your pumpkin spice soap:
- Add Color: Use natural colorants like turmeric for a beautiful golden hue.
- Mix Oils: Experiment with different oils (like sweet almond or avocado) for varied properties.
- Herbal Add-ins: Crushed oats or poppy seeds can add texture and exfoliation.
Storage and Shelf Life
Your homemade pumpkin spice soap should be stored in a cool, dry place. When adequately cured and stored, the soap can last for over a year. Avoid exposing the soap to direct sunlight or humidity to prolong its shelf life.
Safety Tips
- Always use safety gear, including gloves and goggles when handling lye.
- Work in a well-ventilated area to avoid inhaling fumes.
- Keep lye and finished soap out of reach of children and pets.
Frequently Asked Questions
1. Can I use a different type of oil in this recipe?
Yes, you can substitute oils, but be aware that each oil has different saponification values. Make sure to use a soap calculator to adjust your lye accordingly.
2. What happens if I don’t cure the soap long enough?
Using soap that hasn’t fully cured can lead to skin irritation as the lye might not be fully neutralized.
3. Can I add colorants to the soap?
Absolutely! Just be sure to use soap-safe colorants, particularly if you want to maintain the natural aspect of the soap.
4. Is it safe to use pumpkin puree in soap?
Yes, using pumpkin puree is safe and adds natural moisture, but be cautious about how much you use as excess water could affect the curing process.
5. How long should I let the soap cure?
Curing typically takes 4-6 weeks, which allows the soap to harden and ensures it’s safe and gentle on the skin.
Conclusion
Creating your own pumpkin spice soap is a rewarding DIY project that brings the warmth of the season into your skincare routine. With this easy-to-follow cold process recipe, you can indulge in the scents of autumn while crafting a product that is all-natural and skincare-friendly. Don’t hesitate to experiment with variations and make this recipe your own! Enjoy the process, and happy soap making!