
Homemade Soap and Candle Making: A Warm DIY Guide for Beginners
Creating your own soap and candles at home is not just a rewarding experience, but it’s also a wonderful way to express your creativity and give personalized gifts to loved ones. Whether you’re looking to craft homemade soap that nourishes the skin or DIY candles that fill your space with delightful aromas, this guide will walk you through the essential steps, tips, and safety considerations, making it easy for even the most novice crafters to jump right in.
Why You Will Love This Recipe
Making your own soap and candles offers numerous benefits. You control the ingredients, allowing you to customize scents and colors, and ensure that no harsh chemicals are used. Plus, both projects can be surprisingly simple and fun! Handmade gifts have a personal touch that store-bought products just can’t match, making them perfect for birthdays, holidays, or just because.
Ingredients
For Homemade Soap
- Base Oils: Choose from olive oil (10 oz), coconut oil (10 oz), and palm oil (10 oz).
- Lye (sodium hydroxide): 4 oz – Handle with care.
- Distilled Water: 12 oz.
- Essential Oils (for fragrance): 1 oz, optional.
- Colorants: Optional, depending on your preferences.
For DIY Candles
- Wax: Soy wax (1 lb) is a great choice for beginners.
- Wicks: 2 cotton wicks suitable for the container size.
- Fragrance Oils: 1 oz, optional based on your scent strength preference.
- Containers: Glass jars or metal tins, approx. 8 oz size.
Equipment
- Soap Making: Scale (for measuring), safety goggles, gloves, heat-resistant containers, stick blender, soap mold, thermometer, and mixing spoons.
- Candle Making: Double boiler (or microwave-safe container), thermometer, pouring pitcher, wick holder, and stirring utensils.
Step-by-Step Instructions
Homemade Soap (Cold Process Method)
Prepare Your Workspace: Ensure your work area is clean and well-ventilated. Safety gear, including goggles and gloves, is a must.
Measure Your Ingredients: Using a scale, weigh the lye and water separately. Always add lye to water (never the reverse) while stirring gently – this will create a heat reaction.
Heat the Oils: In a heat-resistant container, melt your coconut oil if it’s solid, then combine it with olive and palm oils until they reach about 100-110°F.
Mix Lye Solution: Once the lye is fully dissolved and has cooled to room temperature, slowly add it to your oils while blending with a stick mixer until it reaches a light trace (similar to a thin pudding).
Add Fragrance and Colorant: Stir in your essential oils and any colorants you wish.
Pour Into Molds: Carefully pour your soap mixture into molds and leave it to saponify for 24-48 hours.
Unmold and Cure: After 1-2 days, remove the soap from molds and place them on a drying rack. Allow them to cure for about 4-6 weeks.
DIY Candles
Prepare Your Equipment: Gather all your tools and containers.
Measure Your Wax: If you’re using 1 lb of wax, this will yield about 3-4 candles depending on the container size.
Melt the Wax: Using a double boiler or microwave, melt your wax. Monitor the temperature until it reaches approximately 170-180°F.
Add Color and Fragrance: Stir in your fragrance oil and dye once the wax has melted. Mix well to ensure an even consistency.
Attach the Wick: Secure your wick to the bottom of the container using a bit of wax or wick sticker.
Pour Candles: Carefully pour the wax into the container, leaving a small gap at the top.
Set the Candle: Allow it to cool for several hours at room temperature and trim the wick to 1/4 inch above the wax.
Tips for Success
- Soap Making: Always double-check lye measurements with a reliable lye calculator based on your specific oils. Avoid using flavored oils as they often don’t behave well in soap.
- Candle Making: Test a small batch of candles first to find the right wick size for your containers, and be sure to let your candles cure for at least 24 hours before burning for optimal fragrance.
Common Mistakes to Avoid
- For Soap: Never rush the cooling process of your lye solution. If it’s too hot, it can affect the final soap quality.
- For Candles: Avoid pouring wax that is too hot as it can crack the container.
Variations and Customization Ideas
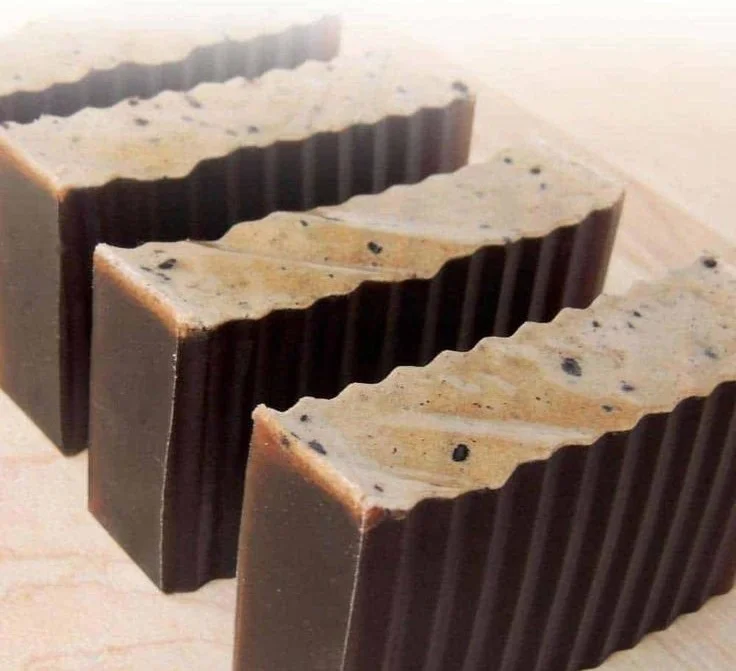
- Soap: Experiment with different oils (like almond, sunflower, or avocado), or add exfoliants like oatmeal or ground coffee for textural benefits.
- Candles: Incorporate herbs or dried flowers into your candles for a beautiful visual effect, or experiment with layering colors.
Storage and Shelf Life
- Soap: Store your cured soaps in a cool, dry place away from direct sunlight. They can last upwards of a year!
- Candles: Store your candles upright in a cool, dry location. Generally, they can last for 1-2 years if stored properly.
Safety Tips
- Soap Making: Always use protective gear when handling lye, and ensure good ventilation during the mixing process.
- Candle Making: Never leave melting wax unattended, and safely monitor burning candles at all times.
Frequently Asked Questions
1. What type of lye is used in soap making?
Sodium hydroxide is the type of lye used in cold process soap making.
2. Can I use regular water instead of distilled water in soap?
It’s best to use distilled water, as tap water can contain impurities that may affect the saponification process.
3. How do I test wicks for my candle size?
Burn small test candles to check how well the wick performs. It should burn evenly without producing soot or excessive smoke.
4. Can I mix different wax types for candles?
While most people stick to one type of wax, experimenting with blends — like paraffin and soy — is common for achieving unique textures and burn qualities.
5. How long after making soap can I use it?
It’s recommended to cure your soap for at least 4-6 weeks before using to allow for proper saponification.
6. What should I do if my candle cracks?
If your candle cracks, it’s likely poured at too high a temperature; next time, try reducing the pouring temperature or allow it to cool slightly before pouring.
Conclusion
Making homemade soap and candles can be a delightful hobby that brings a sense of accomplishment and joy. With just a few ingredients and the right tools, you can create customized products that not only serve functional purposes but also enhance your personal or home aesthetics. Remember to follow safety precautions and enjoy the journey of discovering your own unique recipes. Happy crafting!