
Make Your Home Feel Warm and Inviting with DIY Scented Candle Jars!
Creating a cozy and inviting atmosphere in your home can be easily achieved by making your own scented candles. DIY candle jars filled with delightful fragrances not only elevate your home’s aesthetic but also enhance your relaxation space. In this guide, we’ll walk through the simple steps of making beautiful, scented candles using dried flowers, essential oils, and personalized labels. So grab your crafting apron and let’s get started!
Why You Will Love This Recipe
Making DIY scented candles is a fantastic way to express your creativity while adding a personal touch to your home decor. Here’s why you’ll enjoy this project:
- Customization: Use your favorite scents and blend different oils to create a truly unique aroma.
- Aesthetic Appeal: Decorate your jars with dried flowers, colors, and labels that fit your home’s style.
- Thoughtful Gifts: Homemade candles make perfect gifts for friends and family on any occasion.
- Relaxation: Scented candles promote relaxation and create a serene atmosphere in your home.
Ingredients
For this project, you’ll need the following materials:
- Wax: 2 cups of soy wax or beeswax (both are great for beginners)
- Essential Oils or Fragrance Oils: 1 ounce (approximately 30ml), your choice (lavender, vanilla, citrus, etc.)
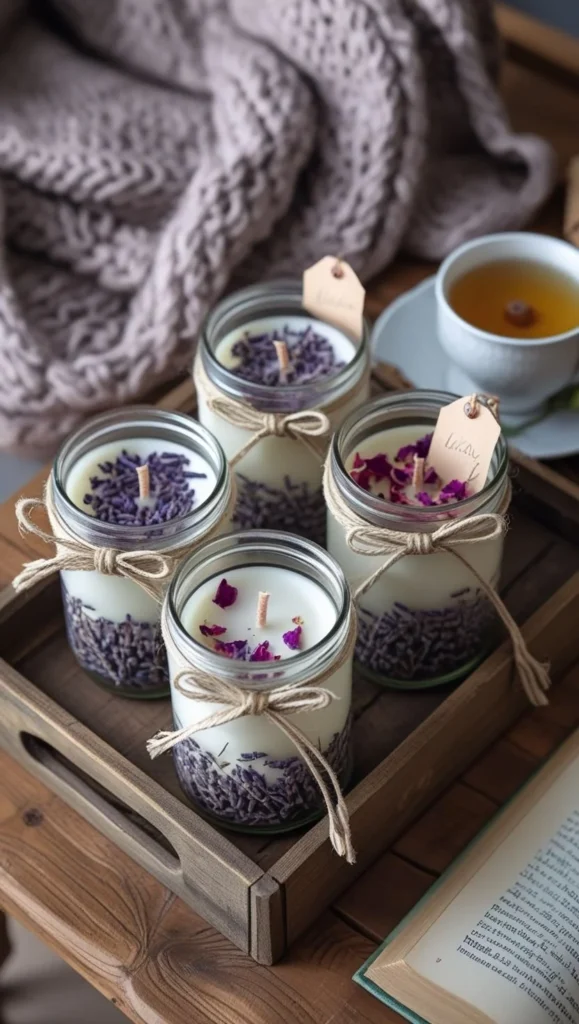
- Dried Flowers (optional): ½ cup (e.g., lavender buds, rose petals, chamomile)
- Wick: Pre-tabbed cotton wicks (8-12 inches long, depending on jar size)
- Container: 2-3 heat-resistant glass jars (8-ounce size is a good start)
Equipment
Here’s what you’ll need for your DIY scented candle project:
- Double boiler or microwave-safe container
- Stirring utensil (wooden stick or spoon)
- Thermometer (optional, but helpful)
- Wick holder or chopsticks (to keep the wick centered while pouring)
- Measuring cup and scale
- Protective gloves (optional)
Step-by-Step Instructions
Step 1: Prepare Your Workspace
- Make sure your workspace is clean and free from any distractions.
- Lay down newspaper or a protective covering to catch any wax spills.
Step 2: Measure the Wax
- Measure out 2 cups of wax. If you’re using soy wax, this equates to about 400 grams if you’re measuring by weight.
Step 3: Melt the Wax
Double Boiler Method:
- Fill the bottom pot with water and bring it to a gentle simmer.
- Place the wax in the top pot and stir periodically until melted (typically takes about 10-15 minutes).
Microwave Method:
- Place the wax in a microwave-safe bowl and heat in 30-second intervals, stirring in between, until fully melted.
Step 4: Add Scents and Mix
- Once completely melted, allow the wax to cool slightly (to about 180°F or 82°C) before adding 1 ounce of fragrance oil.
- Stir thoroughly to ensure an even scent distribution.
Step 5: Prepare the Jars and Wick
- While the wax is cooling, secure the wick to the bottom of each glass jar using a small amount of melted wax or a wick sticker.
- Use a wick holder or chopsticks to center the wick in the jar.
Step 6: Pour the Wax
- Carefully pour the wax into the prepped jars, leaving about half an inch from the top.
- If you’re using dried flowers, sprinkle them into the wax before it hardens, or place them in the jar first for a decorative touch.
Step 7: Allow to Cool
- Let the candles cool completely, which can take several hours.
- Optional: If you notice any sinkholes or uneven surfaces, you can reheat some excess wax and pour it over the top to create a smooth finish.
Step 8: Trim the Wick
- Once cooled, trim the wick to about ¼ inch above the candle surface.
Step 9: Personalize Your Candles
- Create custom labels with your chosen scents and decorative designs.
- Consider adding a warm message if you plan to gift these candles.
Tips for Success
- Temperature Matters: Make sure not to pour the wax when it’s too hot, as this can lead to cracks or uneven surfaces once cooled.
- Keep It Simple: Experiment with single scents before blending oils – this will help you gauge your familiar comfort with aromatic combinations.
Common Mistakes to Avoid
- Pouring at the Wrong Temperature: Always wait until your wax cools slightly before adding fragrance.
- Too Much Fragrance: Excessive fragrance can lead to burning issues or smoke. Stick to recommended amounts.
- Neglecting Wick Size: Using a wick that’s too small will cause your candle to burn poorly, while a wick that’s too large can create soot and uneven burning.
Variations and Customization Ideas
- Color: Add candle dye to achieve colors that match your home décor.
- Layering: Consider pouring different layers of colors or scents for a multi-dimensional candle.
- Essential Oil Blends: Experiment with blending oils for unique scents that reflect the seasons, such as pumpkin spice for autumn.
Storage and Shelf Life
Store your finished candles in a cool, dry place away from direct sunlight. When properly stored, they can last for several months to a year.
Safety Tips
- Always use heat-resistant containers to prevent breakage.
- Do not leave burning candles unattended.
- Ensure your candle wick is trimmed to reduce soot and uncontrolled flames.
- Keep candles out of reach of pets and children.
Frequently Asked Questions
Can I use any type of wax for making candles?
Yes, you can use various wax types such as paraffin, soy, beeswax, or palm. Each type has different burning characteristics, so choose based on your preferences.
What should I do if my candles burn unevenly?
Uneven burning can often be fixed by ensuring the wick is centered. Additionally, using a proper wick size can mitigate issues. If the problem persists, try adjusting the wax temperature next time.
Can I use synthetic fragrance oils in my candles?
Yes, synthetic fragrance oils are commonly used and can provide an excellent scent throw. Just make sure they are labeled as candle-safe.
How do I clean up wax spills?
For minor spills, let the wax cool and harden, then scrape off with a plastic spatula. For stubborn stains, heat gently with a hairdryer to soften before cleaning.
Conclusion
Making DIY scented candles can be a fulfilling and fun project that adds warmth and personality to your home. With just a few materials and some creativity, you can create candles that smell great and look beautiful. Whether for personal use or as thoughtful gifts, these handmade candles are sure to bring joy and a touch of coziness to any space. So roll up your sleeves and start crafting your fragrant masterpieces today!