
26 Fresh & Elegant Spring Nail Design Ideas
Spring is here, and with it comes a delightful opportunity to refresh your nail designs! Whether you’re preparing for a wedding, a casual brunch, or simply embracing the vibrant tones of the season, we have compiled a list of 26 fresh and elegant spring nail design ideas just for you. Each design reflects the rejuvenating spirit of spring, emphasizing soft colors, floral patterns, and playful graphics. Let’s dive into some inspiring nail art ideas that will have you feeling chic and ready for the sunshine.
Why You Will Love These Nail Designs
Spring is all about renewal and creativity, and showcasing that on your nails can elevate your overall style. These nail designs are not only visually stunning, but they also allow you to express your personality and mood. From pastel hues that represent soft florals to bold geometric patterns that offer a modern twist, you have a wide array of choices. Perfect for both beginners and seasoned nail art enthusiasts, these designs can be customized based on your preferences.
1. Pastel Ombre
Description: Blend soft hues like pink, lavender, and mint for a stunning ombre effect.
How to Achieve: Use a makeup sponge to dab the colors onto a white base coat, blending smoothly.
2. Floral Accents
Description: Create a beautiful floral pattern on one or two accent nails.
How to Achieve: Use a thin nail art brush and special nail polish or acrylic paint to hand-paint small flowers.
3. Minimalist Geometric
Description: Combine negative space with simple shapes like triangles or stripes.
How to Achieve: Use striping tape for precision and choose a palette of soft colors.
4. Glitter Fade
Description: Sparkle at the tips with a gradient of fine glitter.
How to Achieve: Apply a clear polish base and gently sprinkle glitter, fading it down the nail.
5. Lemon Zest
Description: Draw cute lemon slices for a fun summer vibe.
How to Achieve: Paint a solid color nail, then add tiny lemon graphics on top with a fine brush.
6. Abstract Lines
Description: Use contrasting colors to create bold lines that overlap.
How to Achieve: Utilize a fine brush and layered colors for an impactful look.
7. Rainbow Swirls
Description: Incorporate multiple colors in swirling patterns for a bright summer look.
How to Achieve: Use a dotting tool to create swirls with several spring-inspired shades.
8. Watercolor Wash
Description: Mimic the look of watercolor for a soft and breezy effect.
How to Achieve: Dilute nail polish with a base coat for a translucent finish.
9. Marble Effect
Description: A chic marble finish with gentle spring colors.
How to Achieve: Swirl two polish colors together using a toothpick on a wet base.
10. Butterfly Designs
Description: Paint tiny butterflies for a whimsical touch.
How to Achieve: Use a thin nail brush to create delicate butterfly wings with colors of your choice.
11. Polka Dots
Description: Classic polka dots in pastel colors make for a cheerful design.
How to Achieve: Use a dotting tool to place dots on a contrasting base.
12. Tribal Prints
Description: Add a modern edge with tribal-inspired patterns.
How to Achieve: Use fine brushes or nail art stickers for intricate designs.
13. Floral Water Decals
Description: Apply floral water decals for an effortless design.
How to Achieve: Soak the decal in water, apply it to your nail, and seal it with top coat.
14. Sunshine Stripes
Description: Bright yellow and white stripes for a sunny feel.
How to Achieve: Tape off sections of the nail and paint in alternating colors.
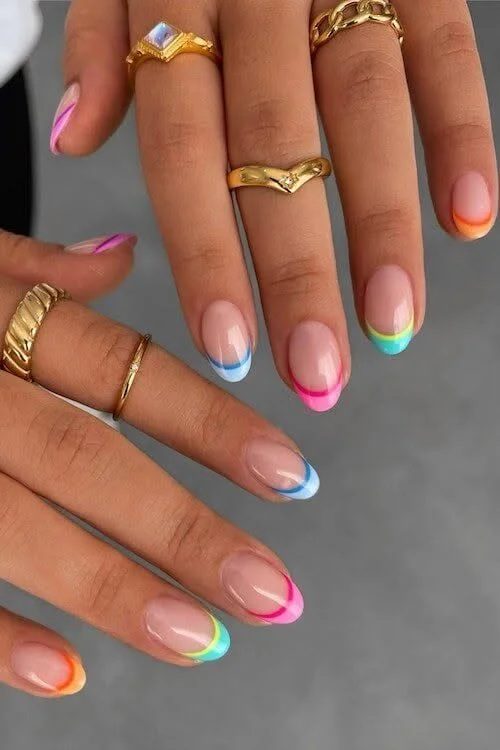
15. Neon Tip
Description: Bright neon tips against a neutral base brings a fun twist.
How to Achieve: Use a light color as a base and apply neon polish to the tips.
16. Ombre Glitter
Description: Combine an ombre effect with glitter for glam.
How to Achieve: Gradually blend your colors from the cuticle to the tip, then top with glitter.
17. Dotted Flowers
Description: Create flowers using dot techniques for an easy artistic approach.
How to Achieve: Dot the center and add petals around it using different colors.
18. Seashell Inspired
Description: Mimic the beauty of seashells with pinks and purples.
How to Achieve: Use a sponge to create textured waves of color reminiscent of seashells.
19. Sweet Pea Nails
Description: Adorn your nails with soft sweet pea graphics.
How to Achieve: Hand-paint small, delicate sweet pea flowers on a light background.
20. Color Blocking
Description: Block out colors for a creatively bold look.
How to Achieve: Tape and paint alternate sections of two or three colors on the nail.
21. Glitter Dots
Description: Add glittery dots on a solid base.
How to Achieve: Use a larger dotting tool to place glitter dots consistently around the nail.
22. Fruit Slices
Description: Cute citrus slices or watermelon designs will brighten your look.
How to Achieve: A steady hand and a fine brush are key for detailed fruit illustrations.
23. Soft Gradient
Description: A gentle blend of colors for a soft and elegant finish.
How to Achieve: Use a sponge to gradient blend two or three of your favorite colors.
24. Sweet Florals
Description: Create whimsical flower patterns with soft, pastel colors.
How to Achieve: Paint small flowers with dots and petals using various nail colors.
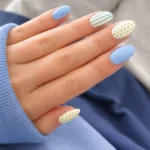
25. Striped Base
Description: A striped base with small floral designs for an elegant finish.
How to Achieve: Paint thin horizontal lines and add small flower graphics on top.
26. Ombre Butterfly
Description: Ombre nails with a butterfly outline design complete with shimmer.
How to Achieve: Graduate colors from light to dark, then outline butterflies in black.
Tips for Success
- Start Simple: If you’re a beginner, it’s best to start with simpler designs before moving on to more complex patterns.
- Practice: Nail art requires practice. Don’t be discouraged if your first attempts aren’t perfect—keep trying!
- Use Quality Tools: Invest in good brushes, dotting tools, and nail art supplies to achieve the best results.
Common Mistakes to Avoid
- Not Letting Layers Dry: Always allow each layer to dry before adding more polish or designs to prevent smudging.
- Skipping Base and Top Coats: Using a base coat protects your nails, and a top coat seals your design for longevity.
- Overusing Products: Too much polish can lead to clumpy nails and slow drying times. Use thin coats instead.
Variations and Customization Ideas
Feel free to customize these designs based on your preferences! Swap colors, create ombres in your favorite hues, or add unique elements such as rhinestones or glitter to make each look distinctly yours.
Storage and Shelf Life
Polish typically has a shelf life of about two to three years. Store your polish bottles in a cool, dark place to prolong their effectiveness. Ensure the lids are tightly sealed to prevent drying out or thickening.
Safety Tips
While nail art is a fun creative outlet, it’s important to ensure your workspace is well-ventilated when using nail polish fumes. If you experience any allergic reactions to nail products, discontinue use immediately and consult a dermatologist.
Frequently Asked Questions
Q1: How long should I wait between coats?
A1: Typically, waiting 2-5 minutes between coats is sufficient, but ensure each coat is dry to the touch before applying the next.
Q2: Can I use regular paint for nail art?
A2: It’s best to use nail polish as regular paint can be harder to remove and may not adhere well to your nails.
Q3: What’s the best way to remove nail art?
A3: Use acetone-based nail polish remover for more stubborn designs, but be gentle to avoid damaging your nails.
Q4: What’s the best method to avoid smudging?
A4: Apply a quick dry top coat after your design has dried for a smooth, sealed finish.
Q5: How can I make my nail designs last longer?
A5: Maintain them by applying top coat every few days and keeping your nails moisturized.
Q6: Are there tools I need for nail art?
A6: Basic tools include a dotting tool, thin brushes, and striping tape for clean lines and added precision.
Conclusion
Spring is a wonderful time to explore creative nail designs that reflect the beauty of the season. Whether you try pastel ombres, floral accents, or vibrant graphic designs, there’s no limit to what you can create with a little patience and practice. Embrace the spirit of spring, gather your nail supplies, and let your creativity flow. Happy nail painting!