
Cosmic Craze for Star-Themed Nail Art: 15 Celestial Mani Designs
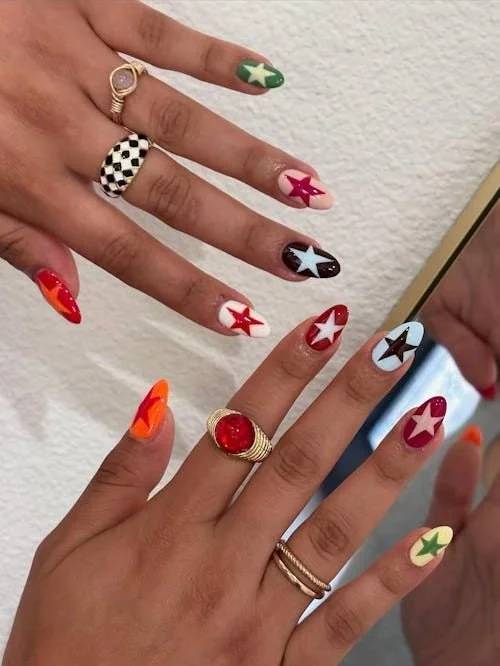
The world of beauty is always evolving, and one of the most exciting trends taking over BeautyTok right now is star-themed nail art. From shimmering constellations to delicate moon phases, celestial motifs are making their way onto fingertips everywhere. If you’re looking to add a touch of cosmic magic to your manicure, you’re in the right place! Here, we will explore 15 creative star-themed nail designs that you can try for yourself.
Why You Will Love This Article
Not only will these designs add a unique flair to your look, but they also allow for ample creativity and personal expression. Whether you’re a nail art novice or a seasoned pro, you can find inspiration and tips to help you achieve the perfect cosmic manicure. Let’s get started!
1. Twinkling Stars with Glitter
Ingredients
- Base coat
- Dark blue nail polish
- Gold or silver glitter polish
- Top coat
Equipment
- Nail brushes
- Dotting tool
- Nail file
- Clean-up brush
Step-by-Step Instructions
- Prep your nails: Begin by filing your nails into your desired shape and pushing back your cuticles.
- Apply base coat: Start with a protective base coat to prevent staining and enhance longevity.
- Paint your base color: Apply two coats of dark blue nail polish, allowing each coat to dry.
- Create stars: Using a dotting tool, dip it into gold or silver glitter polish and place tiny dots on your nails to form star shapes.
- Seal with a top coat: Finish your look with a shiny top coat to seal in your design and add extra shine.
Tips for Success
- Allow sufficient drying time between coats to avoid smudging.
- Use fine glitter for more delicate star designs.
2. Moons and Shooting Stars
Ingredients
- Base coat
- Light purple nail polish
- White nail polish
- Yellow nail polish (for shooting stars)
- Top coat
Equipment
- Nail brushes
- Dotting tool
Step-by-Step Instructions
- Base preparation: Start with clean, dry nails and apply a base coat.
- Colored base: Paint two coats of light purple on your nails.
- Create moon shapes: Use white polish to make crescent moons on the tips of your nails.
- Add shooting stars: Dip the dotting tool in yellow polish and create small lines trailing off from the moons.
- Top off: Apply a top coat to secure the design.
Tips for Success
- Use a steady hand for cleaner shapes.
- Experiment with different base colors for various effects.
3. Galaxy Nails
Ingredients
- Base coat
- Black nail polish
- Various colors (blue, pink, purple) for galaxy effect
- White nail polish
- Top coat
Equipment
- Makeup sponge
- Nail brushes
Step-by-Step Instructions
- Prepare your nails: Apply a base coat and let it dry completely.
- Base color: Paint your nails with black polish.
- Sponge on colors: Using a makeup sponge, dab on mixtures of blue, pink, and purple polish onto your nails in a random pattern.
- Add stars: Use white polish to paint small dots across the nails to represent stars.
- Seal your design: Finish with a top coat for protection and shine.
Tips for Success
- Work in thin layers to avoid an overly chunky look.
- Be creative with color combinations to achieve a unique galaxy effect.
4. Starry Night Sky
Ingredients
- Base coat
- Navy blue nail polish
- Gold or holographic star stickers
- Top coat
Equipment
- Tweezers (for stickers)
Step-by-Step Instructions
- Base application: Apply a base coat and allow it to dry.
- Nail polish: Paint your nails with navy blue polish.
- Add star stickers: Once dry, use tweezers to apply star stickers to random spots on your nails.
- Top coat: Finish the design with a top coat to hold the stickers in place.
Tips for Success
- Choose high-quality stickers for longevity.
- Ensure that the base coat is completely dry before applying stickers to avoid lifting.
5. Constellation Nails
Ingredients
- Base coat
- Light blue nail polish
- White nail polish
- Top coat
Equipment
- Thin nail brush
- Dotting tool
Step-by-Step Instructions
- Nail prep: Start with clean nails and a protective base coat.
- Paint base color: Apply two coats of light blue polish.
- Draw constellations: Use a thin nail brush dipped in white polish to draw constellations. Use the dotting tool to add dots for stars.
- Seal with top coat: Allow your design to dry and then apply a top coat.
Tips for Success
- Look up constellation patterns to replicate accurately.
- Feel free to choose a darker base color for a more dramatic effect.
Common Mistakes to Avoid
- Neglecting to use a base coat can lead to staining.
- Applying thick coats of polish can result in smudging or uneven designs.
Variations and Customization Ideas
- Experiment with neon colors for a modern twist on traditional colors.
- Use matte top coat for a different finish.
Storage and Shelf Life
- Store your nail polishes in a cool, dry place away from direct sunlight to prolong their lifespan.
Safety Tips
- If you experience allergic reactions, stop use immediately.
- Ensure good ventilation when using nail polishes, especially with strong fumes.
Frequently Asked Questions
1. What if my nail polish is too thick?
Thinning nail polish with a few drops of polish thinner can help restore consistency.
2. How can I remove nail polish without damaging my nails?
Use a gentle acetone-free remover to avoid stripping the nail’s natural oils.
3. Can I mix different nail polishes together?
Yes, mixing colors can create unique shades, but ensure they are compatible.
4. How do I fix smudged nails?
If you smudge your nail design, you can often touch it up with a fine brush and matching polish.
Conclusion
Adding cosmic-themed nail art to your repertoire not only sparks joy but also allows for individuality and creativity. From twinkling stars to mesmerizing galaxies, there’s a style for every cosmic enthusiast out there. So grab your nail supplies, explore these trendy designs, and let your nails shine as brightly as the night sky! Happy polishing!